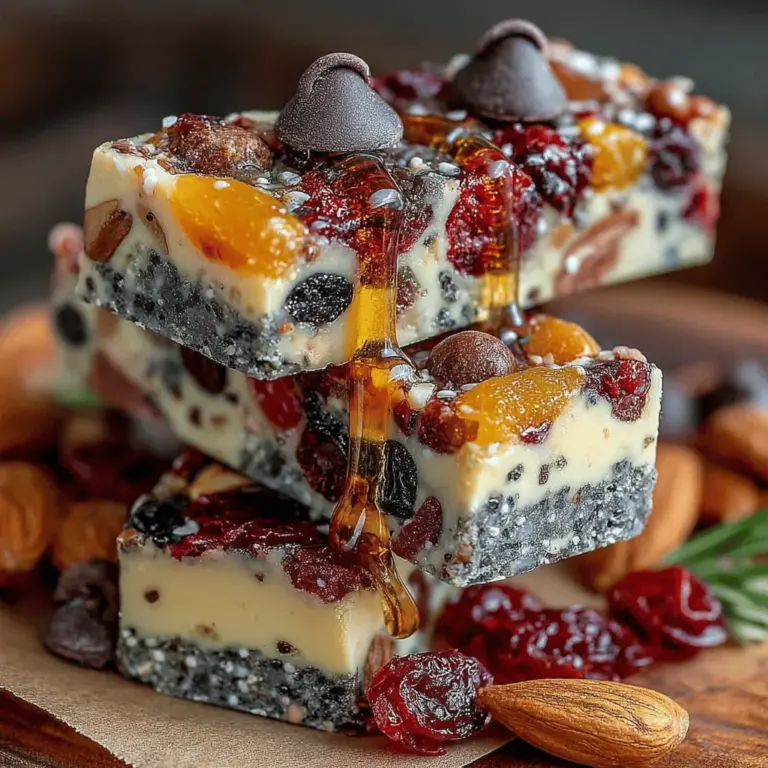
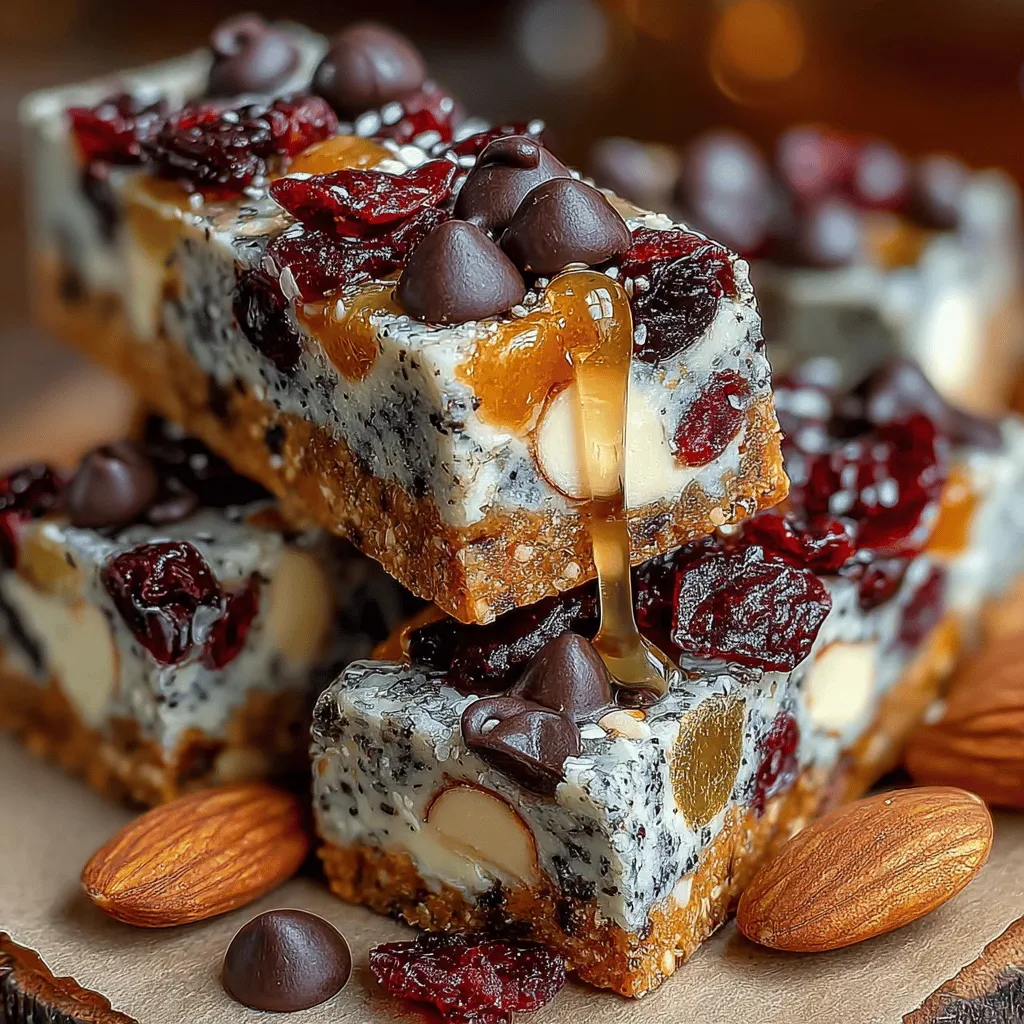
Nutty Bliss No-Bake Trail Mix Energy Bars Recipe
In recent years, energy bars have surged in popularity, becoming a go-to snack for health-conscious individuals and busy professionals alike. These convenient little bars are perfect for on-the-go nourishment, offering a quick source of energy whether you’re hitting the gym, heading to work, or embarking on a road trip. However, many store-bought options are laden with artificial ingredients, preservatives, and excessive sugars, making them less than ideal for those seeking wholesome nutrition.
The good news is that making your own energy bars at home is easier than you might think. Not only does this give you complete control over what goes into your snacks, but it also allows you to tailor the flavors and ingredients to your personal preferences. Enter the Nutty Bliss No-Bake Trail Mix Energy Bars—an enticing combination of nutritious elements that deliver both flavor and sustenance without the need for an oven. These bars are designed to not only satisfy your hunger but also fuel your body with wholesome ingredients.
A Deliciously Simple Recipe
The Nutty Bliss No-Bake Trail Mix Energy Bars stand out for their simplicity and use of nutrient-dense components. With just a handful of wholesome ingredients, you can whip up a batch of these energy bars in no time. The best part? There’s no baking involved, making them an ideal choice for those who prefer quick and effortless cooking methods.
In this recipe, you’ll discover how rolled oats, nut butter, sweeteners, mixed nuts, seeds, dried fruits, and optional dark chocolate chips come together to create a deliciously satisfying snack. Each ingredient plays a crucial role in crafting bars that are not only delectable but also packed with nutrition.
Understanding the Ingredients
To appreciate the Nutty Bliss No-Bake Trail Mix Energy Bars fully, let’s dive deeper into the ingredients that make this recipe shine.
Rolled Oats
Rolled oats serve as the foundation for these energy bars, providing both texture and nutritional benefits. Rich in dietary fiber, they help keep you feeling full longer and support digestive health. Additionally, oats are packed with antioxidants, which can contribute to overall well-being. In the context of this recipe, rolled oats play a vital role in binding the bars together while also giving them a hearty, chewy texture that many find satisfying.
Nut Butter
Nut butter is another key ingredient that not only adds creaminess but also enhances the flavor profile of the energy bars. Almond butter is a popular choice, but you can also opt for alternatives like peanut butter or cashew butter, depending on your taste preferences. Each type of nut butter boasts its own nutritional advantages, offering healthy fats, protein, and essential vitamins. The creamy consistency of nut butter helps bind the ingredients together while imparting a rich, nutty flavor that enhances the overall taste of the bars.
Sweeteners
When it comes to sweetening your Nutty Bliss Energy Bars, you have options. Honey and maple syrup are both excellent natural sweeteners that can elevate the flavor while providing a touch of sweetness. Unlike refined sugars, these natural alternatives offer additional nutrients and a lower glycemic index, making them a healthier choice. Finding the right balance of sweetness is essential; too much can overpower the other flavors, while too little might leave your bars tasting bland.
Mixed Nuts
Incorporating mixed nuts into your energy bars not only adds crunch but also boosts the nutritional profile significantly. Nuts are rich in healthy fats, protein, and essential minerals, making them an excellent addition to any snack. You can experiment with various nut combinations—such as almonds, walnuts, or pecans—to find your perfect mix. Each type of nut brings its unique flavor and texture, contributing to a more complex and enjoyable eating experience.
Seeds
Seeds like chia, pumpkin, and sunflower seeds are nutritional powerhouses that enhance the texture and health benefits of your energy bars. Chia seeds are known for their high omega-3 fatty acid content, while pumpkin seeds provide a good source of magnesium and zinc. Sunflower seeds offer a delightful crunch and are rich in vitamin E. By adding a variety of seeds, you can create energy bars that are not only delicious but also packed with beneficial nutrients.
Dried Fruits
Dried fruits, such as cranberries, apricots, or raisins, provide natural sweetness while also adding flavor and texture. They can elevate the overall taste of your energy bars and offer additional vitamins and minerals. When selecting dried fruits, it’s important to choose high-quality options without added sugars or preservatives to keep your bars as healthy as possible. Dried fruits can also contribute to the chewiness of the bars, making each bite more enjoyable.
Dark Chocolate Chips (Optional)
For those who want to indulge a little, adding dark chocolate chips can be a delightful option. Dark chocolate is rich in antioxidants and has been linked to various health benefits, including improved mood and heart health. When incorporating chocolate chips, opt for high-quality dark chocolate with a high cocoa content to maximize the health benefits while adding a touch of sweetness to your energy bars.
Vanilla Extract and Salt
Finally, don’t underestimate the importance of vanilla extract and salt in this recipe. Vanilla enhances the overall flavor, creating a more rounded and satisfying taste profile. A pinch of salt, on the other hand, helps to balance the sweetness of the bars, making every bite more flavorful.
Getting Started with Your Nutty Bliss No-Bake Trail Mix Energy Bars
Now that you understand the key ingredients that make up the Nutty Bliss No-Bake Trail Mix Energy Bars, it’s time to get down to the initial steps of the recipe.
1. Gather Your Ingredients: Before you start, make sure you have all the ingredients on hand. This includes rolled oats, your choice of nut butter, honey or maple syrup, a variety of mixed nuts, seeds, dried fruits, optional dark chocolate chips, vanilla extract, and a pinch of salt.
2. Prepare Your Workspace: Clear a counter space and gather mixing bowls, measuring cups, and a spatula or spoon for mixing. You’ll also need a baking dish or tray lined with parchment paper for setting the bars.
3. Mix the Dry Ingredients: In a large bowl, combine the rolled oats, mixed nuts, seeds, and dried fruits. Stir everything together to ensure that the ingredients are evenly distributed.
4. Combine Wet Ingredients: In a separate bowl, mix your chosen nut butter, honey or maple syrup, vanilla extract, and salt until smooth. This mixture will serve as the binding agent for your energy bars.
5. Combine Wet and Dry Mixtures: Pour the wet mixture over the dry ingredients and stir until everything is well combined. You may need to use your hands to ensure that all the dry ingredients are coated with the nut butter mixture.
6. Press and Set: Transfer the combined mixture into the prepared baking dish, pressing it down firmly to create an even layer. This step is crucial for ensuring that the bars hold together once set.
With these initial steps completed, you’re well on your way to creating a batch of Nutty Bliss No-Bake Trail Mix Energy Bars that you and your family will love. Stay tuned for the final steps that will guide you through the setting and cutting process, ensuring you enjoy these nutritious snacks in no time.
Step-by-Step Instructions for Making Nutty Bliss No-Bake Trail Mix Energy Bars
Creating Nutty Bliss No-Bake Trail Mix Energy Bars is a straightforward process that rewards you with nutritious snacks perfect for an energy boost at any time of the day. Let’s dive into the detailed steps to ensure you make the best energy bars possible.
Preparing the Base
The first step in crafting your Nutty Bliss No-Bake Trail Mix Energy Bars is preparing the base. This involves mixing the dry ingredients, which typically include oats, nuts, seeds, and any additional mix-ins you desire.
1. Mixing Dry Ingredients: In a large mixing bowl, combine rolled oats, a variety of chopped nuts like almonds and walnuts, and seeds such as chia or flaxseeds. It’s essential to combine these ingredients thoroughly to ensure an even distribution of flavors and textures. This combination not only provides a satisfying crunch but also contributes to the overall nutritional profile of the bars.
2. Importance of Even Distribution: A well-mixed dry ingredient base is crucial for texture and flavor consistency. If certain areas of the bars are overloaded with nuts while others are sparse, you may end up with an uneven taste and texture. Take your time to stir thoroughly, ensuring each ingredient is evenly incorporated.
Making the Binding Mixture
The binding mixture is what holds your energy bars together, and it’s important to get this step right.
1. Heating Nut Butter and Sweetener: In a small saucepan over low heat, combine your choice of nut butter (like almond or peanut butter) with a natural sweetener such as honey or maple syrup. Stir the mixture continuously until it’s smooth and easily pourable. This usually takes about 2-3 minutes.
2. Tips for Achieving the Right Consistency: The goal is to have a warm, fluid mixture that can coat the dry ingredients without being too runny. If it’s too thick, it may not mix well with the dry ingredients; if too thin, it won’t bind properly. Adjust by adding a little more nut butter or sweetener as needed, keeping a close eye on the consistency.
3. Importance of Stirring and Timing: Stir the mixture continuously as it heats to prevent burning. Timing is key; once it’s heated and smooth, remove it from the heat immediately to avoid overcooking.
Combining Ingredients
Now it’s time to bring everything together.
1. Techniques for Mixing Wet and Dry Components: Pour the warm nut butter and sweetener mixture over the dry ingredients in the large bowl. Using a spatula or wooden spoon, mix everything together. The goal is to ensure that all the dry ingredients are coated evenly with the wet mixture.
2. Tips for Troubleshooting a Crumbly Mixture: If the mixture appears crumbly and doesn’t hold together, you may not have added enough liquid. In this case, you can add a bit more nut butter or a splash more sweetener to help the bars stick together.
Pressing into the Pan
Once everything is combined, the next step is to form the bars.
1. Importance of Packing the Mixture Firmly: Transfer the mixture into a lined baking dish or pan. Use a flat spatula or your hands to press the mixture firmly into the pan, ensuring it’s packed tightly. This step is crucial for maintaining the integrity of the bars once they are cut.
2. Using Parchment Paper for Easy Removal: Lining your pan with parchment paper not only makes for easy removal later but also helps in keeping the bars from sticking to the sides. Leave some overhang on the edges for easy lifting.
Chilling the Bars
Chilling is a critical step that affects the final texture of your energy bars.
1. Explanation of the Chilling Process: Place the pan in the refrigerator to chill. As the mixture cools, it will firm up, making it easier to cut into bars later. This chilling process helps the nut butter and sweetener set, creating a cohesive texture.
2. Recommended Chilling Time: Ideally, chill the bars for at least 2 hours, or until they feel firm to the touch. For best results, consider leaving them overnight, allowing them to achieve a perfect texture.
Cutting and Serving
After chilling, it’s time to cut and enjoy your creation.
1. Best Practices for Cutting Bars into Even Pieces: Using a sharp knife, carefully cut the chilled mixture into bars or squares. To achieve even pieces, it can be helpful to score the mixture lightly before cutting all the way through.
2. Storage Suggestions for Freshness and Longevity: Store the cut bars in an airtight container in the refrigerator for up to two weeks. For longer storage, you can freeze them layered with parchment paper, ensuring they remain fresh for up to three months.
Nutritional Benefits of Nutty Bliss No-Bake Trail Mix Energy Bars
Nutty Bliss No-Bake Trail Mix Energy Bars are not only delicious but also packed with nutritional benefits, making them an excellent choice for a healthy snack.
Overview of the Health Benefits of Energy Bars as a Snack
These energy bars provide a well-rounded option for a quick snack. They are rich in healthy fats from nuts, fiber from oats, and natural sugars from sweeteners, offering sustained energy without the crash associated with processed snacks.
Discuss the Balance of Macronutrients: Protein, Fats, and Carbohydrates
Each bar contains a balanced mix of macronutrients:
– Protein: Nuts and seeds contribute protein, essential for muscle repair and growth.
– Fats: Healthy fats from the nut butter and nuts support brain health and provide lasting energy.
– Carbohydrates: Whole grains like oats offer complex carbohydrates that fuel your body, making these bars perfect for pre- or post-workout snacks.
Highlight the Energy-Boosting Properties of the Bars
The combination of complex carbs, healthy fats, and protein makes these bars an ideal energy-boosting treat. They provide a lasting source of energy, making them perfect for busy days, workouts, or outdoor adventures.
Customizing Your Energy Bars
One of the best aspects of making your own energy bars is the ability to customize them to your taste and dietary preferences.
Suggestions for Ingredient Substitutions and Additions
Feel free to experiment with different ingredients to create a unique flavor profile:
1. Different Nut Butters and Their Flavors: While almond and peanut butter are popular choices, you can also try cashew butter or sunflower seed butter for a different taste and texture.
2. Alternative Sweeteners and Their Effects: Instead of honey or maple syrup, consider using agave nectar or brown rice syrup. Each sweetener has its own distinct flavor that can alter the final taste of your bars.
3. Adding Spices for Flavor Variation: Incorporate spices such as cinnamon, nutmeg, or vanilla extract to add warmth and depth of flavor to your bars.
4. Incorporating Protein Powders or Superfoods: To boost the nutritional content, consider adding protein powder or superfoods like chia seeds, hemp seeds, or even spirulina for an extra health kick.
Conclusion
Nutty Bliss No-Bake Trail Mix Energy Bars are an easy and delicious way to create your own healthy snacks at home. These bars not only satisfy hunger but also provide a balanced mix of macronutrients that support an active lifestyle.
We encourage you to experiment with your own variations while maintaining the core recipe, allowing you to tailor the bars to your preferences. With minimal effort, you can enjoy a homemade snack that is not only better for your health but also a fun kitchen activity for families and individuals alike.
By making these energy bars, you’re taking a step towards healthier snacking habits that benefit both your body and mind. Embrace the joy of creating nutritious snacks that fuel your day and keep you energized on your journey to a healthier lifestyle.
