Introduction
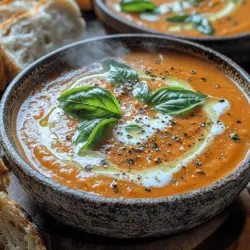
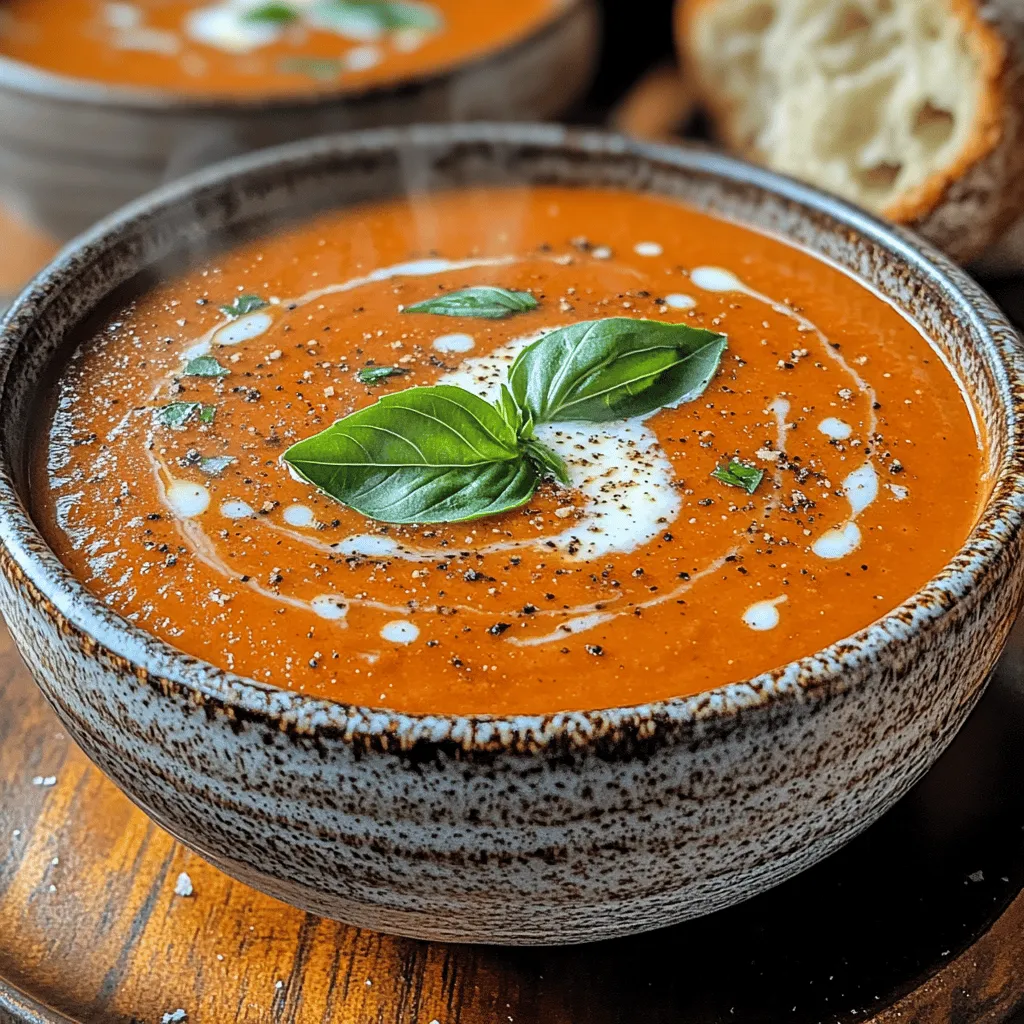
Roasted red pepper soup is more than just a comforting bowl of goodness; it’s a culinary experience that wraps you in warmth and flavor. This vibrant dish captures the essence of roasted peppers, blending them into a creamy, luscious soup that can elevate any meal. Known for its rich taste and striking color, creamy roasted red pepper soup has become a staple in many kitchens, especially during the cooler months when we crave hearty, nourishing foods.
This soup is not only a delight for the taste buds but also brings a sense of nostalgia, often reminding people of family gatherings, cozy dinners, or a leisurely lunch at a favorite café. The beauty of making creamy roasted red pepper soup at home lies in its simplicity and the joy of creating something delicious from scratch. Whether you’re serving it as a starter at a dinner party or enjoying a quiet evening at home, this soup is sure to impress.
What makes this soup so special is its versatility. You can serve it as a stand-alone dish or pair it with a crusty bread or grilled cheese sandwich for a complete meal. Moreover, it can easily be customized to cater to various dietary preferences, making it an ideal choice for everyone at your table.
Understanding the Components of Creamy Roasted Red Pepper Soup
Before diving into the recipe, it’s essential to understand the key components that make this soup so delicious. The primary ingredient, roasted red peppers, brings a natural sweetness and depth of flavor that is both unique and satisfying. Here’s a closer look at the ingredients you’ll need, and why each one matters:
Roasted Red Peppers
The star of this soup, roasted red peppers, are not only flavorful but also packed with nutrients. You can roast the peppers yourself for a smoky flavor or use jarred roasted peppers for convenience. The roasting process caramelizes the natural sugars in the peppers, creating a sweet and savory base for the soup.
Aromatics
Onions and garlic are essential aromatics that form the foundation of the soup’s flavor profile. Sautéing them until translucent releases their natural sweetness and depth, enhancing the overall taste of the dish.
Vegetable or Chicken Broth
The choice between vegetable or chicken broth will depend on your dietary preferences. Both options provide a flavorful liquid base that helps to blend the ingredients together beautifully. Homemade broth can add an extra layer of flavor, but store-bought options work just as well for convenience.
Cream
For that signature creaminess, heavy cream or a dairy-free alternative can be used. The cream not only adds richness but also balances the acidity from the tomatoes and peppers, resulting in a well-rounded flavor.
Seasonings
Seasonings play a crucial role in elevating the soup’s flavor. Salt, pepper, and a pinch of red pepper flakes add depth and a subtle kick. Fresh herbs like basil or thyme can also be introduced for added aroma and freshness.
Optional Add-Ins
Consider adding a splash of balsamic vinegar for acidity, or a tablespoon of smoked paprika for an extra smoky flavor. These little tweaks can transform your soup, making it uniquely yours.
Preparing the Ingredients for the Best Creamy Roasted Red Pepper Soup
Now that you understand the key components, it’s time to gather your ingredients and prepare them for cooking. A well-prepared ingredient list is crucial for a smooth cooking experience. Here’s a step-by-step guide to ensure you have everything ready:
Selecting the Right Ingredients
– Red Peppers: Choose firm, bright red peppers for the best flavor. Look for ones that are heavy for their size with smooth skin. Avoid any with blemishes or soft spots.
– Aromatics: Use fresh onions and garlic for the best flavor. Yellow or sweet onions work particularly well in this recipe.
– Broth: If using store-bought broth, opt for low-sodium varieties to control the salt levels in your soup.
– Cream: For a dairy-free version, consider coconut cream or cashew cream as excellent alternatives that still provide a rich texture.
Roasting the Peppers
How to Roast Peppers at Home
1. Preheat your oven: Set it to 450°F (232°C).
2. Prepare the peppers: Cut the peppers in half and remove the seeds and stems. You can also leave them whole if you prefer.
3. Roast: Place the peppers skin-side up on a baking sheet lined with parchment paper. Drizzle a little olive oil over them for added flavor.
4. Cook: Roast for about 20-25 minutes until the skins are charred and blistered.
5. Cool and Peel: Once roasted, remove them from the oven and let them cool. After cooling, the skins should easily peel off, revealing the tender, flavorful flesh beneath.
Sautéing the Aromatics
1. Heat a pot: In a large pot, heat a tablespoon of olive oil or butter over medium heat.
2. Add onions: Once hot, add diced onions and sauté until they become translucent, about 5-7 minutes.
3. Add garlic: Stir in minced garlic and continue to sauté for another minute, until fragrant.
Combining the Ingredients
1. Add roasted peppers: Once the onions and garlic are ready, add the roasted red peppers to the pot.
2. Pour in the broth: Add your chosen broth, bringing it to a simmer. This process allows the flavors to meld beautifully.
3. Season: Add salt, pepper, and any additional seasonings you prefer, adjusting to taste.
With your ingredients prepared and the initial cooking steps completed, you’re well on your way to creating a delicious creamy roasted red pepper soup. The next steps will involve blending the soup to achieve that signature creamy texture and finishing it off with the perfect garnishes. Stay tuned for the detailed instructions to complete this nourishing dish!
Layering Tips for Optimal Flavor
Creating a delicious lasagna requires attention to detail, particularly when it comes to layering. Each layer contributes to the overall flavor and texture of the dish. Here’s how to effectively build the layers for maximum taste.
First Layer: Sauce
Start with a generous layer of your prepared sauce on the bottom of the baking dish. This acts as a base to prevent the pasta from sticking. Use about 1 to 1.5 cups of sauce, ensuring a thick, even coverage. If you’re using a homemade tomato sauce, the robust flavors will infuse the lasagna and keep it moist during baking.
Second Layer: Pasta Sheets
Next, place your pasta sheets directly on top of the sauce. If you’re using no-boil lasagna noodles, they will absorb some of the moisture from the sauce, cooking perfectly as the lasagna bakes. For regular pasta sheets, make sure to stagger them slightly to cover any gaps, ensuring an even distribution of layers. It’s also wise to break the sheets when necessary to fit snugly into your dish.
Third Layer: Cheese Mixture
The third layer is where the creamy, cheesy goodness comes into play. Spread a layer of your ricotta cheese mixture (made from ricotta, egg, and herbs) over the pasta sheets. Aim for about 1.5 to 2 cups, spreading it evenly to cover the pasta. This layer not only adds richness but also contributes to the overall creaminess of the lasagna.
Fourth Layer: Meat Filling
Add your meat filling on top of the cheese mixture. Use about 1 to 1.5 cups, depending on how meaty you want your lasagna. Spread it evenly over the cheese layer, making sure to distribute it well so every bite is packed with flavor. If you’re using vegetables instead of meat, like sautéed mushrooms or spinach, layer them here for a delightful twist.
Repeating Layers and How to Finish It Off
Continue the layering process by repeating the sauce, pasta sheets, cheese mixture, and meat filling until you reach the top of your baking dish. Depending on the depth of your dish, you can usually manage three to four layers. The final layer should be pasta sheets topped with a generous amount of sauce and a blend of mozzarella and Parmesan cheese. This top layer is crucial for achieving that beautiful, golden crust.
Importance of Leaving Space for Bubbling and Expansion
When building your lasagna, remember to leave some space at the top of the dish. As the lasagna bakes, the sauce will bubble, and the cheese will expand. If the dish is too full, it can overflow, creating a messy oven and potentially ruining your beautiful creation. A good rule of thumb is to leave about half an inch of space at the top.
Baking the Perfect Lasagna
Preheating the Oven: Optimal Temperature for Baking
Now that your lasagna is assembled, it’s time to preheat your oven. Set it to 375 degrees Fahrenheit (190 degrees Celsius). Preheating is essential as it ensures that the lasagna cooks evenly and thoroughly.
Baking Times and What to Look For
Bake the lasagna for about 45 minutes to an hour. The exact time may vary depending on your oven and the thickness of your layers. To know when it’s done, look for bubbling around the edges and a golden-brown top. The cheese should be melted and slightly crispy, providing that perfect contrast to the soft layers beneath.
Cheese Bubbling and Golden Brown Top
A well-baked lasagna will have cheese that is bubbly and slightly browned. If you find that the top is browning too quickly, you can cover it with aluminum foil during the last 15 minutes of baking to prevent burning while ensuring the inside cooks thoroughly.
Checking for Doneness
To check if your lasagna is fully cooked, insert a knife or toothpick into the center. If it comes out hot and the layers are set, your lasagna is ready. If it feels cool or overly liquidy, give it a little more time in the oven.
Letting the Lasagna Rest: Why This Step Is Crucial
Once your lasagna is baked to perfection, resist the temptation to dig in immediately. Let it rest for at least 15-20 minutes before slicing. This resting period allows the layers to set, making it easier to cut and serve without everything spilling out. It also enhances the flavors as they meld together.
Serving Suggestions for Homemade Lasagna
Ideal Sides to Complement Lasagna
Lasagna is a hearty dish that pairs beautifully with lighter sides. Consider serving it with a fresh garden salad dressed with a simple vinaigrette or roasted vegetables to balance the richness of the lasagna.
Garlic Bread, Salads, and Wines
For a classic Italian meal, serve your lasagna with warm, crusty garlic bread. It’s perfect for soaking up the delicious sauce. If you’re looking for a drink pairing, a medium-bodied red wine, such as Chianti or Merlot, complements the flavors of the lasagna beautifully.
Presentation Ideas for a Family Dinner or Special Occasion
When it comes to presentation, consider serving your lasagna in the baking dish for a rustic feel or transferring individual slices to elegant plates for a more refined look. Garnish with fresh basil or parsley for a pop of color and freshness.
Storing Leftovers: Best Practices for Maintaining Flavor
If you have leftovers, store them in an airtight container in the refrigerator. Lasagna can be kept for 3-5 days. To reheat, cover it with foil and warm it in the oven at 350 degrees Fahrenheit until heated through. You can also freeze lasagna for future meals. Wrap it tightly in plastic wrap and then in aluminum foil. Frozen lasagna can last for up to three months; just thaw it in the refrigerator overnight before reheating.
Variations on the Classic Lasagna Recipe
Exploring Regional Variations (e.g., Italian, American, Vegetarian)
While traditional lasagna is made with meat sauce and ricotta, there are countless variations to explore. Italian lasagna often features béchamel sauce, while American versions may be heavier on cheese and meat. Vegetarian lasagna is also a popular option, utilizing a variety of vegetables to create a satisfying meal.
Creative Ingredient Swaps for Unique Flavors
Feel free to get creative with your ingredients! Try swapping traditional noodles with zucchini slices for a lower-carb version or using whole wheat pasta for added nutrition. For the cheese mixture, consider adding herbs like basil or oregano for an extra flavor kick.
Adding Vegetables Like Spinach, Mushrooms, or Zucchini
Incorporating vegetables is a great way to boost the nutritional value of your lasagna. Spinach, mushrooms, and zucchini can be sautéed and layered between the pasta sheets for added flavor and texture. Experiment with seasonal vegetables to keep your lasagna exciting and fresh.
Experimenting with Different Cheeses and Sauces
Explore different cheese combinations for a unique take on the classic recipe. Try adding goat cheese or feta for a tangy twist, or experiment with different sauces, such as a pesto or Alfredo base, for a completely different flavor profile.
Conclusion
Making lasagna from scratch is a labor of love that pays off with every delicious bite. The joy of layering fresh ingredients and creating a dish that brings family and friends together is truly rewarding. Whether you stick to the classic recipe or venture into creative variations, lasagna’s versatility allows you to adapt it to your taste preferences.
Encourage yourself to enjoy the cooking process, experiment with flavors, and make the recipe your own. Whether it’s a cozy family dinner or a gathering with friends, your homemade lasagna will surely impress and satisfy. So roll up your sleeves, gather your ingredients, and get ready to create a dish that’s as comforting as it is delicious.