Introduction
Indulging in a slice of Zesty Lemon Curd Tart is an experience that captures the essence of sunny days and fresh flavors. This dessert is not just a treat for the taste buds; it’s a celebration of the versatility of citrus fruits, particularly lemons. The vibrant, tangy filling contrasts beautifully with a buttery, flaky crust, creating a symphony of textures and flavors in every bite. As lemon lovers know, citrus desserts are a staple in many culinary traditions, praised for their refreshing qualities that awaken the senses and brighten any occasion.
The appeal of a Zesty Lemon Curd Tart lies in its perfect balance of tartness and sweetness. The tartness of the lemon curd is offset by the sweetness of the sugar, resulting in a dessert that is both invigorating and satisfying. Whether served at a summer gathering, a holiday feast, or simply enjoyed as an afternoon snack, this tart is sure to impress friends and family alike. In this article, we will explore the components of this delightful tart, starting with the essential tart crust and the luscious lemon curd filling that makes it a standout dessert.
Understanding the Components of the Tart
To truly appreciate the Zesty Lemon Curd Tart, it’s essential to understand its components. The tart crust is the foundation of this dessert, providing a contrast to the creamy lemon curd filling. A well-made crust adds not only texture but also a nutty flavor that enhances the overall experience. The buttery richness of the crust complements the bright acidity of the lemon curd, creating a harmonious balance that is both satisfying and refreshing.
The Tart Crust
The tart crust is typically made from a combination of flour, sugar, and butter, resulting in a rich, crumbly texture. Its role in the dessert is crucial; it must be sturdy enough to hold the filling while remaining tender and flaky. A good tart crust should have a golden-brown finish that adds visual appeal, making it as delightful to look at as it is to eat.
Lemon Curd: Origins and Uses
Lemon curd has a rich history that dates back to the 19th century in England, where it was often served as a spread for scones or used as a filling for cakes and pastries. This creamy concoction is made from fresh lemon juice, egg yolks, sugar, and butter, whisked together until thickened. The result is a smooth, tangy filling that is both sweet and tart, making it an ideal choice for tarts, pies, and even as a topping for yogurt or ice cream.
The love for lemon curd can be attributed to its versatility. It serves not only as a filling but also as a flavor enhancer for various desserts. Whether you’re spreading it on a piece of toast or using it to elevate a simple cake, lemon curd is a delightful addition to any culinary repertoire.
The Significance of Garnishes
While the lemon curd filling and tart crust are the stars of this dessert, garnishes play a significant role in enhancing both presentation and flavor. Fresh fruits, such as berries or slices of lemon, can be artfully arranged on top of the tart to add color and freshness. A dusting of powdered sugar or a dollop of whipped cream can also provide an elegant finish, making the tart not just a treat for the palate but a feast for the eyes as well.
Preparing the Tart Crust
Creating the perfect tart crust is a crucial step in making a Zesty Lemon Curd Tart. The crust sets the stage for the tart’s overall flavor and texture, and achieving the right consistency can make all the difference. Below, we’ll outline the ingredients needed to make the crust, followed by detailed instructions to guide you through the process.
Ingredients for the Tart Crust
To make the tart crust, you will need the following ingredients:
– 1 ½ cups all-purpose flour
– ½ cup unsalted butter, cold and cut into cubes
– ¼ cup granulated sugar
– 1 large egg yolk
– 2 tablespoons ice water (more if needed)
– A pinch of salt
Step-by-Step Instructions for Making the Perfect Crust
1. Mixing Dry Ingredients: Begin by sifting the all-purpose flour and salt together in a large mixing bowl. This ensures that the flour is aerated and free of lumps, creating a light and flaky crust. Add the granulated sugar to the flour mixture and stir gently to combine.
2. Incorporating Butter: Next, add the cold, cubed unsalted butter to the flour mixture. Using a pastry cutter or your fingertips, work the butter into the flour until the mixture resembles coarse crumbs. The goal is to incorporate the butter without melting it, as cold butter is crucial for achieving a flaky texture.
3. Adding the Egg Yolk: Once the butter and flour are well combined, create a well in the center of the mixture and add the egg yolk. Gently mix the yolk into the crumb mixture using a fork, being careful not to overwork the dough.
4. Incorporating Ice Water: Gradually add the ice water, one tablespoon at a time, mixing until the dough begins to come together. You may need to adjust the amount of water based on the humidity and the consistency of your dough. The dough should be moist but not sticky.
5. Chilling the Dough: Once the dough is formed, shape it into a disk and wrap it in plastic wrap. Refrigerate the dough for at least 30 minutes. Chilling the dough is crucial as it allows the gluten to relax, resulting in a tender crust.
6. Pressing the Dough into the Tart Pan: After chilling, remove the dough from the refrigerator. On a lightly floured surface, roll out the dough to fit your tart pan, typically about ¼ inch thick. Transfer the rolled-out dough to the tart pan, pressing it gently into the edges. Trim any excess dough hanging over the sides.
7. Ensuring Even Cooking: To ensure even cooking, prick the bottom of the crust with a fork to create small holes, preventing it from puffing up during baking. Line the crust with parchment paper and fill it with pie weights or dried beans to hold the shape while baking.
8. Baking the Crust: Preheat your oven to 350°F (175°C). Bake the crust for about 15-20 minutes or until it is lightly golden. Remove the weights and parchment paper, then return the crust to the oven for an additional 5-10 minutes to achieve a golden-brown finish. Keep an eye on it to avoid over-baking.
With the tart crust prepared, you’re now ready to move on to crafting the perfect lemon curd filling. This next step will elevate your Zesty Lemon Curd Tart to new heights of flavor and delight.
The Science Behind Thickening the Curd
Creating the perfect lemon curd is not just about mixing ingredients; it involves a delicate balance of temperature and timing. The thickening process occurs primarily through the cooking of eggs and the incorporation of butter. When you heat the egg yolks and sugar, the proteins in the eggs begin to denature, which thickens the mixture. As the curd cooks, it should reach a temperature of about 170°F (76°C) to ensure it has thickened enough to coat the back of a spoon. This temperature is crucial as it ensures the eggs are fully cooked, providing both safety and the right consistency.
To determine if your lemon curd is ready, perform a simple test: dip a spoon into the mixture and run your finger across the back. If the line holds its shape, the curd is thick enough. If it runs back together quickly, it needs more time on the heat. Remember to stir constantly to prevent the eggs from scrambling, which could ruin the smooth texture you desire.
Importance of Incorporating Butter
Butter plays a pivotal role in lemon curd, adding a luxurious richness and creating a velvety texture. It emulsifies with the eggs and lemon juice to form a cohesive mixture, enhancing the mouthfeel and overall flavor. For the best results, use unsalted butter, which allows you to control the seasoning of your lemon curd. Make sure to add the butter to the curd mixture off the heat, allowing it to melt gently and integrate smoothly without further cooking the eggs. This step not only enriches the curd but also brings a subtle sheen that elevates the presentation.
Insights into the Flavor Profile
A successful lemon curd strikes a perfect balance between sweetness and tartness. The natural acidity of the lemons brings brightness to the curd, while the sugar helps to offset that tang, resulting in a harmonious flavor. When crafting your curd, taste as you go. If you find the mixture too tart, consider adding a little more sugar, but do so gradually. Conversely, if the sweetness overwhelms the lemon flavor, a splash of extra lemon juice can help restore balance. This adaptability allows you to create a lemon curd that suits your personal preference, whether you enjoy a tart kick or a sweeter note.
Combining the Elements
Once your curd is prepared and cooled, it’s time to assemble your tart. Carefully pour the lemon curd into the cooled tart shell, ensuring not to disturb the crust. To achieve a professional finish, use a spatula or the back of a spoon to gently guide the curd into the edges of the shell. This method helps in achieving an even distribution and prevents air bubbles from forming, ensuring a smooth surface.
After pouring in the curd, it’s crucial to chill the tart in the refrigerator for at least 4 hours, or overnight if possible. This chilling period allows the curd to set properly, resulting in a firm yet creamy filling. It also enhances the flavor development, making each bite more delightful.
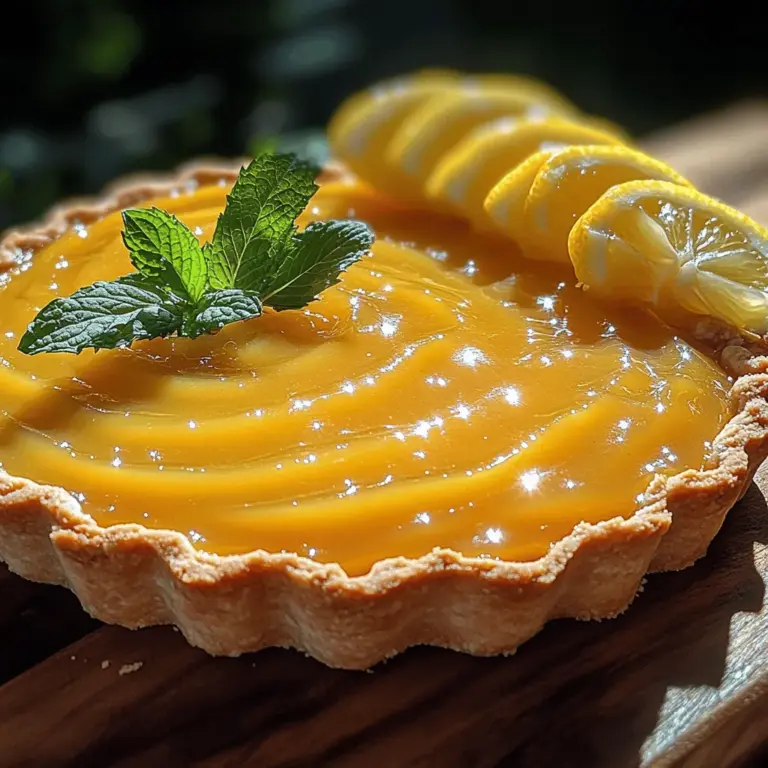
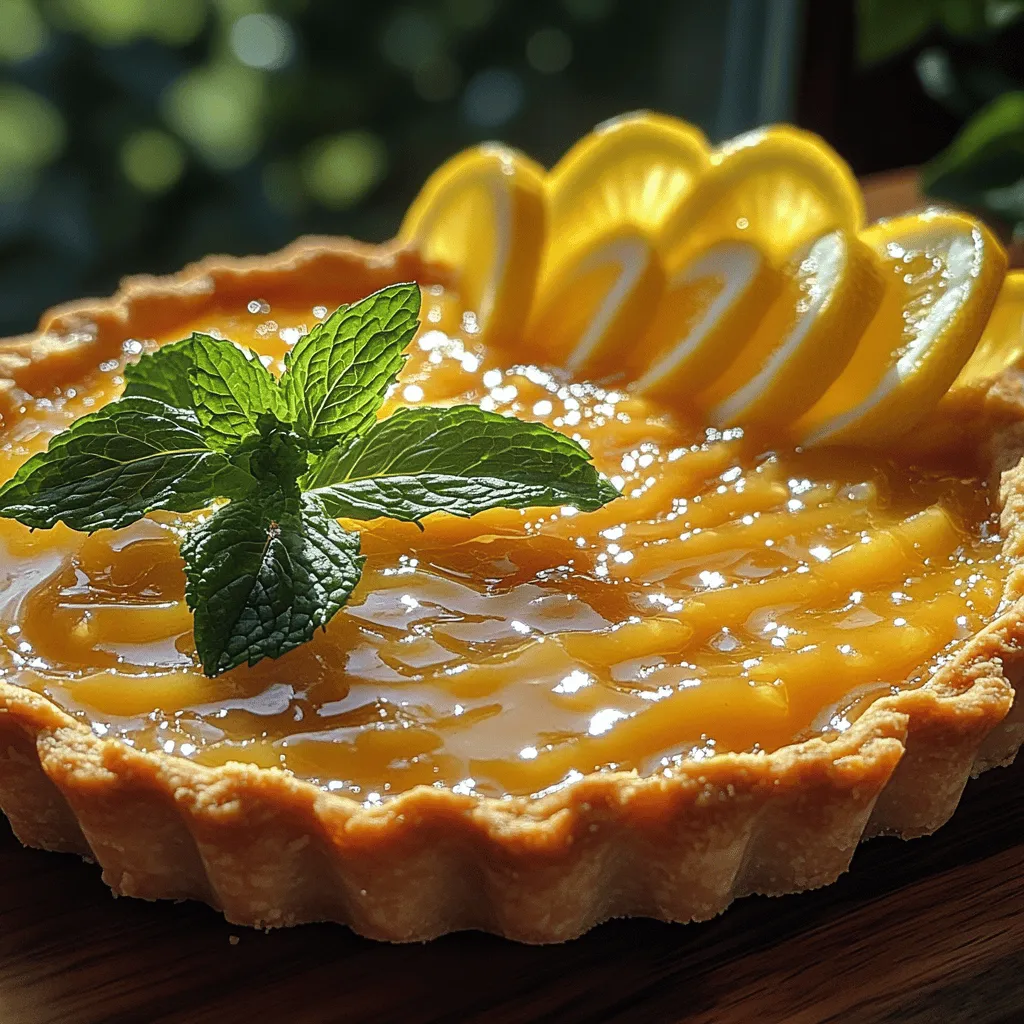
Garnishing and Serving Suggestions
Garnishing your Zesty Lemon Curd Tart adds an extra touch of elegance and enhances its visual appeal. Fresh mint leaves can provide a pop of color and a refreshing aroma, while thin slices of lemon can be artfully arranged on top for a striking presentation. For an added layer of flavor, consider sprinkling a few edible flowers, such as nasturtiums or violets, which not only look beautiful but also complement the tartness of the lemon.
If you want to switch up the garnishing based on the occasion, consider using whipped cream or a light meringue topping for a more festive look. For a winter gathering, a sprinkle of powdered sugar might evoke a snowy effect, making your tart feel seasonal and special.
When it comes to serving, the Zesty Lemon Curd Tart pairs beautifully with various beverages. A chilled glass of sparkling wine or a refreshing iced tea can accentuate the tart’s flavors. Alternatively, serving it alongside a scoop of vanilla ice cream or a dollop of crème fraîche can add a creamy contrast that balances the tartness.
Common Challenges and Solutions
Making a tart can come with its fair share of challenges, but with the right tips, you can navigate them successfully. One common issue is a soggy crust, which can occur if the lemon curd is poured into a warm or unbaked crust. To avoid this, ensure your tart shell is fully baked and cooled before filling. You can also brush the crust with a thin layer of melted chocolate or egg wash before baking to create a moisture barrier.
If you encounter cracks in your tart crust, it’s often due to overworking the dough. To prevent this, handle the dough as little as possible and chill it adequately before rolling. If cracks do occur, don’t fret—some lemon curd poured on top can help disguise them.
Ensuring your lemon curd sets properly is another concern. If your curd remains too runny after chilling, it may not have been cooked long enough. In such cases, you can reheat the curd gently, whisking continuously until it thickens, and then allow it to cool and set again.
For storage, keep your tart covered in the refrigerator, where it can last for up to five days. If you need to keep it longer, consider freezing the tart without garnishes. Wrap it tightly in plastic wrap and aluminum foil, and it can last up to two months in the freezer. When ready to serve, thaw it in the refrigerator overnight.
Conclusion
Creating a Zesty Lemon Curd Tart is not only a rewarding culinary experience but also a delightful dessert that can brighten any occasion. The process involves understanding the science of curd preparation and balancing flavors, resulting in a tart that is both tangy and sweet. Whether for a casual get-together, a holiday feast, or a special celebration, this tart is versatile and can be dressed up or down to suit your needs.
Don’t hesitate to experiment with this recipe—try different citrus fruits, such as lime or orange, or even incorporate fresh berries into the curd for a unique twist. Each variation offers a new way to enjoy this classic dessert, allowing you to cater to your tastes and those of your guests. So gather your ingredients, roll up your sleeves, and dive into the world of lemon curd tarts—your taste buds will thank you!
