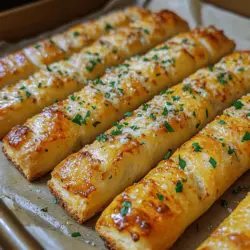
Crispy Garlic Breadsticks Recipe
When it comes to comfort food, few things can compete with the irresistible allure of crispy garlic breadsticks. These golden-brown delights boast a crunchy exterior that gives way to a soft, chewy center. The moment you pull them out of the oven, your kitchen will be enveloped in the mouthwatering aroma of garlic and herbs, instantly whetting your appetite. Whether served as an accompaniment to a warm bowl of marinara sauce, a hearty pasta dish, or simply enjoyed on their own, homemade garlic breadsticks are an ideal side dish or snack that can elevate any meal.
One of the most appealing aspects of garlic breadsticks is their simplicity. This recipe allows you to create a delectable treat with minimal effort, making it perfect for both novice cooks and seasoned chefs alike. The combination of fresh ingredients and the satisfaction of baking from scratch will not only impress your family and guests but also fill your home with a tempting scent that is hard to resist.
The Allure of Garlic Breadsticks
Garlic breadsticks have earned their place as a beloved staple across various cuisines, particularly in Italian cooking. Their popularity can be attributed to their versatility and the way they enhance the dining experience. Imagine enjoying a slice of pizza or a comforting bowl of pasta, only to find that the addition of a warm, garlicky breadstick completes the meal. They serve as the perfect vessel for sopping up sauces, making every bite of your dish more enjoyable.
Many of us have fond memories of savoring garlic breadsticks at family gatherings or cozy dinners at our favorite Italian restaurants. The anticipation builds as the warm basket of freshly baked breadsticks arrives at the table, accompanied by a side of marinara or a drizzle of olive oil. It’s a moment that brings people together, inviting conversation and laughter over shared plates. This nostalgic connection to garlic breadsticks makes them a beloved choice for both everyday meals and special occasions.
Key Ingredients and Their Roles
To achieve that perfect balance of flavor and texture in your crispy garlic breadsticks, it’s essential to understand the key ingredients that come together in this recipe. Each component plays a vital role in creating the delicious final product.
– All-Purpose Flour: The foundation of your breadsticks, all-purpose flour provides the necessary structure and chewiness. A high-quality flour will yield a better texture, ensuring that your breadsticks are both crispy on the outside and soft on the inside.
– Instant Yeast: This is your quick-rising agent, allowing the dough to rise rapidly without the need for lengthy proofing times. Instant yeast simplifies the preparation process, enabling you to enjoy your homemade breadsticks in less time.
– Olive Oil: Adding richness and flavor, olive oil enhances the dough while also contributing to a crispy crust. Its health benefits make it a preferred choice for many home cooks.
– Garlic: The star ingredient that defines the dish, garlic infuses the dough with its unmistakable flavor. Use fresh garlic for the best results, as it provides a robust taste that dried garlic simply cannot match.
– Parmesan Cheese: Sprinkled on top before baking, Parmesan cheese adds a savory, nutty flavor and contributes to the crispy topping. Its golden brown hue once baked is visually appealing and tantalizing.
In addition to these main ingredients, there are optional components that can elevate the flavor profile of your garlic breadsticks:
– Red Pepper Flakes: For those who enjoy a hint of heat, red pepper flakes can be added to the dough or sprinkled on top before baking, giving your breadsticks a delightful kick.
– Fresh Parsley: Chopped fresh parsley not only adds a pop of color but also brings a fresh, herbal note that complements the richness of the garlic and cheese.
Step-by-Step Guide to Making Crispy Garlic Breadsticks
Preparing the Dough
Now that you’ve gathered your ingredients, it’s time to start making your crispy garlic breadsticks. The first step involves mixing the dough, which sets the stage for your delightful creation.
1. Mixing the Ingredients: In a large mixing bowl, combine the all-purpose flour, instant yeast, and a pinch of salt. Whisk these dry ingredients together until well mixed. This step ensures that the yeast is evenly distributed throughout the flour, allowing for consistent rising.
2. Adding Wet Ingredients: Next, create a well in the center of the dry mixture and pour in warm water and olive oil. It’s crucial to use warm water, ideally between 100°F and 110°F (37°C to 43°C). This temperature range is optimal for activating the yeast, promoting a quicker rise without killing the yeast.
3. Mixing the Dough: Using a wooden spoon or your hands, mix the ingredients until they come together to form a shaggy dough. You may need to adjust the flour or water slightly, depending on humidity levels and the absorption capacity of your flour. The goal is to achieve a dough that is moist but not overly sticky.
4. Kneading the Dough: Once the dough has formed, transfer it to a lightly floured surface. Knead the dough for about 5-7 minutes until it becomes smooth and elastic. This process develops the gluten, contributing to the chewy texture of the breadsticks. If the dough feels overly sticky, sprinkle a little extra flour as needed.
5. First Rise: After kneading, shape the dough into a ball and place it in a lightly greased bowl. Cover the bowl with a clean kitchen towel or plastic wrap, and let it rise in a warm, draft-free area until it doubles in size, which typically takes about 1 hour.
As the dough rises, you can prepare for the next steps, including preheating your oven and gathering any additional toppings you’d like to add to your crispy garlic breadsticks. This is just the beginning of a delicious journey that will culminate in an unforgettable culinary experience. Stay tuned for the next part of this recipe, where we will shape, bake, and enjoy these delightful breadsticks!
Kneading for Perfection
Kneading is a crucial step in making crispy garlic breadsticks as it helps develop gluten, which gives the bread its structure and chewiness. When you knead the dough, the flour proteins (glutenin and gliadin) combine with water to form gluten. This process creates a network that traps air bubbles produced by the yeast, allowing the dough to rise properly.
To knead your dough effectively, begin by placing it on a floured surface. Use the palms of your hands to push the dough away from you, then fold it back over itself. Rotate the dough a quarter turn and repeat the process for about 8-10 minutes. You’ll know it’s ready when the dough becomes smooth and elastic.
Once kneaded, let the dough rest for a few minutes. This resting period allows the gluten to relax, making it easier to shape later. After resting, place the dough in a lightly oiled bowl, cover it with a clean kitchen towel or plastic wrap, and let it rise in a warm place until it doubles in size. This process, known as proofing, generally takes about 1 to 2 hours, depending on the ambient temperature.
The significance of letting the dough rise cannot be overstated. It not only enhances the flavor through fermentation but also gives the breadsticks a light, airy texture. Skipping this step can result in dense, chewy sticks that lack the delightful crunch we all love.
Shaping the Breadsticks
Once the dough has risen, it’s time to shape the breadsticks. Start by gently deflating the dough to release any trapped air. Turn it out onto a floured surface and divide it into equal portions. Depending on how thick you want your breadsticks, you can cut the dough into 12 to 16 pieces.
To roll the dough into the desired shape, take one piece and gently stretch it into a long rope, about 6-8 inches in length. Aim for a uniform thickness to ensure even baking. If the dough resists stretching, let it rest for a couple of minutes before trying again. This rest allows the gluten to relax, making it easier to shape.
As you shape, keep an eye out for visual cues that indicate the dough is ready for baking. After rising, the dough should appear puffy and slightly domed, with visible air bubbles forming on the surface. This indicates that the gluten has developed correctly and that your breadsticks will have a pleasant texture.
Creating the Garlic Mixture
The garlic herb paste is essential for infusing flavor into your breadsticks and taking them to the next level. To create this mixture, combine:
– 4-5 cloves of minced garlic
– 1/4 cup of melted butter or olive oil
– 1 tablespoon of dried Italian herbs (such as oregano, basil, or thyme)
– Salt and pepper to taste
Mix these ingredients in a small bowl until well combined. The garlic will infuse into the breadsticks during baking, creating a delicious aroma and a savory taste.
Feel free to adjust the flavors based on your personal preferences. For a spicier kick, consider adding a pinch of red pepper flakes. If you prefer a milder taste, you can reduce the amount of garlic or even add a bit of grated Parmesan cheese for a rich, cheesy flavor.
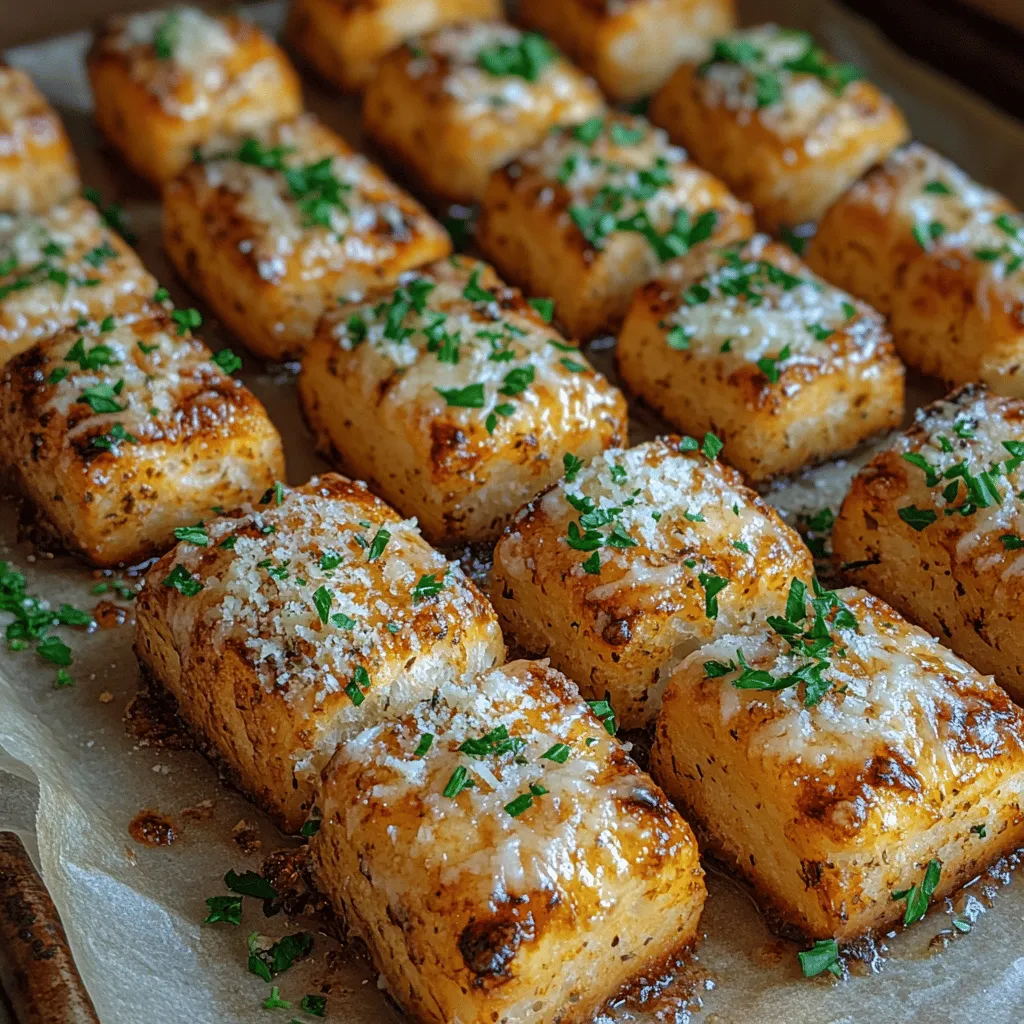
Baking to Crispy Perfection
To achieve that golden, crispy crust, preheat your oven to 425°F (220°C). This high temperature is key for creating a beautifully baked exterior while ensuring the inside remains soft and tender. Line a baking sheet with parchment paper to prevent sticking and arrange the shaped breadsticks evenly spaced apart on the sheet.
Brush the garlic herb mixture generously over each breadstick before placing them in the oven. Reserve a bit of the mixture for brushing after baking, if desired. Bake your breadsticks for about 12-15 minutes, or until they are golden brown and have a crisp exterior.
To determine doneness, look for a deep golden color and listen for a hollow sound when you tap the bottom of a breadstick. If you notice they are browning too quickly, you can cover them loosely with aluminum foil for the last few minutes of baking.
Serving Suggestions
Crispy garlic breadsticks are incredibly versatile and can be enjoyed in numerous ways. Here are some delightful ideas for pairing:
– Dips: Serve your breadsticks alongside classic marinara sauce, creamy garlic butter, or zesty ranch dressing. These dips enhance the flavors and make for a fun appetizer or snack.
– Accompanying Dishes: These breadsticks pair beautifully with pasta dishes, salads, or soups. Imagine them served alongside a rich spaghetti marinara, a fresh garden salad, or a hearty minestrone soup. They bring a satisfying crunch and flavor that complements these meals perfectly.
– Creative Leftovers: If you have leftover breadsticks, don’t let them go to waste! They can be used in sandwiches as a crunchy base or chopped into cubes to create homemade croutons for salads or soups. To reheat, simply pop them in the oven for a few minutes until they are warm and crispy again.
Nutritional Information
Understanding the nutritional benefits of the ingredients used in your crispy garlic breadsticks can help you enjoy them more mindfully. Here’s a brief overview:
– Flour: Provides carbohydrates for energy.
– Yeast: A source of B vitamins and supports gut health.
– Garlic: Known for its immune-boosting properties, garlic also contains antioxidants.
– Olive Oil or Butter: Contributes healthy fats, though moderation is key to maintaining a balanced diet.
When enjoying your garlic breadsticks, consider portion sizes. A serving of 2-3 breadsticks is reasonable, especially when paired with a protein-rich salad or a hearty soup.
Conclusion
Making crispy garlic breadsticks from scratch is a joyful and rewarding experience. With simple ingredients and straightforward techniques, you can create a delightful treat that elevates any meal. The aroma of freshly baked breadsticks filling your kitchen is enough to bring anyone to the table.
Homemade recipes like these not only satisfy cravings but also encourage creativity in the kitchen. Don’t hesitate to experiment with different herbs, cheeses, or spices to make this recipe your own. Whether enjoyed alone or shared with family and friends, these garlic breadsticks are sure to become a favorite. So roll up your sleeves, gather your ingredients, and start baking—deliciousness awaits!