Introduction to Crispy Air-Fried Mac & Cheese Balls
In the realm of comfort food, few dishes can rival the satisfaction of mac and cheese. This beloved classic, with its creamy, cheesy goodness, has been a staple in households for generations. However, in recent years, innovative culinary techniques have given rise to exciting new adaptations of traditional recipes. One such delightful creation is the crispy air-fried mac & cheese balls—an ingenious way to enjoy your favorite pasta dish in a new and exciting form.
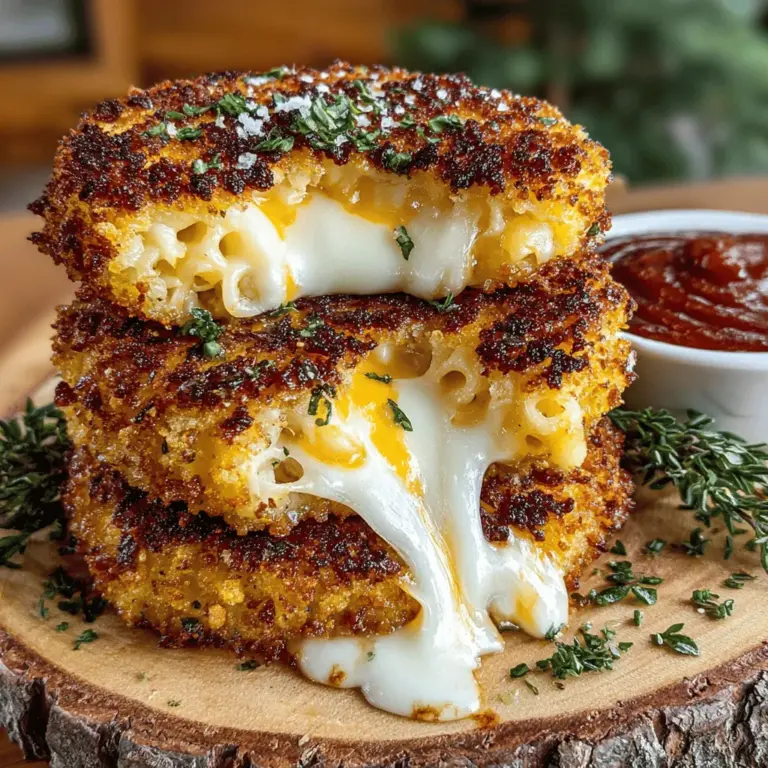
These mac & cheese balls offer the perfect combination of crunchy exterior and a gooey, cheesy interior. They are not only easy to prepare but also provide a healthier alternative to deep-fried versions, thanks to the use of an air fryer. This method allows you to enjoy the same satisfying crunch without the excess oil, making them a fantastic choice for health-conscious snackers. Whether you’re looking for a fun appetizer for a gathering, a unique snack for movie night, or simply a delightful way to indulge in your favorite flavors, these mac & cheese balls are sure to impress.
Understanding the Ingredients
To create the perfect crispy air-fried mac & cheese balls, understanding the key ingredients is crucial. Each component plays a vital role in achieving the ideal flavor and texture that sets this dish apart.
– Cooked Macaroni: The foundation of this dish, cooked macaroni provides that classic pasta texture that is essential for any mac and cheese recipe. Opting for elbow macaroni is standard, but feel free to experiment with other shapes for added fun.
– Cheeses: A combination of sharp cheddar and Parmesan is ideal for this recipe. Sharp cheddar contributes a robust flavor that pairs beautifully with the creamy texture, while Parmesan adds a subtle nuttiness and depth of flavor that elevates the overall dish.
– Cream Cheese: This ingredient is key to achieving a creamy consistency that binds the ingredients together. It not only enhances the richness but also helps in maintaining the shape of the mac & cheese balls during cooking.
– Seasonings: The right blend of seasonings can transform the flavor profile of your mac & cheese balls. Garlic powder, onion powder, smoked paprika, salt, and black pepper work together to create a well-rounded taste that complements the cheesiness of the dish.
– Panko Breadcrumbs: For that irresistibly crispy exterior when air-fried, panko breadcrumbs are the go-to choice. Their larger size and airy texture create a delightful crunch that contrasts beautifully with the creamy filling.
– Eggs: Acting as a binding agent, eggs help the breadcrumbs adhere to the mac & cheese balls. They also contribute to the overall structure, ensuring that the balls hold their shape during the cooking process.
Step-by-Step Process for Making Air-Fried Mac & Cheese Balls
Creating crispy air-fried mac & cheese balls is a straightforward process, but attention to detail in each step is crucial for achieving the best results. Here, we’ll break down the process into easy-to-follow steps that will guide you through making this delicious snack.
Preparing the Mac & Cheese Mixture
Start by cooking your macaroni according to the package instructions. Once al dente, drain and set aside to cool slightly. In a large mixing bowl, combine the cooked macaroni with your choice of shredded cheeses—sharp cheddar and Parmesan work best for this recipe.
Next, add the cream cheese, along with your selected seasonings: garlic powder, onion powder, smoked paprika, salt, and black pepper. It is essential to mix thoroughly to ensure an even distribution of flavors throughout the macaroni and cheese mixture. This step is vital, as it will determine the flavor profile of the final product. Use a spatula or your hands to combine the ingredients, breaking up any clumps of cream cheese as you go.
Chilling the Mixture
Once you have a well-combined mac & cheese mixture, the next step is to chill it. This is a critical phase in the process that cannot be overlooked. Chilling the mixture helps it firm up, making it easier to shape into balls. Transfer the mixture to an airtight container or cover the bowl with plastic wrap, and refrigerate for at least 30 minutes. For best results, you can chill it for up to an hour. This waiting period enhances the texture and helps the balls retain their shape during cooking.
Forming the Balls
After chilling, it’s time to form your mac & cheese balls. Remove the mixture from the refrigerator and use a cookie scoop or your hands to portion out the mixture. Aim for uniform balls, about 1 to 1.5 inches in diameter, to ensure even cooking. If you prefer larger or smaller balls, just be mindful that this will affect cooking time. Once you have formed a batch, place them on a parchment-lined tray or plate.
Breading the Balls
To achieve that signature crispy exterior, setting up a breading station is essential. Prepare three shallow bowls: one with flour, another with beaten eggs, and the third filled with panko breadcrumbs. The flour helps the egg adhere to the mac & cheese balls, while the panko creates a crispy coating.
First, roll each mac & cheese ball in the flour, ensuring it is coated evenly. Shake off any excess flour before dipping it into the beaten eggs, making sure it’s fully coated. Finally, roll the ball in the panko breadcrumbs, pressing gently to ensure the breadcrumbs stick well. Repeat this process until all the mac & cheese balls are breaded.
By following this meticulous approach, you’ll set yourself up for success in creating crispy air-fried mac & cheese balls that are not only delicious but also visually appealing. Stay tuned for the next part of this recipe, where we will cover the air frying process and tips for serving your delightful creations!

Step-by-Step Instructions for Coating the Balls in Egg and Panko Breadcrumbs
Once your mac and cheese mixture has chilled and firmed up, it’s time to shape and coat the balls. Begin by preparing a workstation with three shallow dishes: one for flour, one for beaten eggs, and the last for Panko breadcrumbs.
Coating Process
1. Shape the Balls: Using your hands, scoop a tablespoon of the chilled mac and cheese mixture and roll it into a ball. Repeat this process until all the mixture has been shaped into balls. You should end up with about 12 to 16 balls, depending on the size you prefer.
2. Dredge in Flour: Roll each ball in the flour, ensuring it is evenly coated. This step helps the egg adhere better to the surface.
3. Dip in Egg: Next, dip the floured ball into the beaten eggs, allowing any excess to drip off.
4. Coat with Panko: Finally, roll the egg-coated ball in Panko breadcrumbs until fully covered. The Panko will give the mac and cheese balls their signature crispy texture.
Set the coated balls aside on a plate or a baking sheet lined with parchment paper as you finish coating the rest.
Preheating the Air Fryer
Preheating your air fryer is a crucial step in achieving perfectly crispy mac and cheese balls. By preheating, you ensure that the balls start cooking immediately when placed inside, which helps develop that golden-brown exterior.
Recommended Temperature Settings
For mac and cheese balls, set your air fryer to 375°F (190°C). Preheat the unit for about 5 minutes. This optimal temperature allows for a nice crisp without burning the coating before the filling is heated through.
Air Frying the Balls
Once your air fryer has preheated, it’s time to arrange the mac and cheese balls inside. Proper arrangement is key to ensure even cooking.
Arranging the Balls
1. Place in the Basket: Arrange the mac and cheese balls in a single layer in the air fryer basket. Avoid overcrowding to allow air to circulate freely around each ball. You may need to work in batches if your air fryer is small.
2. Use Olive Oil Spray: For added crispiness, lightly spray the balls with olive oil. This step enhances browning and helps achieve that desired crunchy texture.
Cooking Until Golden
Cooking time for the air-fried mac and cheese balls typically ranges from 10 to 12 minutes. However, it’s essential to monitor the cooking process closely.
Visual Cues for Doneness
– Color: Look for a golden-brown color on the surface of the balls.
– Texture: The coating should appear crispy and firm.
– Temperature: If you have a food thermometer, the internal temperature should reach at least 165°F (74°C) to ensure they are heated through.
Halfway through the cooking time, gently shake the basket or use tongs to turn the balls to ensure even cooking.
Serving Suggestions for Mac & Cheese Balls
Once your mac and cheese balls are perfectly cooked, it’s time to serve them up! They are versatile and pair beautifully with a variety of dipping sauces.
Dipping Sauces
– Marinara Sauce: A classic choice that complements the cheesy flavor beautifully.
– Ranch Dressing: Adds a creamy and tangy element that many enjoy.
– Buffalo Sauce: For those who love a kick, this will elevate the dish.
Garnishes and Side Dishes
Consider garnishing with fresh herbs, such as parsley or chives, for a pop of color. To create a complete meal, serve the mac and cheese balls alongside a crisp salad or a vegetable platter for balance.
Nutritional Benefits of Air-Frying
Air-frying offers several health benefits compared to traditional frying methods, making these mac and cheese balls a guilt-free indulgence.
Lower Fat Content
By using significantly less oil, air-frying reduces the fat content of your food. Traditional deep frying can add excess calories and unhealthy fats, whereas air-frying maintains flavor without the added grease.
Retained Nutrients
Additionally, air-frying helps retain more nutrients compared to boiling or frying, preserving the natural goodness of the ingredients in your mac and cheese.
Creative Variations of the Recipe
One of the best aspects of this mac and cheese balls recipe is its versatility. Here are some creative ways to customize your dish:
Flavor Additions
– Bacon: Add crispy bacon bits to the mac and cheese mixture for a savory twist.
– Jalapeños: Incorporate diced jalapeños for a spicy kick that adds heat.
– Different Cheeses: Experiment with various cheese types, such as pepper jack for a spicier flavor or gouda for a smoky touch.
Dietary Adaptations
If you’re looking for vegetarian or gluten-free options, here are some suggestions:
– Vegetarian: Use a plant-based cheese and pasta to keep the dish meat-free.
– Gluten-Free: Substitute regular flour and Panko with gluten-free alternatives, ensuring everyone can enjoy this delicious treat.
Conclusion: Enjoying Your Crispy Air-Fried Mac & Cheese Balls
Crispy air-fried mac and cheese balls are not just a meal; they are a delightful experience that brings joy to any gathering. Whether enjoyed as a snack, appetizer, or part of a main meal, these crunchy bites offer comfort and satisfaction that is hard to resist.
The process of making these mac and cheese balls can be a fun cooking adventure, whether you’re entertaining guests or treating yourself to a cozy night in. The combination of gooey cheese and crispy coating is sure to become a new favorite in your household. So gather your ingredients, follow the steps, and indulge in the deliciousness of these air-fried creations. Enjoy your culinary journey and the smiles that come with sharing this delightful dish!