Frozen Yogurt Chocolate Mint Wedges Recipe
Introduction
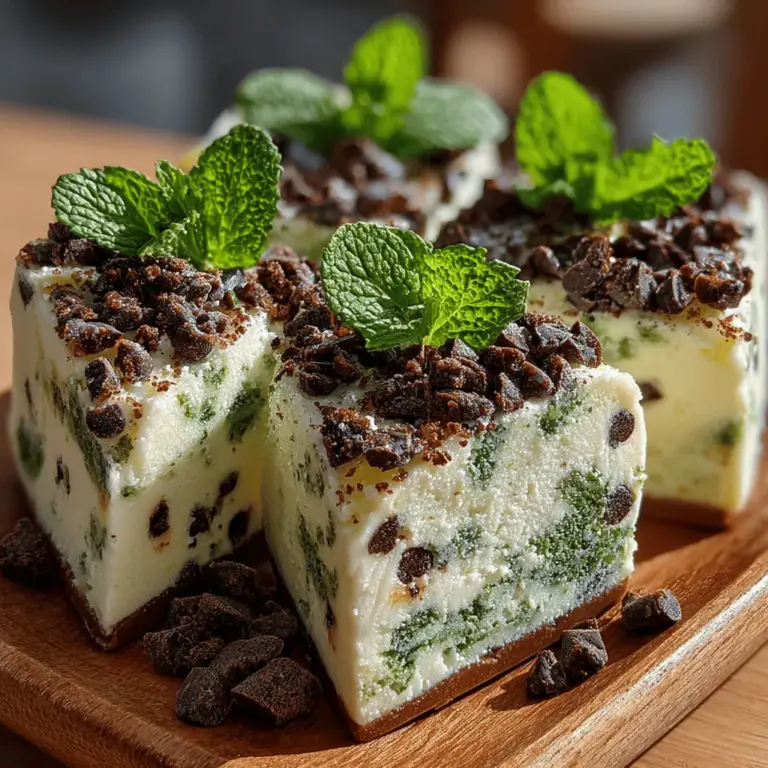
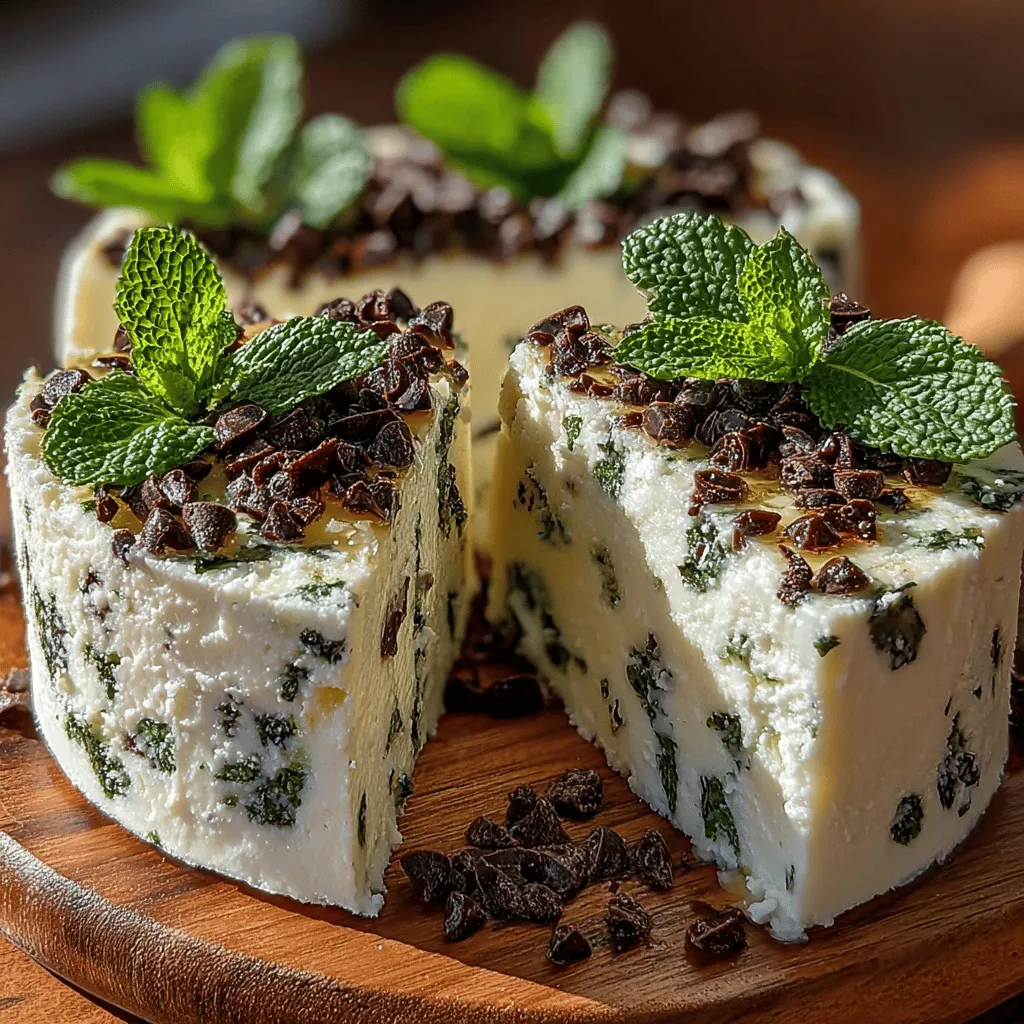
In recent years, frozen yogurt has surged in popularity, positioning itself as a refreshing alternative to traditional ice cream. This delightful dessert not only satisfies sweet cravings but also offers a lighter, often healthier option for those looking to indulge without the guilt. Among the myriad of frozen yogurt creations, the Frozen Yogurt Chocolate Mint Wedges stand out as a particularly appealing treat. Ideal for warm weather, this recipe combines the creamy goodness of yogurt with refreshing mint and rich chocolate, creating a harmonious flavor profile that is sure to please palates of all ages.
What makes this recipe even more enticing is its versatility. Whether you’re a non-vegan or a strict vegan, these Frozen Yogurt Chocolate Mint Wedges can be customized to suit your dietary preferences. This means everyone can enjoy this delectable dessert, making it a perfect addition to any gathering or a satisfying snack for yourself.
Understanding Frozen Yogurt
Frozen yogurt has a fascinating history that dates back to the 1970s when it first emerged as a trendy dessert option. Unlike ice cream, which is typically made with cream and a higher fat content, frozen yogurt is primarily crafted from yogurt, resulting in a creamier, tangy flavor. The base ingredient, yogurt, not only contributes to the signature taste but also enhances the nutritional profile, making it a more wholesome choice for dessert lovers.
One of the primary benefits of choosing frozen yogurt over traditional ice cream is its lower fat content. Yogurt is a source of probiotics, which are beneficial for gut health, and it provides essential nutrients like calcium and protein. These advantages make frozen yogurt a more health-conscious option, especially when prepared at home. Homemade frozen yogurt allows for greater control over the ingredients, enabling you to create a dessert that aligns with your nutritional goals while maximizing flavor without unnecessary additives.
Ingredient Spotlight
The Frozen Yogurt Chocolate Mint Wedges recipe is built on a foundation of wholesome ingredients, each playing a crucial role in crafting this delightful treat:
– Plain Greek Yogurt: The star ingredient, Greek yogurt, is packed with protein and probiotics, promoting digestive health. Its creamy texture serves as the perfect base for the frozen yogurt, offering a decadent mouthfeel without the excessive calories found in many ice creams. Additionally, Greek yogurt is lower in sugar than traditional yogurt, making it an excellent choice for a healthier dessert.
– Honey vs. Maple Syrup: Sweetness is key to any dessert, and in this recipe, you have the option to use honey or maple syrup. Honey, a natural sweetener, boasts antibacterial properties and adds a subtle floral note. On the other hand, maple syrup is a vegan-friendly alternative that imparts a rich, caramel-like flavor. Both sweeteners bring their unique qualities to the dish, allowing you to choose based on your dietary preferences.
– Pure Vanilla Extract: A staple in dessert recipes, pure vanilla extract enhances the overall flavor profile. It adds depth and warmth, complementing the creaminess of the yogurt. When selecting vanilla extract, opt for high-quality, pure extracts rather than imitation versions, as they provide a more authentic taste.
– Fresh Mint Leaves: Mint is the key ingredient that brings a refreshing brightness to the wedges. Rich in vitamins A and C, as well as antioxidants, fresh mint offers more than just flavor; it contributes to your overall health. Its cooling properties make it an excellent choice for a summer treat, enhancing the enjoyment of each bite.
– Dark Chocolate Chips: The addition of dark chocolate chips not only satisfies chocolate cravings but also provides health benefits. Dark chocolate is rich in antioxidants and is known to improve heart health. For vegans, there are plenty of dairy-free chocolate options available, ensuring that everyone can enjoy this recipe without compromise.
– Peppermint Extract: To amplify the minty flavor, a splash of peppermint extract is included. This ingredient enhances the overall taste, ensuring that each bite delivers a refreshing burst of mint. It’s essential to use pure peppermint extract to avoid artificial flavors that can detract from the dessert’s quality.
– Salt: A pinch of salt may seem like an insignificant addition, but it plays a crucial role in balancing the sweetness of the yogurt and enhancing the overall flavor. Salt acts as a flavor enhancer, making the chocolate and mint notes pop.
Step-by-Step Instructions
Now that we’ve explored the ingredients and their benefits, it’s time to dive into the preparation process for the Frozen Yogurt Chocolate Mint Wedges. Creating this delightful dessert is straightforward and requires minimal equipment, making it perfect for anyone looking to whip up a delicious treat at home. Follow these step-by-step instructions to achieve the perfect frozen yogurt wedges:
1. Gather Your Ingredients: Start by assembling all the necessary ingredients. This includes plain Greek yogurt, honey or maple syrup, pure vanilla extract, fresh mint leaves, dark chocolate chips, peppermint extract, and a pinch of salt.
2. Prepare the Mint: Wash the fresh mint leaves thoroughly to remove any dirt or impurities. Pat them dry with a paper towel. Next, finely chop the mint leaves to release their oils and flavor. Set aside a few whole leaves for garnish if desired.
3. Mix the Yogurt Base: In a mixing bowl, combine the plain Greek yogurt, sweetener of choice (honey or maple syrup), pure vanilla extract, finely chopped mint, and a pinch of salt. Stir the mixture until all the ingredients are well incorporated and the flavors are evenly distributed.
4. Add the Chocolate Chips: Gently fold in the dark chocolate chips, ensuring that they are evenly dispersed throughout the yogurt mixture. This step adds a rich, chocolaty element that complements the mint beautifully.
5. Prepare the Baking Dish: Line a baking dish with parchment paper to prevent sticking. The size of the dish can vary depending on how thick you want your wedges to be; a 9×9 inch or similar-sized dish works well for this recipe.
6. Spread the Mixture: Pour the yogurt mixture into the prepared baking dish, using a spatula to spread it evenly. Smooth the top to create a uniform surface, ensuring that the chocolate chips and mint are evenly distributed.
7. Freeze: Cover the baking dish with plastic wrap or a lid and place it in the freezer. Allow it to freeze for at least 4-6 hours, or until the mixture is completely firm.
By following these initial steps, you’ll be on your way to creating delicious Frozen Yogurt Chocolate Mint Wedges that are sure to impress. Stay tuned for the next part of the article, where we’ll explore serving suggestions, variations, and tips for perfecting this easy and refreshing dessert.
Preparing the Mixture: Techniques for Achieving a Smooth Consistency
To create the perfect base for your Frozen Yogurt Chocolate Mint Wedges, it’s crucial to achieve a creamy and smooth mixture. Start by ensuring that your yogurt is at room temperature; this helps with blending. Whether you opt for Greek yogurt for its rich texture or regular yogurt for a lighter feel, both work wonderfully.
1. Mixing Method: Use a high-speed blender or food processor. This equipment helps to break down any lumps in the yogurt, creating a velvety texture. Blend the yogurt with your chosen sweetener until the mixture is smooth and creamy. If you prefer a little tang, adding a splash of vanilla extract can enhance the flavor without overwhelming the mint and chocolate.
2. Incorporating Ingredients: After achieving a smooth yogurt base, consider adding a tablespoon of citrus juice, such as lemon or lime, to brighten the flavors. This step is optional but can elevate the overall taste profile.
Incorporating Mint and Chocolate: Tips for Evenly Distributing Ingredients
Once your yogurt mixture is smooth, it’s time to fold in the mint and chocolate components. The key here is to ensure that both ingredients are evenly distributed throughout the mixture.
1. Fresh Mint vs. Extract: If using fresh mint, finely chop the leaves to release their oils and enhance their flavor. If you choose mint extract, start with a small amount, as it can be quite potent. A few drops go a long way.
2. Chocolate Addition: For the chocolate, finely chop your preferred dark or semi-sweet chocolate. This will allow the chocolate to disperse more evenly throughout the mixture. You can also use mini chocolate chips for a fun texture.
3. Folding Technique: Gently fold the mint and chocolate into the yogurt mixture using a rubber spatula. This technique helps maintain the airiness of the yogurt while ensuring even distribution without overmixing.
Lining the Pan: Best Practices for Ease of Removal Post-Freezing
To ensure your Frozen Yogurt Chocolate Mint Wedges come out of the pan easily, proper lining is essential.
1. Choosing the Right Pan: A square or rectangular baking dish works best for this recipe. Aim for a size of about 8×8 inches or 9×5 inches.
2. Lining the Pan: Use parchment paper to line the bottom and sides of your baking dish. Leave some overhang on the sides, as this will help you lift the frozen wedges out once they are set. Alternatively, you can use silicone baking pans, which naturally promote easy removal.
3. Greasing (Optional): If you’re using a metal pan, lightly grease the parchment paper with a non-stick spray or a small amount of coconut oil to further ease the removal process.
Freezing the Mixture: Recommendations for Optimal Freezing Time
Now that your mixture is ready and the pan is lined, it’s time for the freezing process.
1. Pouring the Mixture: Carefully pour the yogurt mixture into the prepared pan, smoothing out the top with a spatula for an even surface.
2. Freezing Duration: Place the pan in the freezer and allow it to freeze for at least 4-6 hours, or until solid. For the best results, let it freeze overnight. This ensures that the yogurt sets completely, making it easier to cut.
3. Monitoring Freezing: If your freezer tends to freeze items quickly, check the mixture after a few hours. It should be firm but not rock solid, which can make cutting difficult.
Cutting and Serving the Wedges: Techniques for Clean Cuts and Presentation
Once the mixture is completely frozen, it’s time to cut it into wedges for serving.
1. Preparation for Cutting: Allow the pan to sit at room temperature for about 5-10 minutes before cutting. This will soften the edges slightly and make it easier to slice.
2. Cutting Technique: Use a sharp knife, preferably warmed under hot water and dried, to cut through the frozen yogurt. Wipe the knife clean between cuts to ensure neat edges.
3. Serving Presentation: Arrange the wedges on a serving platter. Consider garnishing with additional fresh mint leaves or a drizzle of melted chocolate for an appealing presentation.
Flavor Variations and Customizations
While the Frozen Yogurt Chocolate Mint Wedges are delicious as is, there are numerous ways to customize them to suit your tastes.
Suggestions for Alternative Flavor Profiles
1. Herb Variations: Experiment with different herbs for unique flavor profiles. Basil can provide a sweet and slightly peppery taste, while rosemary offers a more robust flavor. Use these herbs sparingly, as they can easily overpower the yogurt.
2. Chocolates and Toppings: Instead of chocolate, consider using fruit-based toppings such as crushed berries or mango puree. Nut-based toppings like chopped almonds or walnuts add a delightful crunch and healthy fats to your wedges.
Creative Serving Ideas
1. Pairing with Fresh Fruit: Serve the wedges with a side of fresh fruit like strawberries, raspberries, or even a citrus salad. This not only enhances the flavor but also adds a beautiful color contrast on the plate.
2. Sauces for Added Flavor: Drizzle a homemade fruit sauce or a chocolate sauce over the wedges to elevate the dessert experience. A simple berry coulis made by blending fresh berries with a bit of honey is a great option.
3. Garnishes for Presentation Enhancement: Upgrade the visual appeal by garnishing with edible flowers or a sprinkle of cocoa powder. These little touches can make a simple dessert feel elegant.
Nutritional Information
Understanding the nutritional profile of your Frozen Yogurt Chocolate Mint Wedges can help you enjoy them guilt-free.
1. Nutritional Overview: Each serving of these wedges is a healthier alternative to traditional ice cream desserts. Greek yogurt provides a significant source of protein, calcium, and probiotics, which are beneficial for gut health.
2. Caloric Comparison: When compared to standard chocolate desserts, these wedges typically contain fewer calories and less sugar, making them a more wholesome option for dessert lovers. Keep in mind that portion sizes matter; enjoying one or two wedges can satisfy your sweet tooth without overindulgence.
3. Portion Control: To maintain a balanced diet, practice portion control by cutting the wedges into smaller pieces. This allows for enjoyment without excess calories while still providing a sweet treat.
Conclusion
Making Frozen Yogurt Chocolate Mint Wedges at home is not only a fun and rewarding experience but also a healthier dessert option. By using simple ingredients and customizing flavors, you can create a frozen treat that everyone will love. The joy of sharing delicious, homemade desserts with friends and family is incomparable, and with this recipe, you have a delightful way to do just that.
So why not explore the world of homemade frozen treats? With a few simple techniques and a bit of creativity, you can craft desserts that are not only satisfying but also good for you. Enjoy your culinary adventure and the smiles that come with sharing these delightful Frozen Yogurt Chocolate Mint Wedges.
