Banana Walnut Bliss Frozen Yogurt Bars: A Healthy Sweet Treat
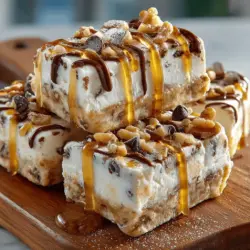
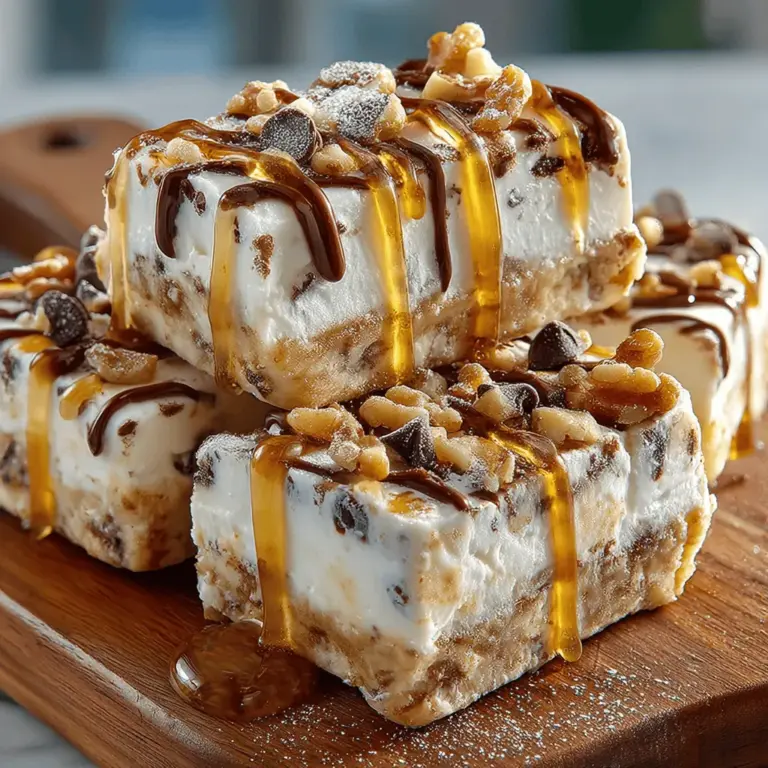
Frozen treats have an undeniable charm, especially when they offer a tasty way to indulge without compromising on health. The Banana Walnut Bliss Frozen Yogurt Bars are a perfect example of this delightful combination. These bars not only satisfy your sweet tooth but also provide a nutritious boost thanks to their wholesome ingredients. Featuring the natural sweetness of ripe bananas, the creamy texture of Greek yogurt, and the satisfying crunch of walnuts, these bars make for an excellent snack for both children and adults alike.
As we delve into this recipe, we’ll explore the numerous benefits of the ingredients, provide you with step-by-step instructions, and share tips on how to store and serve these delicious bars for maximum enjoyment. Whether you’re looking for a refreshing dessert on a hot day or a nutritious snack to power through your afternoon slump, these frozen yogurt bars are sure to hit the spot.
Understanding the Ingredients
Before diving into the recipe, it’s important to understand the nutritional benefits of the key ingredients. Each component plays a significant role in not only enhancing the flavor but also contributing to the overall healthfulness of the treat.
Exploring the Nutritional Benefits of Bananas
Bananas are often celebrated for their impressive nutritional profile. They are rich in potassium, which is essential for maintaining proper heart function and regulating blood pressure. Additionally, bananas are a great source of dietary fiber, promoting healthy digestion and keeping you feeling full longer. Their natural sweetness allows you to reduce the need for added sugars in recipes, making them an ideal choice for desserts. When selecting bananas for this recipe, aim for ripe ones that are slightly speckled. These bananas will provide the best flavor and sweetness for your frozen yogurt bars.
The Power of Greek Yogurt
Greek yogurt is another star ingredient in this recipe. Known for its rich, creamy consistency, Greek yogurt is high in protein, which plays a crucial role in muscle repair and growth. It also contains probiotics, beneficial bacteria that support gut health and digestion. Incorporating Greek yogurt into your diet can help boost your immune system and improve overall health. When preparing your Banana Walnut Bliss Frozen Yogurt Bars, choose plain, unsweetened Greek yogurt to keep the flavors pure and allow the natural sweetness of the bananas to shine through.
Sweeteners: Honey vs. Maple Syrup
When it comes to sweetening your frozen yogurt bars, you have options. Honey and maple syrup are both natural sweeteners that can enhance the flavor of the bars while providing some nutritional benefits. Honey contains antioxidants and has antibacterial properties, while maple syrup is rich in minerals like manganese and zinc. Depending on your dietary preferences or restrictions, you can choose either sweetener. If you prefer a vegan option, maple syrup is the way to go. Be sure to taste the mixture as you go, adjusting the sweetness to suit your personal preferences.
The Role of Walnuts in the Recipe
Walnuts not only add a delightful crunch to the Banana Walnut Bliss Frozen Yogurt Bars but also contribute significant health benefits. They are an excellent source of heart-healthy fats, including omega-3 fatty acids, which are known to reduce inflammation and promote cardiovascular health. Additionally, walnuts are packed with antioxidants that help combat oxidative stress in the body. Incorporating walnuts into your diet can support brain health and improve mood, making them a fantastic addition to this recipe.
Optional Add-ins: Mini Chocolate Chips
For those who enjoy a bit of decadence, consider adding mini chocolate chips to your frozen yogurt bars. This optional ingredient can balance taste with nutrition, providing a touch of sweetness that complements the bananas and walnuts beautifully. However, if you’re looking to keep the bars on the healthier side, you can omit the chocolate chips or reduce the quantity to suit your taste. The beauty of this recipe lies in its versatility, allowing you to customize it according to your preferences.
Step-by-Step Instructions for Banana Walnut Bliss Frozen Yogurt Bars
Now that we’ve explored the benefits of the ingredients, it’s time to roll up your sleeves and get started on making these delicious frozen yogurt bars. Each step is designed to ensure that you achieve the best possible flavor and texture, so follow along carefully.
Preparing the Bananas for Optimal Flavor
The first step in creating your Banana Walnut Bliss Frozen Yogurt Bars is preparing the bananas. Selecting the right bananas is crucial; look for ones that are ripe but not overripe. A few brown spots on the peel indicate optimal sweetness. To prepare the bananas, peel them and place them in a mixing bowl. Use a fork or a potato masher to mash them until they reach a smooth consistency. The goal is to achieve a creamy texture without any large chunks, as this will ensure even mixing with the other ingredients.
Creating the Yogurt Mixture: A Creamy Base
Once your bananas are mashed, it’s time to create the yogurt mixture. In the same bowl, add the Greek yogurt and your chosen sweetener (honey or maple syrup). Using a spatula or whisk, mix the ingredients thoroughly until they are well combined. It’s important to ensure that the bananas and yogurt are fully integrated to create a smooth base for your frozen bars. If you’re adding mini chocolate chips or any other optional ingredients, fold them in gently at this stage to distribute them evenly throughout the mixture.
This initial preparation sets the stage for the delicious frozen yogurt bars you’ll be enjoying. As you continue with the recipe, you’ll soon see how simple and rewarding it is to create a healthy dessert that doesn’t skimp on flavor. Stay tuned for the next steps, where we will detail how to pour the mixture into molds and freeze them to perfection, ensuring that you can savor the delightful taste of Banana Walnut Bliss Frozen Yogurt Bars in no time.
Achieving the Perfect Creamy Texture
Creating the ideal creamy texture for your Banana Walnut Bliss Frozen Yogurt Bars is crucial to their success. The key lies in the blending process. Begin by using ripe bananas, as they are naturally sweeter and contribute to a smoother consistency. When blending your ingredients, make sure to use a high-powered blender or food processor. This will help break down the bananas and mix them thoroughly with yogurt and any other ingredients like honey or maple syrup.
Incorporating Add-ins for Extra Crunch
To elevate your frozen yogurt bars, consider adding walnuts and chocolate chips. These not only enhance the flavor but also provide a delightful crunch.
How to Fold in Walnuts and Chocolate Chips
After achieving the creamy banana-yogurt mixture, it’s time to fold in your add-ins. Use a spatula to gently incorporate the chopped walnuts and chocolate chips. Be careful not to over-mix—this can lead to a less creamy texture and uneven distribution of the add-ins.
Ensuring Even Distribution Throughout the Mixture
To ensure each bar has an even distribution of walnuts and chocolate chips, fold them in gradually. Add a little at a time, mixing just until combined. This will make sure that every bite of your frozen yogurt bar is deliciously packed with flavor.
Lining the Baking Dish for Easy Removal
Properly lining your baking dish is essential for easy removal of the frozen yogurt bars once they are set.
Best Practices for Using Parchment Paper
Use a baking dish that is at least 8×8 inches for the best results. Cut a piece of parchment paper that is large enough to cover the bottom and sides of the dish. The parchment paper will act as a barrier, preventing the yogurt mixture from sticking to the dish.
Importance of Leaving Overhang for Easy Lifting
When placing the parchment paper in the dish, ensure that there is some overhang. This overhang will act as handles, making it easier to lift the bars out once they are frozen. It’s a straightforward step that saves you from the hassle of cutting them directly in the dish.
Pouring and Smoothing the Mixture
After preparing your add-ins and lining your dish, it’s time to pour in the yogurt mixture.
Techniques for Spreading the Mixture Evenly
Using a spatula, carefully pour the banana-yogurt mixture into the lined baking dish. Begin at one corner and work your way across, gently spreading the mixture to the edges. This helps avoid air pockets and ensures an even thickness across the bars.
Ensuring a Smooth Top for Aesthetic Appeal
To achieve a smooth, professional-looking finish, take a straight edge, like a knife or a ruler, and run it across the top of the mixture after spreading it. This will give your bars a clean edge and a pleasing appearance once they are frozen and cut.
Freezing the Bars: Timing is Key
Freezing your Banana Walnut Bliss Frozen Yogurt Bars requires precise timing for optimal texture and taste.
How Long to Freeze for Best Results
Place the baking dish in the freezer and allow the mixture to freeze for at least 4-6 hours, or until it is solid. For best results, leaving it overnight is recommended. This ensures that the bars are perfectly frozen and will hold their shape when cut.
Signs That the Mixture is Ready to Be Removed
To determine if your bars are ready, check for firmness. The surface should feel solid, and when you press lightly with your finger, it should not leave an indentation. If they are still soft, give them a bit more time in the freezer.
Cutting and Serving the Frozen Bars
Once your bars are fully frozen, it’s time to cut and serve them.
Tips for Cutting Frozen Yogurt Bars Without Damaging Them
Remove the baking dish from the freezer and carefully lift the bars out using the parchment paper overhang. Place them on a cutting board. To cut the bars without damaging them, use a sharp knife that has been warmed under hot water. This will create clean cuts and prevent the yogurt from crumbling.
Recommendations for Serving Temperature
For the best flavor and texture, allow the bars to sit out for about 5-10 minutes before serving. This slight thawing will make them easier to bite into while still maintaining their frozen quality.
Storing Your Frozen Yogurt Bars
To make the most of your Banana Walnut Bliss Frozen Yogurt Bars, proper storage is crucial.
Best Practices for Storing Frozen Treats
Once cut, store any leftover bars in an airtight container or wrap them individually in plastic wrap. This will help prevent freezer burn and maintain their flavor. If using a container, consider adding a layer of parchment paper between the bars to prevent sticking.
Shelf Life of the Bars and Signs of Spoilage
When stored properly, these bars can last in the freezer for up to 2-3 months. Keep an eye out for any ice crystals forming on the surface, which can indicate freezer burn. If the bars develop an off smell or flavor, it’s best to discard them.
Making the Most of Your Frozen Yogurt Bars
These frozen yogurt bars are incredibly versatile and can be enjoyed in various ways.
Suggestions for Serving: Pairing with Fruits or Nuts
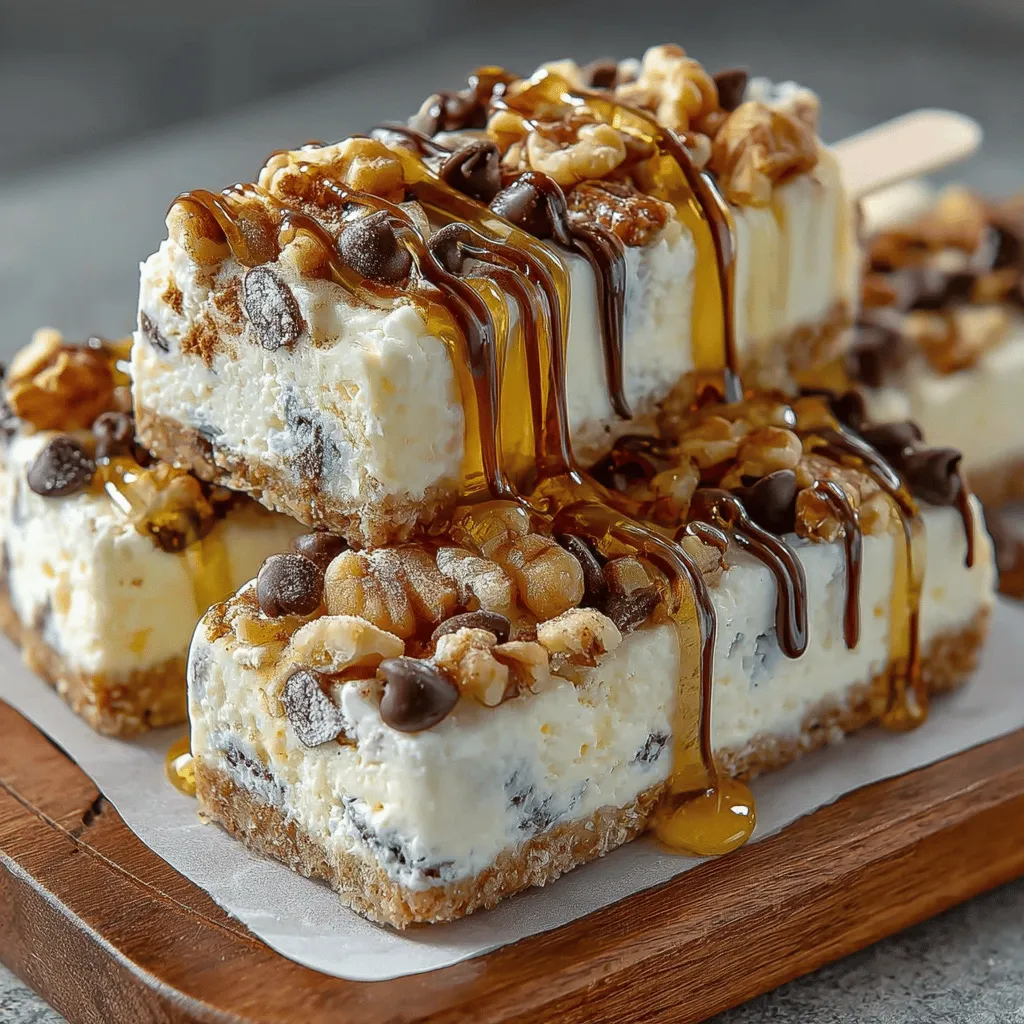
For an extra touch, serve your Banana Walnut Bliss Frozen Yogurt Bars with fresh fruit like berries or sliced bananas. A sprinkle of additional chopped walnuts or a drizzle of honey can enhance the flavor and presentation.
Creative Ways to Enjoy the Bars Beyond the Traditional Serving
For a fun twist, consider blending the bars into a smoothie or using them as a topping for oatmeal or yogurt bowls. They can also be crumbled over a salad for a unique texture and flavor combination.
Conclusion
Banana Walnut Bliss Frozen Yogurt Bars are a fantastic way to indulge in a sweet treat that is both delicious and nutritious. With simple, wholesome ingredients, this recipe not only satisfies your sweet tooth but also provides health benefits that make it a guilt-free choice. Whether enjoyed on a hot summer day or as a quick snack, these bars are sure to become a favorite in your household. By following the detailed steps outlined above, you can easily create these delightful treats that everyone will love. Treat yourself and your family to a refreshing dessert that’s easy to make and packed with flavor, ensuring that your banana walnut bliss experience is nothing short of delightful.