Introduction
There’s a certain magic that comes from baking bread at home. The aroma wafting through your kitchen, the anticipation as it rises, and the satisfaction of pulling a golden loaf from the oven can make anyone feel like a culinary wizard. Among the many types of bread, buttery garlic herb rolls hold a special place in the hearts of many. These rolls are not just a side dish; they are a comforting addition to any meal, perfect for family dinners, holiday gatherings, or even as a delightful snack enjoyed on their own.
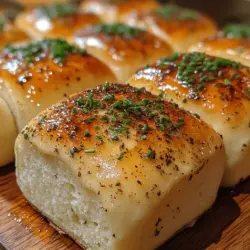
Imagine sinking your teeth into a warm, soft roll, its buttery exterior giving way to a flavorful, herb-infused interior. The combination of garlic, fresh herbs, and rich butter creates a taste experience that is both simple and extraordinary. Whether served alongside a hearty soup, as a complement to a roast, or just with a smear of butter, these rolls elevate any dining occasion. Plus, their versatility means they can be dressed up with herbs and spices or kept classic and straightforward.
As we delve into this homemade buttery garlic herb rolls recipe, you’ll discover not only how easy it is to create these delightful rolls but also the joy they bring to your dinner table. Let’s explore the essential ingredients that make these rolls so special and the steps involved in crafting your very own batch.
Understanding the Ingredients
To create the perfect buttery garlic herb rolls, let’s begin by breaking down the key ingredients and their roles in achieving that irresistible flavor and texture.
All-Purpose Flour
The backbone of any bread recipe is all-purpose flour. It provides the necessary structure for the rolls, allowing them to rise and develop that sought-after fluffy texture. The gluten proteins in the flour are activated when mixed with water and kneaded, which gives the rolls their chewiness.
Instant Yeast
Instant yeast is a game changer in the world of bread baking. Unlike active dry yeast, instant yeast doesn’t require proofing; it can be mixed directly with the dry ingredients. It works quickly, ensuring a quicker rise and less waiting time, which is fantastic for those who are eager to enjoy fresh rolls.
Sugar
Sugar plays a dual role in this recipe. Not only does it enhance the flavor of the rolls, giving them a hint of sweetness, but it also aids in browning. This means that when your rolls bake, they will develop a beautiful golden crust that’s visually appealing. Additionally, sugar serves as food for the yeast, helping it to thrive and produce carbon dioxide, which makes the dough rise.
Salt
While it might seem like a simple ingredient, salt is crucial in bread making. It enhances the overall flavor of the rolls and strengthens the gluten structure. This results in a chewier texture and prevents the dough from becoming too elastic, ensuring that your rolls have the right amount of fluffiness without being tough.
Warm Milk
Warm milk adds moisture and richness to the dough. It helps to hydrate the flour and activates the yeast, enabling it to do its job effectively. The warmth of the milk is essential; if it’s too hot, it can kill the yeast, and if it’s too cold, the yeast won’t activate properly.
Unsalted Butter
Butter is the secret ingredient that takes these rolls from good to extraordinary. It contributes flavor and tenderness, ensuring that the rolls are soft and buttery. Using unsalted butter allows you to control the salt level in the recipe, which is especially important since we are already adding salt separately.
Garlic and Herbs
Garlic and fresh herbs are what truly elevate these rolls. The garlic provides a savory punch, while the herbs add a layer of freshness and complexity. You can use a variety of herbs, such as rosemary, thyme, or parsley, depending on your preference. Fresh herbs tend to offer a more vibrant flavor compared to dried herbs, making them a fantastic choice for this recipe.
Step-by-Step Guide to Making Buttery Garlic Herb Rolls
Now that we’ve covered the ingredients, it’s time to get our hands doughy and start making these delicious rolls. Follow this step-by-step guide to ensure your buttery garlic herb rolls turn out perfectly every time.
Preparing the Dough
The first step in creating your rolls is preparing the dough. Start by combining the warm milk and instant yeast in a mixing bowl. It’s important to ensure that the milk is at the right temperature—ideally between 100°F and 110°F. If you don’t have a thermometer, you can test it by feeling it; it should feel warm but not hot to the touch.
Once the yeast is combined with the warm milk, let it sit for about 5 minutes. You should see some bubbles forming on the surface, which indicates that the yeast is activated and ready to go.
Mixing and Kneading
After the yeast has been activated, it’s time to mix in the dry ingredients. In a large mixing bowl, combine the all-purpose flour, sugar, and salt. Mix these ingredients together to ensure even distribution. Then, pour the activated yeast mixture into the bowl.
Using a wooden spoon or your hands, begin to mix the ingredients until they come together to form a rough dough. Once combined, transfer the dough to a floured surface. This is where the fun begins: kneading!
Kneading is essential for developing gluten, which gives the dough its structure and texture. To knead, fold the dough over itself and push it down with the heel of your hand. Rotate the dough a quarter turn and repeat. Knead for about 8-10 minutes until the dough is smooth and elastic. You’ll know it’s ready when it springs back when poked and feels slightly tacky but not sticky.
First Rise: Creating the Perfect Environment
After kneading, it’s time for the dough to rise. This step is crucial, as it allows the yeast to work its magic, producing carbon dioxide that will make your rolls light and fluffy. To create the perfect environment for rising, place the dough in a lightly greased bowl and cover it with a clean kitchen towel or plastic wrap.
Find a warm spot in your kitchen, away from drafts. An oven that’s turned off but has the light on is a great option, or you can place the bowl near a sunny window. Let the dough rise for about 1 to 1.5 hours, or until it has doubled in size.
During this time, you can prepare your garlic and herb mixture, which will be brushed on the rolls once they are shaped and ready for baking. This mixture will add an extra layer of flavor, ensuring that every bite is bursting with deliciousness.
—
Stay tuned for the next part of the article, where we will continue with shaping the dough, the second rise, and, of course, the baking process that will result in perfectly golden buttery garlic herb rolls!
Shaping the Rolls
Once your dough has risen and doubled in size, it’s time to shape it into rolls. This step is crucial for creating the perfect buttery garlic herb rolls. Start by lightly flouring your work surface to prevent sticking. Gently punch down the dough to release the air and divide it into equal pieces. For uniformity, use a bench scraper or knife to cut the dough into sections, aiming for about 12 to 16 pieces, depending on your preferred roll size.
To shape the rolls, take one piece of dough and tuck the edges under to create a smooth top. This technique helps to form a taut surface that will rise beautifully in the oven. Roll each piece in your hands to create a ball, ensuring that the size is consistent across all rolls. This uniformity is vital as it ensures even baking—some rolls won’t end up undercooked while others are overdone.
Once shaped, place the rolls on a parchment-lined baking sheet or in a greased baking dish, making sure to leave enough space between them, as they will expand during the second rise.
Second Rise: The Key to Fluffy Rolls
The second rise, also known as proofing, is an essential step in achieving fluffy, airy rolls. After shaping your rolls, they should rest for about 30 to 45 minutes. This allows the gluten to relax and the yeast to activate once more, resulting in a lighter texture.
To effectively cover and protect the rolls during this time, loosely drape a clean kitchen towel over the pan. This helps retain moisture while preventing drafts, which can lead to uneven rising. If your kitchen is particularly cool, consider placing the rolls in an oven that has been turned off but still warm or in a sunny spot.
During this rise, keep an eye on the rolls. They should puff up and nearly double in size, ready to be baked to perfection.
Preparing the Garlic Herb Butter
Now, let’s move on to the star of the show: the garlic herb butter. This flavorful mixture elevates the rolls from simple bread to a delightful indulgence. Begin by melting 1/2 cup of unsalted butter in a small saucepan over low heat.
Once melted, add 3 to 4 cloves of minced garlic to the butter. It’s important to cook the garlic just until fragrant—this usually takes about 1 to 2 minutes. Be cautious not to let it brown, as burnt garlic can impart a bitter taste to your butter.
After removing the pan from the heat, add fresh herbs of your choice. A combination of chopped parsley, rosemary, and thyme works beautifully, but feel free to get creative. You can add grated Parmesan cheese for a cheesy twist or even a sprinkle of red pepper flakes for a hint of heat. Mix everything thoroughly to create a fragrant and flavorful butter that will be brushed onto the rolls before and after baking.
Baking the Rolls
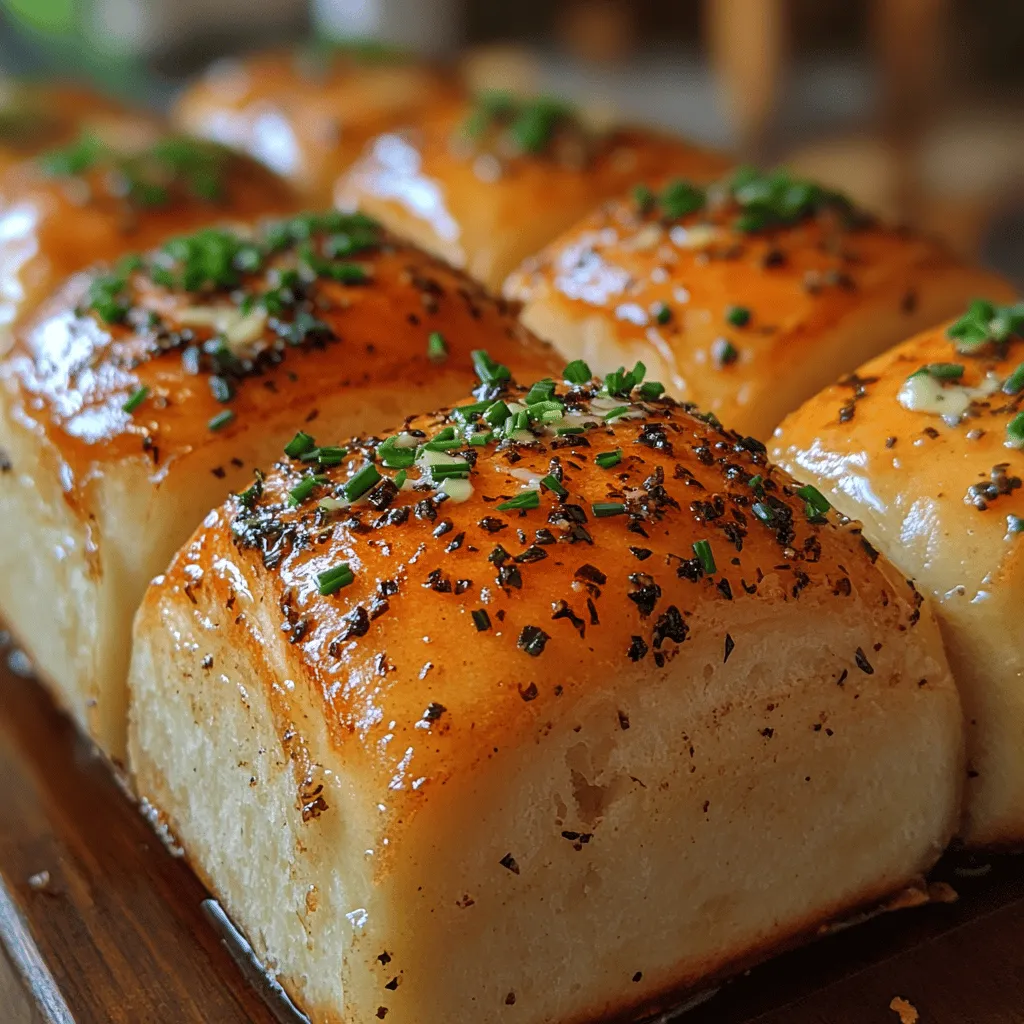
Before baking your rolls, preheat your oven to 375°F (190°C). A well-preheated oven is crucial for achieving that perfect golden crust. As the rolls rise, brush them generously with a portion of the garlic herb butter mixture. This not only adds flavor but also helps in developing a beautiful, glossy finish as they bake.
Keep an eye on the rolls while they are in the oven. They should bake for about 15 to 20 minutes, or until they are golden brown on top. A good visual cue is to look for a deep golden color; this indicates that the rolls are cooked through. You can also tap the bottom of a roll—if it sounds hollow, that’s a sign they’re done.
Once out of the oven, don’t forget to brush the hot rolls with the remaining garlic herb butter. This final touch enhances the flavor and ensures they remain moist. The aroma will be irresistible, and your kitchen will smell like a bakery.
Serving Suggestions and Pairings
These buttery garlic herb rolls are best served warm, as they are at their most flavorful and soft. Consider presenting them in a basket lined with a cloth for a rustic touch. They pair wonderfully with a variety of dishes, making them a versatile addition to any meal.
For a comforting dinner, serve these rolls alongside a hearty bowl of soup, such as a creamy tomato basil or a savory chicken noodle. They also complement fresh salads, providing a delightful contrast to crisp greens—try them with a Caesar or a Mediterranean salad.
If you have any leftovers (though that’s rare!), get creative. You can slice the rolls and toast them with some extra garlic herb butter to make delicious garlic bread. Alternatively, chop them into cubes and bake them lightly to create croutons that can add a delightful crunch to salads or soups.
Nutritional Information
While these buttery garlic herb rolls are a treat, it’s also important to be mindful of their nutritional content. Each roll contains approximately 150 calories, with about 7 grams of fat, 20 grams of carbohydrates, and 3 grams of protein. This indulgent recipe straddles the line between comfort food and moderation, so enjoy them as part of a balanced meal.
Pair these rolls with healthy sides like steamed vegetables or a fresh salad to create a well-rounded dining experience. Remember, it’s all about balance—savoring the delightful taste of homemade rolls while maintaining a nutritious diet.
Conclusion
Making your own buttery garlic herb rolls is a rewarding experience that fills your home with warmth and delicious aromas. The process of combining ingredients, shaping the dough, and baking brings families together, creating lasting memories around the dinner table.
As you try this recipe, take pride in the fact that you are crafting something special from scratch. The joy of sharing warm, homemade rolls with loved ones is unparalleled, and the satisfaction of pulling them from the oven, golden and fragrant, is truly a moment to cherish.
We encourage you to experiment with variations, whether that’s adding new herbs or incorporating flavors that resonate with your family. Baking is as much about tradition as it is about creativity. So gather your ingredients, roll up your sleeves, and experience the joy of baking these buttery garlic herb rolls at home. Your family—and your taste buds—will thank you.