Frozen Banana Split Bars Recipe
When it comes to frozen desserts, few treats can rival the delightful experience of a banana split. Now, imagine that classic sundae transformed into an easy-to-make frozen bar. Enter the Frozen Banana Split Bars—a delicious blend of creamy, fruity, and chocolatey goodness. This recipe not only captures the essence of the beloved banana split but also offers a healthier twist, making it an appealing option for dessert lovers of all ages.
Frozen desserts hold a special place in our hearts, especially during warmer months. They offer a refreshing escape from the heat while often being lighter and healthier than traditional ice cream. The beauty of Frozen Banana Split Bars lies in their versatility; you can easily adapt the recipe to suit your dietary preferences or ingredient availability. With wholesome ingredients like ripe bananas, Greek yogurt, and natural sweeteners, these bars are not just a treat for your taste buds but also a nourishing snack that you can enjoy guilt-free.
The Benefits of Ingredients
Before diving into the preparation of these delightful bars, it’s essential to understand the nutritional benefits of the ingredients involved. Each component contributes to both the flavor and health profile of the recipe.
Ripe Bananas
At the heart of the Frozen Banana Split Bars is the ripe banana, a fruit that offers more than just natural sweetness. Bananas are rich in potassium, which supports heart health and helps regulate blood pressure. They also contain vitamin C, vitamin B6, and dietary fiber, making them an excellent choice for a nutritious dessert base. The natural sugars in ripe bananas provide a perfect sweetness that eliminates the need for excessive added sugars, making them a staple in many healthy dessert recipes.
Greek Yogurt
Greek yogurt is another star ingredient in this recipe, adding a creamy texture and a nutritional punch. It is packed with protein, which helps keep you feeling full and satisfied. Additionally, Greek yogurt contains probiotics that are beneficial for gut health. Its tangy flavor balances the sweetness of the bananas and enhances the overall taste profile of the bars, making them rich and indulgent without being overly heavy.
Honey vs. Maple Syrup
For natural sweetening, you have the option to use either honey or maple syrup. Both are excellent alternatives to refined sugars, each bringing its unique flavor to the table. Honey offers a floral sweetness and is known for its antibacterial properties, while maple syrup provides a distinct caramel-like flavor with a wealth of antioxidants. Choosing between the two can depend on personal preference or dietary restrictions, as honey is not vegan, whereas maple syrup is.
Cocoa Powder
To give these bars a decadent touch, cocoa powder is included, providing not only a rich chocolate flavor but also numerous health benefits. Cocoa powder is loaded with antioxidants, which can help combat oxidative stress in the body. It also has mood-enhancing properties, making it a delightful addition that elevates the overall enjoyment of the dessert. The combination of cocoa with the other ingredients creates a balanced flavor profile that is both satisfying and indulgent.
Nuts and Fruits
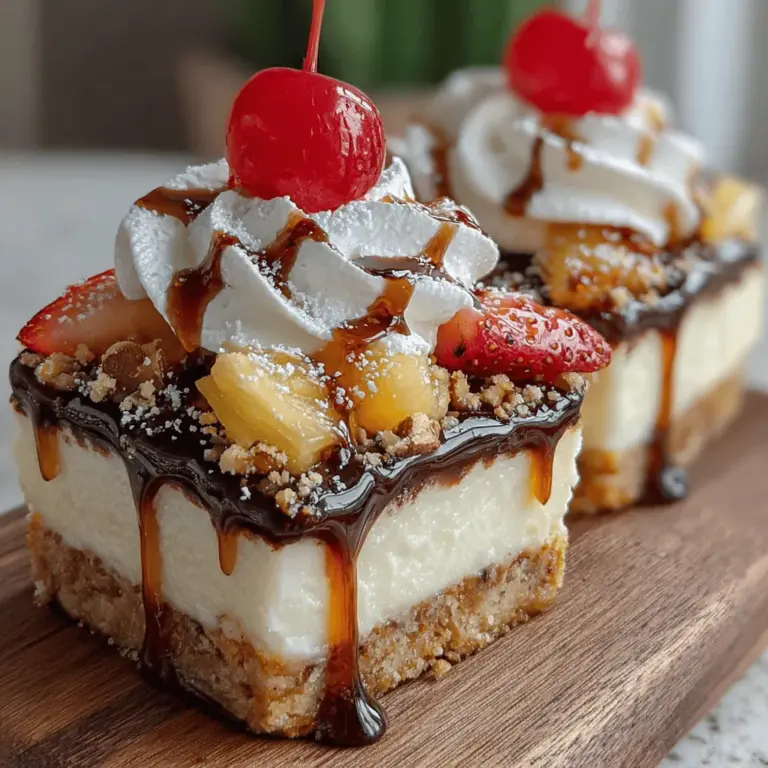
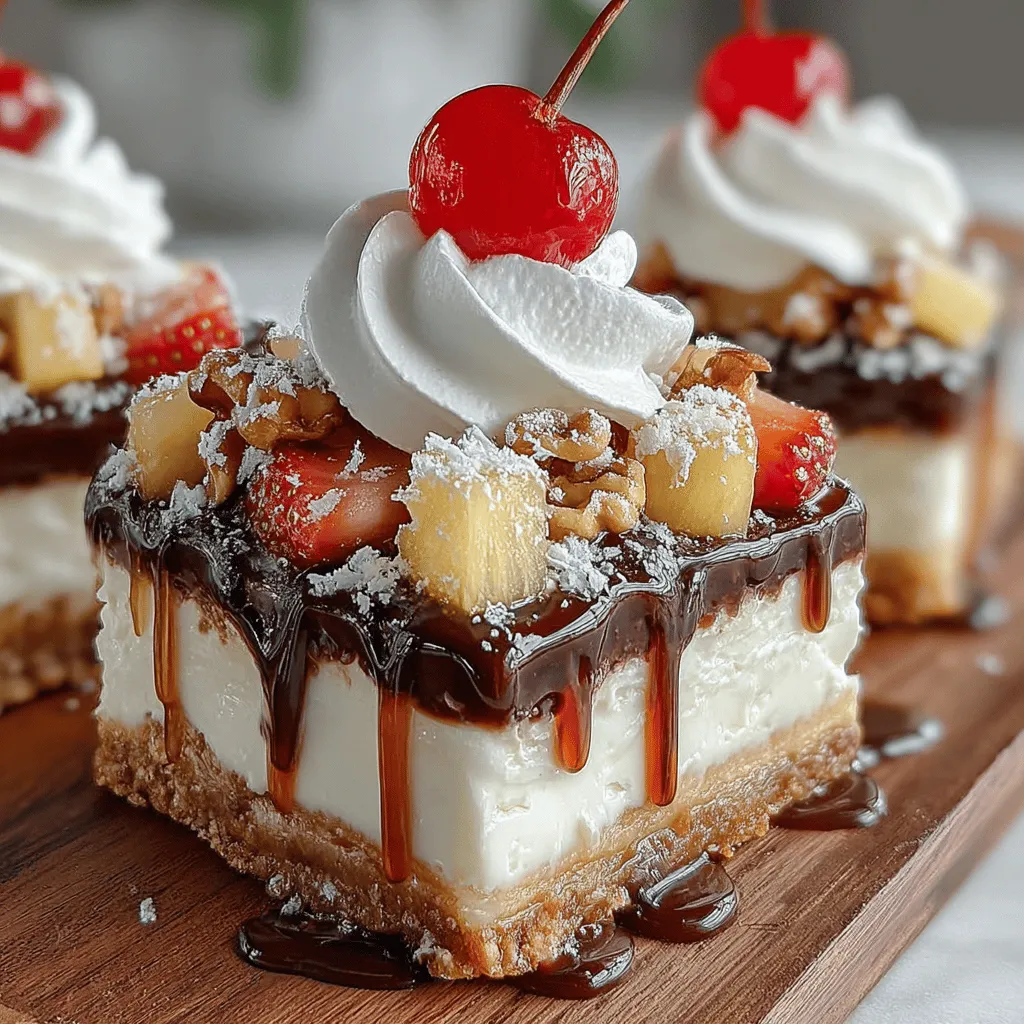
Lastly, the addition of nuts and other fruits can enhance the texture and nutritional value of the Frozen Banana Split Bars. Nuts like walnuts or almonds add a satisfying crunch, healthy fats, and protein, while fruits such as strawberries or pineapple can elevate the flavor and add a refreshing burst of juiciness. These elements not only contribute to the overall taste but also make the bars visually appealing, resembling a traditional banana split.
Step-by-Step Instructions for Frozen Banana Split Bars
Now that we understand the benefits of the ingredients, it’s time to roll up your sleeves and get started on preparing these delightful Frozen Banana Split Bars. The key to success here lies in preparation and organization, as you will be layering different components to achieve the perfect balance of flavors and textures.
Preparing the Base
To create the base of your Frozen Banana Split Bars, first gather your ripe bananas, Greek yogurt, honey (or maple syrup), and vanilla extract. Begin by peeling and slicing the bananas, placing them into a mixing bowl. Using a fork or a potato masher, mash the bananas until they reach a smooth consistency. Next, add in the Greek yogurt, honey (or maple syrup), and vanilla extract. Mix thoroughly until all ingredients are well combined. The resulting mixture should be creamy and sweet, forming a perfect foundation for your bars.
Creating the Chocolate Layer
Once the banana base is ready, it’s time to incorporate the chocolate flavor. In a separate bowl, combine cocoa powder with a small amount of the banana mixture, stirring until smooth. This step is crucial as it allows the cocoa to blend seamlessly into the base, preventing clumps and ensuring an even distribution of chocolate flavor throughout the bars. The rich chocolate layer will add depth to the overall flavor, making each bite a delightful experience.
Assembling the Bars
With both the banana base and chocolate layer prepared, you’re ready to assemble your bars. Start by lining a baking dish with parchment paper for easy removal later. Pour half of the banana mixture into the prepared dish, spreading it evenly. Then, carefully spoon the chocolate layer over the banana base, ensuring that it covers the entire surface. Finally, top it off with the remaining banana mixture, smoothing it out to create a uniform layer. This layering technique not only enhances the presentation but also ensures that each bite is filled with a blend of flavors.
Mixing in Fruity Goodness
To capture the traditional banana split essence, it’s essential to incorporate fruity elements into your bars. Consider adding chopped strawberries, diced pineapples, or even crushed nuts on top of the final banana layer. Gently press the fruit pieces into the mixture to ensure they adhere well as the bars freeze. This step not only enhances the taste and texture but also adds a pop of color to your dessert, making it visually appealing and exciting to enjoy.
Finishing Touches
For the final touch, sprinkle mini chocolate chips over the top of the bars before placing them in the freezer. This addition provides a delightful crunch and an extra hint of chocolate in each bite. If you want to go the extra mile, drizzle some chocolate syrup or a handful of crushed nuts over the top. These finishing touches will elevate your Frozen Banana Split Bars from simple to sensational, making them irresistible.
As you prepare to freeze your assembled bars, be sure to cover them well with cling film or additional parchment paper to prevent freezer burn. Allow the bars to freeze for several hours or until firm. Once set, you’ll have a delicious treat ready to be sliced and served.
Stay tuned for the next part of this article, where we will delve into the serving suggestions, storage tips, and additional variations to customize your Frozen Banana Split Bars even further. Enjoy the delightful process of creating this healthy yet indulgent dessert that the whole family will love!
Freezing Process
The freezing stage is crucial for achieving the perfect texture of your Frozen Banana Split Bars. After preparing your mixture of bananas, yogurt, and toppings, it is essential to allow sufficient time for the bars to freeze completely. Aim for at least 4-6 hours of freezing time; this duration ensures that the bars set properly and attain a firm yet creamy consistency. If you try to cut them too soon, the bars may be mushy and difficult to handle, leading to a less enjoyable eating experience.
To enhance the freezing process, ensure that your bars are placed in a flat, even layer. This distribution allows for uniform freezing, preventing any soft spots from forming. Once frozen, you can leave the bars in the freezer for up to two weeks, although they are best enjoyed within a week for optimal freshness.
Serving Suggestions
The beauty of Frozen Banana Split Bars lies not only in their flavor but also in their versatility. Here are some creative serving suggestions to elevate your dessert experience:
1. Layering with Toppings: Once set, slice the bars and drizzle them with homemade chocolate or caramel sauce. Add a sprinkle of chopped nuts, shredded coconut, or crushed graham crackers for added texture and flavor.
2. Fruit Garnish: Serve the bars with a side of fresh fruit, such as sliced strawberries, blueberries, or a dollop of whipped cream. This not only enhances the presentation but also adds a refreshing touch to each bite.
3. Create a Dessert Platter: For gatherings, arrange the bars on a platter alongside an array of toppings. Include options like mini chocolate chips, crushed Oreos, or sprinkles, allowing guests to customize their dessert experience.
4. Pair with Ice Cream: For an extra indulgent treat, serve a slice of the Frozen Banana Split Bar alongside a scoop of your favorite ice cream. The combination of creamy textures will delight any ice cream lover.
Nutritional Information
Understanding the nutritional profile of Frozen Banana Split Bars can help you make mindful choices. Here’s a breakdown of key nutrients per serving:
– Calories: Approximately 150 calories per serving (compared to traditional banana splits that can range from 300-500 calories).
– Sugar: Contains about 10 grams of natural sugars primarily from bananas and yogurt (a significant reduction from the 40+ grams found in many traditional recipes).
Portion Control and Healthier Dessert Options
Portion control is vital when enjoying desserts, especially if you’re conscious of calorie intake. With Frozen Banana Split Bars, you can easily manage portions, as they can be cut into smaller squares, allowing for a guilt-free indulgence. Additionally, by using yogurt as a base, you are providing your body with beneficial probiotics, making this dessert not just delicious but also a healthier alternative to traditional ice cream desserts.
Variations and Customizations
The flexibility of Frozen Banana Split Bars makes them a perfect canvas for your creativity. Here are some delightful variations and customizations to consider:
– Alternative Fruits: While bananas are a classic choice, feel free to experiment with other fruits. Berries such as strawberries, raspberries, or blueberries offer vibrant colors and flavors. Tropical options like mangoes or peaches can add a refreshing twist.
– Dairy-Free or Vegan Substitutions: For those following a dairy-free or vegan lifestyle, substitute regular yogurt with coconut or almond-based yogurts. They provide the same creaminess without the dairy, making it easier for everyone to enjoy this dessert.
– Flavor Alternatives: Enhance the flavor profile by using flavored yogurts—such as vanilla, strawberry, or lemon. You can also introduce spices like cinnamon or nutmeg to the banana mixture for a unique touch.
Storing and Freezing Tips
To ensure that your Frozen Banana Split Bars maintain their deliciousness and texture over time, consider the following best practices for storing and freezing:
– Storing Leftovers: If you have leftovers, wrap the bars individually in plastic wrap or store them in an airtight container. This prevents freezer burn and keeps them fresh. Properly stored, they can last up to two weeks in the freezer.
– Maintaining Texture and Flavor: To preserve the integrity of your bars, avoid stacking them directly on top of one another unless they are separated by parchment paper. This will help maintain their shape and prevent them from sticking together.
– Serving After Freezing: To serve, remove the bars from the freezer and let them thaw for a few minutes at room temperature before cutting. This will make them easier to slice without crumbling. Use a warm knife to cut through the bars smoothly.
Conclusion
In summary, Frozen Banana Split Bars are not only a delicious way to satisfy your sweet cravings but also offer a healthy alternative to traditional desserts. With their creamy texture, vibrant flavors, and customizable options, these bars are perfect for any occasion. The nutritional benefits, particularly the lower calorie and sugar content compared to classic banana splits, make them an appealing choice for health-conscious dessert lovers.
We encourage you to experiment with different fruits, flavors, and toppings when preparing your Frozen Banana Split Bars. The possibilities are endless, allowing you to create a personalized dessert that caters to your taste preferences. Embrace the joy of creating a guilt-free treat that everyone will love, and enjoy the delight of a homemade dessert that satisfies without compromising your health goals.
