Introduction
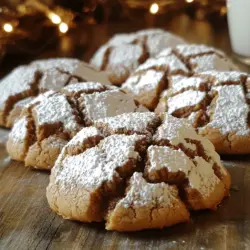
There’s something universally appealing about chocolate crinkle cookies. With their irresistible chewy texture and rich chocolate flavor, these cookies are a treat that brings joy and comfort to any occasion. Whether it’s a family gathering, a holiday celebration, or simply a cozy evening at home, the allure of homemade cookies can brighten anyone’s day. The beauty of chocolate crinkle cookies lies not only in their taste but also in their delightful appearance—a striking contrast between the deep, dark chocolate hue and the snowy white powdered sugar coating that cradles them.
As we embark on this culinary adventure, you’ll discover that making these delectable cookies is a rewarding experience that’s easier than you might think. So, let’s roll up our sleeves and dive into the world of heavenly chewy chocolate crinkle cookies!
The Allure of Chocolate Crinkle Cookies
The origins of crinkle cookies can be traced back to the classic American baking culture, where they quickly gained popularity for their unique appearance and delectable taste. Traditionally, crinkle cookies are characterized by their cracked surface, which forms during the baking process, resulting in a stunning visual that’s as pleasing to the eye as it is to the palate. The powdered sugar coating adds a touch of elegance, making them a perfect addition to any dessert table.
Chocolate lovers rave about crinkle cookies for good reason. The deep, rich chocolate flavor combined with the chewy texture creates a blissful bite that is hard to resist. Each cookie is like a little piece of heaven, offering a satisfying crunch on the outside and a soft, tender center that melts in your mouth. It’s no wonder that these cookies have become a staple in many households, often made for special occasions or simply to indulge in a sweet treat.
What truly sets chocolate crinkle cookies apart is their visual appeal. The crinkled surface, formed as the cookies bake, resembles a beautiful, snowy landscape, while the powdered sugar adds a whimsical touch. This contrast makes them a show-stopper, perfect for gift-giving or sharing with friends and family. Whether you’re a passionate baker or a novice in the kitchen, these cookies promise to impress with both their flavor and appearance.
Ingredients Breakdown
Before we jump into the baking process, let’s take a closer look at the essential ingredients that make these heavenly chewy chocolate crinkle cookies so special.
Granulated Sugar and Brown Sugar
Both granulated sugar and brown sugar are crucial to achieving the perfect balance of sweetness and moisture in your cookies. Granulated sugar not only sweetens the dough but also contributes to the cookies’ crispness on the outside. On the other hand, brown sugar, which contains molasses, adds moisture and a slight chewiness to the cookies, enhancing their overall texture. The combination of these two sugars ensures that each bite is a delightful blend of flavors and textures.
Vegetable Oil
Vegetable oil plays a pivotal role in the texture of chocolate crinkle cookies. It helps create a tender and moist crumb while allowing the cookies to spread evenly during baking. Unlike butter, which can lead to a firmer texture, oil results in a chewier cookie that retains its softness. This is particularly important for crinkle cookies, as the goal is to achieve that perfect chewy center!
Eggs
Eggs are essential for providing structure and moisture to the cookie dough. They act as a binding agent, holding the other ingredients together, while also contributing richness and flavor. The proteins in the eggs help create a stable structure, allowing the cookies to rise and retain their shape as they bake. A well-balanced number of eggs ensures that your cookies come out perfectly chewy without being overly dry or crumbly.
Vanilla Extract
Vanilla extract is a key ingredient that enhances the overall flavor of the cookies. Its warm, sweet aroma complements the rich chocolate and adds depth to each bite. Using pure vanilla extract is recommended for the most authentic flavor, but if you’re in a pinch, artificial vanilla can also work as a substitute. A splash of vanilla can elevate your cookie recipe, making it even more delightful.
Flour, Cocoa Powder, Baking Powder, Baking Soda, and Salt
The backbone of any cookie recipe lies in its dry ingredients. All-purpose flour provides the structure necessary for the cookies, while cocoa powder adds the rich chocolate flavor that crinkle cookies are known for. Baking powder and baking soda are crucial for leavening, helping the cookies rise and achieve that characteristic crinkled appearance. Finally, a pinch of salt enhances the overall flavor, balancing the sweetness and bringing out the best in chocolate.
Semi-Sweet Chocolate Chips
Adding semi-sweet chocolate chips is a fantastic way to intensify the chocolate flavor in your crinkle cookies. As they bake, the chips melt slightly, creating pockets of gooey chocolate in every bite. The contrast between the chewy cookie and the melty chocolate chips creates a delicious experience that chocolate lovers will adore. Feel free to experiment with different types of chocolate chips, such as dark or milk chocolate, to suit your personal taste.
Powdered Sugar
The final touch for chocolate crinkle cookies is the powdered sugar coating. Not only does it create the signature crinkled appearance, but it also adds a delightful sweetness that complements the rich chocolate flavor. The powdered sugar forms a light crust as the cookies bake, making each cookie look like a little snow-capped treat. This visual appeal is part of what makes these cookies so irresistible.
Step-by-Step Guide to Making Heavenly Chewy Chocolate Crinkle Cookies
Preparing the Dough
The first step in creating your heavenly chewy chocolate crinkle cookies is preparing the dough. This stage is critical, as it sets the foundation for the texture and flavor of the finished cookies. Begin by combining the wet ingredients—vegetable oil, granulated sugar, brown sugar, and eggs—in a large mixing bowl. Use a whisk or an electric mixer to blend these ingredients until they are well combined and smooth. The mixture should be light in color and slightly fluffy, indicating that air has been incorporated, which will help the cookies rise.
When mixing, be sure to scrape down the sides of the bowl to ensure all ingredients are evenly incorporated. This step may seem small, but it’s essential for achieving a consistent dough. After the wet ingredients are combined, add the vanilla extract and mix until just blended. This will ensure that the vanilla is evenly distributed throughout the dough, enhancing the overall flavor of your cookies.
Incorporating Dry Ingredients
Once your wet ingredients are perfectly combined, it’s time to incorporate the dry ingredients. In a separate bowl, whisk together the all-purpose flour, cocoa powder, baking powder, baking soda, and salt. Whisking these dry ingredients separately is crucial, as it ensures that the baking powder and baking soda are evenly distributed, preventing any uneven rising during baking.
After whisking, gradually add the dry mixture to the wet ingredients. It’s important to combine them gently to avoid overmixing, which can lead to tough cookies. Use a spatula or wooden spoon, folding the dry ingredients into the wet until just combined. The dough should be slightly thick and glossy, with no visible flour remaining.
Lastly, fold in the semi-sweet chocolate chips, ensuring they are evenly distributed throughout the dough. This step adds bursts of chocolatey goodness that will melt beautifully during baking, creating a delightful contrast in texture.
As you prepare to bake, remember that the dough should be chilled for at least an hour. This chilling step is vital—it allows the flavors to develop and helps prevent the cookies from spreading too much during baking, resulting in that perfect crinkled appearance.
With your dough prepared and chilled, you’ll be one step closer to enjoying delicious heavenly chewy chocolate crinkle cookies. Stay tuned for the next part, where we’ll cover the baking process, tips for achieving the ideal texture, and how to store these delightful treats!
Adding Chocolate Chips
Once you’ve prepared your cookie batter, it’s time for the pièce de résistance: the chocolate chips. Gently fold in 1 cup of semi-sweet or dark chocolate chips using a rubber spatula. This method helps ensure that the chocolate is evenly distributed throughout the dough without overmixing, which can lead to tougher cookies. The goal is to maintain the light, airy texture of the batter while ensuring each cookie is filled with delightful chocolatey goodness.
Chilling the Dough
Chilling the dough is a crucial step in the cookie-making process. When you chill the dough for at least 30 minutes (or up to overnight), it allows the flavors to meld together beautifully, enhancing the overall taste of your cookies. Additionally, chilling the dough helps solidify the fats, which leads to a thicker, chewier cookie structure. If you skip this step, the cookies may spread too much in the oven, resulting in thin, crispy edges instead of the desired chewy center.
Preheating the Oven
Prior to baking, preheat your oven to 350°F (175°C). This is an essential step because baking at the correct temperature is key to achieving the right texture and consistency. An oven that is too hot can cause the cookies to cook unevenly, leading to a burnt exterior and an undercooked center. Conversely, if your oven is not hot enough, the cookies may take longer to bake and will likely lose their defined shape. An oven thermometer can be a great investment to ensure your oven is calibrated correctly.
Forming the Cookies
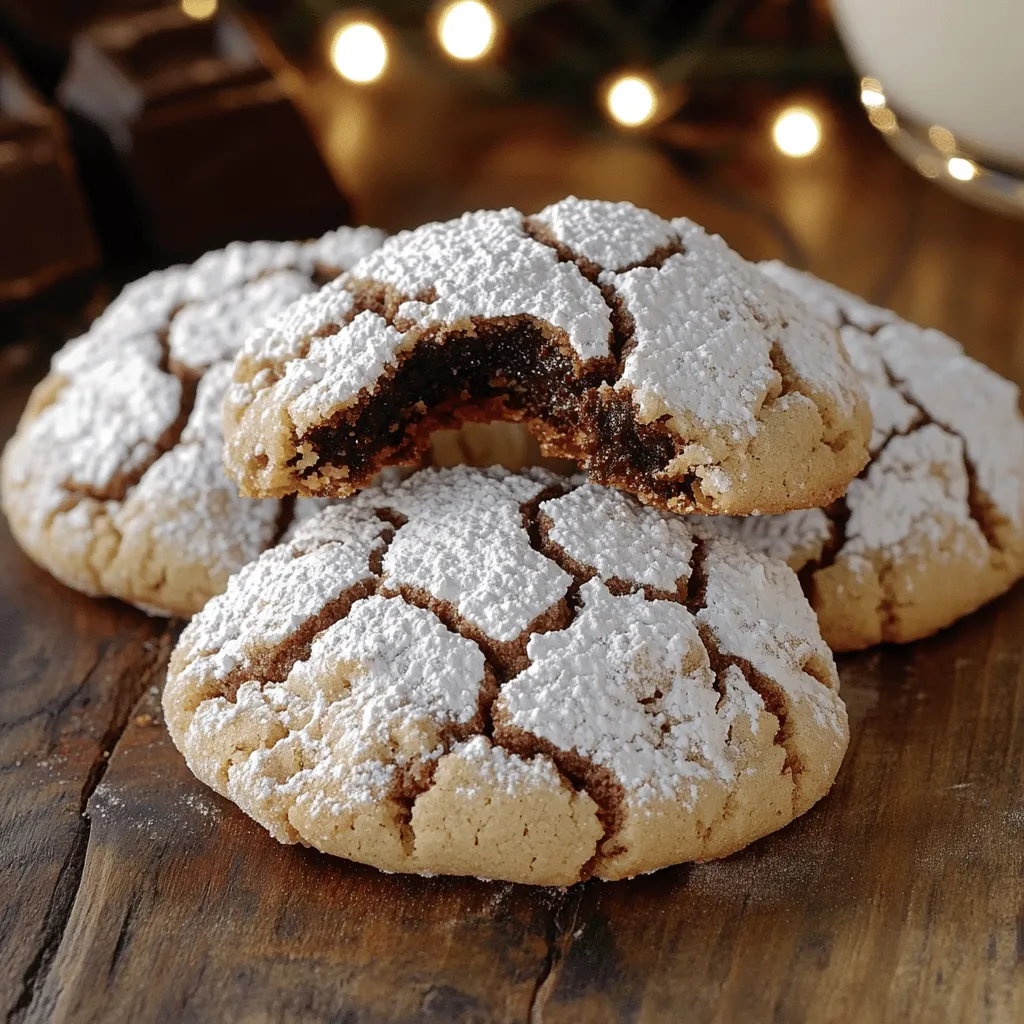
Now that your dough is chilled, it’s time to form the cookies. Scoop about 2 tablespoons of dough for each cookie and roll them into a ball. To achieve uniform size, you might consider using a cookie scoop, which can help you portion out the dough consistently. Once you have shaped the dough balls, roll each one generously in powdered sugar to coat. This not only gives the cookies their signature crinkle appearance but also adds an extra touch of sweetness that complements the rich chocolate flavor. Make sure to coat them well; a heavy dusting will create a striking contrast against the dark cookie once baked.
Baking the Cookies
Place the coated dough balls on a parchment-lined baking sheet, spacing them about 2 inches apart to allow for spreading. Bake in your preheated oven for 10 to 12 minutes. Keep a close eye on them; the cookies should look slightly underbaked in the center when you pull them out of the oven. They will continue to cook on the baking sheet even after being removed from the oven. Overbaking can lead to a loss of that signature chewiness, so it’s better to err on the side of slightly underbaked.
Cooling the Cookies
After removing the cookies from the oven, let them cool on the baking sheet for about 5 minutes. This allows them to set and makes them easier to transfer without falling apart. After that, move them to a wire rack to cool completely. Cooling the cookies properly is crucial for achieving the perfect texture; it allows the cookies to firm up while still retaining their soft, chewy centers.
Serving Suggestions
These Heavenly Chewy Chocolate Crinkle Cookies are delightful on their own, but there are numerous ways to enhance your cookie-eating experience. They pair wonderfully with a glass of cold milk, which complements the richness of the chocolate. For a more decadent treat, consider serving them warm with a scoop of vanilla ice cream on top, creating an indulgent dessert that is sure to impress. Alternatively, enjoy them with a cup of coffee or tea for a comforting afternoon snack.
The Science Behind Chewy Cookies
Understanding the science behind baking can elevate your cookie-making prowess. The texture of chewy cookies is primarily influenced by the balance of ingredients. Sugar, particularly brown sugar, retains moisture, contributing to the chewy texture. Fat, usually in the form of butter, plays a significant role in moisture retention as well. When mixed with flour, the fat coats the flour proteins, limiting gluten formation, which results in a softer cookie.
Chilling the dough also plays a vital role in the chemistry of baking. It slows down the spreading of the cookies, allowing them to maintain their shape and develop a chewy interior. During baking, the sugars caramelize, enhancing flavor, while the proteins in the flour coagulate, allowing the cookies to rise while still keeping their tender texture.
Variations and Customizations
One of the best aspects of baking cookies is the ability to customize them to your taste. Consider adding a cup of chopped walnuts or pecans for a delightful crunch that offsets the softness of the cookie. If you want to switch things up, try using white chocolate chips or even a mix of dark and milk chocolate for a more complex flavor profile.
For those looking for a unique twist, incorporating flavors such as peppermint extract or orange zest can give your cookies a refreshing kick. If you’re catering to dietary restrictions, you can easily modify this recipe for gluten-free or vegan versions. Substitute all-purpose flour with a gluten-free flour blend and replace the eggs with flaxseed meal or a commercial egg replacer. For a vegan option, use plant-based butter and dairy-free chocolate chips.
Conclusion
Baking Heavenly Chewy Chocolate Crinkle Cookies is not just about creating a delicious treat; it’s also a rewarding experience that brings joy to both the baker and those who indulge in the finished product. With their captivating appearance, fudgy centers, and rich chocolate flavor, these cookies are sure to become a favorite in your household. Whether enjoyed on their own, paired with a favorite beverage, or served as part of a dessert spread, they encapsulate the delight of homemade baking. So gather your ingredients, follow the steps, and prepare to enjoy the heavenly satisfaction of these chewy cookies that are sure to impress and satisfy.