Introduction: The Allure of Chocolate Chip Cookies
There’s a reason why chocolate chip cookies hold a special place in hearts and homes around the world. These delightful treats have a rich history that dates back to the 1930s when Ruth Wakefield, the owner of the Toll House Inn in Massachusetts, created the first batch by mixing semi-sweet chocolate into her butter cookie dough. Little did she know that she would accidentally spark a worldwide phenomenon. Today, chocolate chip cookies are synonymous with comfort, nostalgia, and the joy of baking.
The universal appeal of homemade cookies lies in their warm, gooey texture and the captivating aroma that fills the air as they bake. Whether enjoyed fresh out of the oven or stored for later, each bite brings a sense of satisfaction that only homemade treats can offer. Unlike store-bought varieties, homemade chocolate chip cookies allow bakers to customize flavors, textures, and sweetness levels, ensuring that every batch can be uniquely tailored to personal preferences.
However, the secret to achieving that perfect cookie lies in the quality of ingredients and the techniques employed during preparation. From the type of flour used to the choice of chocolate, each component plays a crucial role in defining the cookie’s final outcome. It’s essential to understand how to select and combine these ingredients to create a cookie that is not only delicious but also has the ideal texture and appearance.
Understanding the Ingredients
Flour: Choosing the Right Type for Texture
The foundation of any cookie recipe is the flour. For chocolate chip cookies, all-purpose flour is typically the go-to choice due to its balanced protein content, which provides the ideal structure and chewiness. However, there are variations to consider. For a softer, more tender cookie, some bakers opt for cake flour, which contains less protein. Mixing both all-purpose and cake flour can also yield delightful results, creating a cookie with a tender crumb while still retaining some chewiness.
Sugars: The Role of Brown Sugar vs. Granulated Sugar
When it comes to sugar, the type you choose can significantly affect the flavor and texture of your cookies. Brown sugar, which contains molasses, adds moisture and a rich, caramel-like flavor, resulting in a chewier cookie. In contrast, granulated sugar contributes to a crispier texture and a lighter color. Many recipes call for a combination of both sugars to achieve the perfect balance of chewiness and crispness.
When experimenting with sugar ratios, it’s important to remember that brown sugar can also lead to a denser cookie due to its moisture content. Adjusting the amount of each sugar may require some trial and error, but the rewards are well worth the effort.
Butter: Why Unsalted is the Way to Go
Butter is another critical ingredient that impacts both flavor and texture. For chocolate chip cookies, using unsalted butter is recommended. This allows bakers to control the amount of salt in the recipe and ensures a more consistent flavor profile. Unsalted butter also has a fresher taste, which can enhance the overall cookie experience.
Temperature matters when it comes to butter as well. Room temperature butter, which is soft but not melted, allows for better incorporation with sugars, creating a creamy texture that helps aerate the mixture. This step is crucial for achieving a light, fluffy cookie.
Eggs: The Binding Agent and Its Impact on Richness
Eggs serve as a binding agent in cookie dough, providing structure and moisture. They also contribute to the richness of the cookie. Most chocolate chip cookie recipes call for one large egg, but some may use an additional egg yolk for added richness and a softer texture. It’s important to use eggs at room temperature as this helps them blend more seamlessly into the dough, resulting in a smoother consistency.
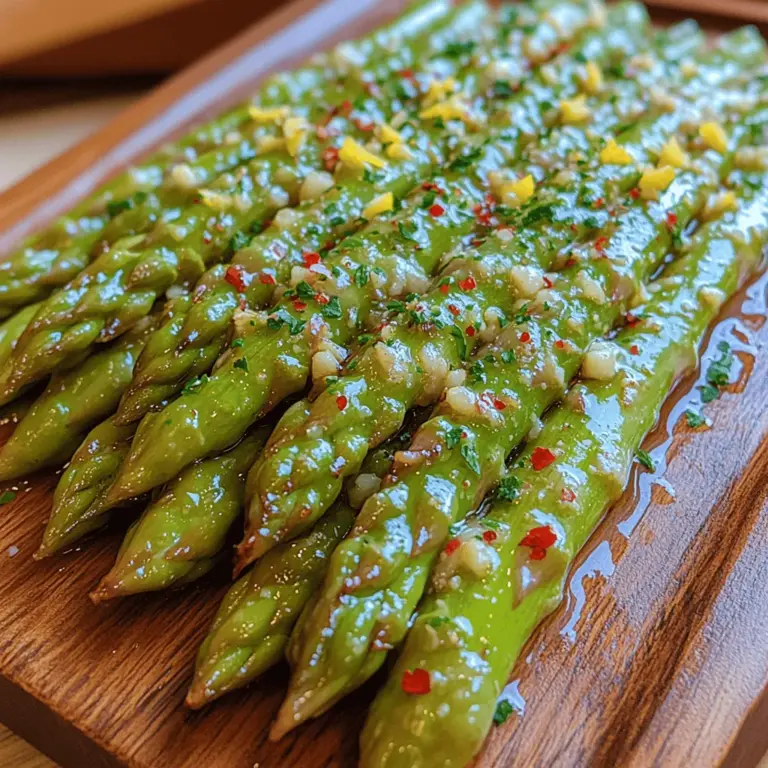
Chocolate: Selecting the Best Varieties for Flavor
The type of chocolate you choose can make or break your cookie experience. Semi-sweet chocolate chips are the classic choice, but don’t hesitate to explore other varieties like dark chocolate, milk chocolate, or even white chocolate for a different flavor profile. Baking chocolate can also be chopped into chunks for a more rustic look and intense flavor.
When selecting chocolate, look for high-quality options with a high cocoa content. This not only enhances the richness of the cookie but also complements the sweetness of the dough. For a gourmet touch, consider mixing different types of chocolate to create a complex flavor experience.
Baking Soda vs. Baking Powder: Understanding Leavening Agents
Baking soda and baking powder serve as leavening agents in cookie recipes, helping the cookies rise and achieve their desired texture. Baking soda, a base, needs an acid to activate it, often found in brown sugar or chocolate. In contrast, baking powder contains both an acid and a base and can activate with moisture and heat.
For chocolate chip cookies, baking soda is most commonly used, as it contributes to a chewy texture and helps cookies spread while baking. Be mindful of the amounts used, as too much can lead to cookies that spread excessively or have a metallic taste.
Salt: Elevating Flavors with the Right Amount
Salt is a crucial yet often overlooked ingredient in cookie recipes. It enhances the flavors of the sugars and chocolate, balancing sweetness and adding depth. A pinch of salt can elevate your cookies, making them taste more complex and satisfying. Most recipes call for a small amount, usually around half a teaspoon, but feel free to adjust based on your taste preferences.
Preparation Techniques for Perfect Cookies
The Importance of Ingredient Temperature
Before diving into the mixing and baking process, it’s important to ensure all ingredients are at the right temperature. Room temperature butter and eggs blend more easily, creating a smooth, homogenous dough. If you forget to take your butter out in advance, a quick microwave spin for a few seconds can soften it without melting.
Proper Measuring Techniques for Accuracy
Accurate measurements are key to successful baking. For dry ingredients like flour, use a spoon to fluff it up in the container before spooning it into a measuring cup. Avoid packing it down, as this can lead to excess flour and dry cookies. For sugars, scoop directly into the measuring cup and level off with a straight edge.
When measuring wet ingredients, use a clear liquid measuring cup for precision. Pour the liquid in and check the measurement at eye level to ensure accuracy. Following these measuring techniques will set the stage for perfect cookie dough consistency.
Creaming Butter and Sugar: The Science Behind It
Creaming together the butter and sugars is a crucial step in cookie preparation. This process incorporates air into the mixture, which leads to a light and fluffy texture in the final cookie. Start by beating the butter until it’s smooth, then gradually add the sugars. Continue to mix until the mixture is pale and fluffy, which usually takes about 3-5 minutes.
Incorporating Dry Ingredients: Avoiding Overmixing
Once your wet ingredients are ready, it’s time to add the dry ingredients. Begin by whisking together the flour, leavening agents, and salt in a separate bowl. Gradually add this dry mixture to the wet ingredients, mixing just until combined. Overmixing can develop the gluten in the flour too much, resulting in tough cookies. A few flour pockets are perfectly acceptable; they will be incorporated as you fold in the chocolate chips.
Folding in Chocolate Chips: Techniques for Even Distribution
When it’s time to add the chocolate chips, use a spatula to gently fold them into the dough. This technique ensures an even distribution without overworking the dough. For a fun twist, consider adding nuts, dried fruits, or even a sprinkle of sea salt on top of the dough before baking to enhance the flavor and texture.
Baking Essentials: Tools and Equipment
Essential Baking Tools: Mixing Bowls, Spatulas, and Measuring Cups
Before you start baking, gather your essential tools to streamline the process. A set of mixing bowls in various sizes will help you manage your ingredients effectively. Silicone spatulas are invaluable for scraping down the sides of bowls and folding in ingredients gently. A good set of measuring cups and spoons is also essential for accurate measurements.
Choosing the Right Baking Sheet and Parchment Paper
The type of baking sheet you choose can affect how your cookies bake. Opt for a heavy-duty, non-stick baking sheet for even heat distribution. If you prefer a crispier bottom, consider using a light-colored baking sheet. Parchment paper is a must-have for lining your baking sheets, as it prevents sticking and makes cleanup a breeze. Additionally, it can help cookies bake evenly and maintain their shape.
With these foundational steps and insights into the ingredients and techniques, you are well on your way to mastering the art of homemade chocolate chip cookies. The next part of this guide will delve into baking times, cooling techniques, and variations to elevate your cookie game even further. Stay tuned as we explore the final steps toward creating the perfect batch of chocolate chip cookies that will have everyone coming back for more.
The Benefits of Using a Cookie Scoop for Uniformity
When baking cookies, consistency is key to achieving that perfect batch. One of the best tools to help you maintain uniformity in size and shape is a cookie scoop. Using a cookie scoop not only ensures that each cookie bakes evenly, but it also simplifies the measuring process, saving you time and effort. This handy tool allows you to portion out your dough with precision, resulting in perfectly round and uniform cookies every time.
Moreover, uniform cookies not only look more appealing but also promote even baking. When cookies are similar in size, they will bake at the same rate, preventing some from becoming overcooked while others remain underdone. Investing in a good quality cookie scoop can enhance your baking experience, making it easier to achieve professional-looking results from your home kitchen.
Oven Temperature Calibration: Ensuring Perfect Baking
Before diving into your cookie baking adventure, it’s crucial to ensure that your oven is calibrated correctly. An oven that is too hot or too cold can significantly affect your baking results. To guarantee that your cookies come out just right, consider the following steps:
1. Use an Oven Thermometer: This simple tool is essential for checking your oven’s accuracy. Many ovens can be off by as much as 25 degrees, which can impact baking times and results.
2. Preheat Properly: Always preheat your oven for at least 10-15 minutes before placing your cookies inside. This ensures that the temperature is consistent and helps your cookies rise and bake evenly.
3. Know Your Oven: Every oven behaves differently. Some may have hot spots where cookies bake faster. Rotate your baking sheets halfway through the baking time to ensure even cooking.
By calibrating your oven and understanding its nuances, you’ll set the stage for baking cookies that have the perfect texture and flavor.
The Classic Chocolate Chip Cookie Recipe
Now that you’re equipped with the right tools and knowledge, let’s dive into the classic chocolate chip cookie recipe that everyone loves.
Detailed Ingredient List
To achieve the classic chocolate chip cookie texture and flavor, gather the following ingredients:
– 2 1/4 cups all-purpose flour
– 1/2 teaspoon baking soda
– 1 cup unsalted butter, room temperature
– 1/2 cup granulated sugar
– 1 cup packed light-brown sugar
– 1 teaspoon salt
– 2 teaspoons pure vanilla extract
– 2 large eggs
– 2 cups semisweet and/or milk chocolate chips
Step-by-Step Instructions for Preparation and Baking
1. Preheat Your Oven: Start by preheating your oven to 350°F (175°C).
2. Mix Dry Ingredients: In a medium bowl, whisk together the flour and baking soda. Set aside.
3. Cream Butter and Sugars: In a large bowl, using an electric mixer, beat the butter and sugars together on medium speed until light and fluffy, about 2-3 minutes.
4. Add Eggs and Vanilla: Add the salt, vanilla extract, and eggs to the butter mixture. Beat until well combined.
5. Combine Wet and Dry Ingredients: Gradually add the flour mixture to the wet ingredients, mixing until just combined. Be careful not to overmix.
6. Fold in Chocolate Chips: Gently fold in the chocolate chips until they are evenly distributed throughout the dough.
7. Scoop the Dough: Using your cookie scoop, portion out the dough onto ungreased baking sheets, spacing them about 2 inches apart.
8. Bake: Place the baking sheets in the preheated oven and bake for 10-12 minutes or until the edges are golden brown and the centers are slightly soft.
9. Cool: Remove the cookies from the oven and let them cool on the baking sheets for 5 minutes before transferring them to wire racks to cool completely.
Tips for Achieving the Ideal Texture: Chewy vs. Crispy
When it comes to chocolate chip cookies, texture preferences vary widely. Here are some tips to help you achieve your ideal cookie texture:
– For Chewy Cookies: Use more brown sugar than granulated sugar, and ensure you don’t overbake your cookies. Underbaking slightly will leave them chewy in the center.
– For Crispy Cookies: Increase the granulated sugar slightly, and bake the cookies a minute or two longer until they are golden brown and firm to the touch.
– Chill the Dough: For both chewy and crispy cookies, chilling the dough for at least 30 minutes can enhance the flavor and texture. This step also helps prevent spreading.
Variations on the Classic Recipe
Once you’ve mastered the classic chocolate chip cookie, consider experimenting with these delicious variations:
Adding Nuts for Crunch and Flavor
Incorporating nuts, such as walnuts or pecans, can add a delightful crunch and depth of flavor to your cookies. Simply fold in about 1 cup of chopped nuts along with the chocolate chips for a nutty twist.
Experimenting with Different Types of Chocolate
Changing the type of chocolate you use can drastically alter the taste of your cookies. Try dark chocolate for a richer flavor, or opt for a mix of white and milk chocolate chips for a sweeter treat. You can also experiment with chocolate chunks for a more rustic look.
Incorporating Spices: Cinnamon, Sea Salt, and More
Adding a pinch of cinnamon can bring warmth and complexity to your cookies. For an extra touch, sprinkle a little sea salt on top of the cookies just before baking to enhance the sweetness of the chocolate.
Vegan and Gluten-Free Adaptations
To make a vegan version of chocolate chip cookies, substitute the butter with coconut oil or vegan butter, and use flaxseed meal mixed with water as an egg replacement. For gluten-free cookies, replace all-purpose flour with a 1:1 gluten-free flour blend.
Storing and Freezing Your Cookies
Storing your cookies properly is essential to maintain their freshness and texture. Here are some best practices:
Best Practices for Storing Cookies to Maintain Freshness
– Room Temperature Storage: Store your cookies in an airtight container at room temperature. This will keep them fresh for up to a week. To prevent soft cookies from becoming hard, place a slice of bread in the container; it will help maintain moisture.
– Refrigeration: If you prefer, you can refrigerate cookies to extend their shelf life. However, be aware that refrigeration can change the texture, making them a bit firmer.
Freezing Dough vs. Baked Cookies: Pros and Cons
– Freezing Dough: If you want to bake cookies on demand, freeze the cookie dough. Portion out the dough using your cookie scoop, place the balls on a baking sheet, and freeze until solid. Once frozen, transfer them to a zip-top bag and keep them in the freezer for up to three months. When you’re ready to bake, simply add a minute or two to the baking time.
– Freezing Baked Cookies: You can also freeze baked cookies. Allow them to cool completely, then layer them between sheets of parchment paper in an airtight container or freezer bag. They can last up to three months in the freezer. Thaw at room temperature for optimal taste and texture.
The Joy of Sharing: Cookies as Gifts
Baking cookies is not just about satisfying your cravings; it’s also a wonderful way to share joy with others. Here are some creative ideas for gifting cookies:
Creative Packaging Ideas for Gifting Cookies
Consider using decorative tins, mason jars, or even simple cellophane bags tied with ribbons to package your cookies beautifully. Add a personal touch with handwritten tags or labels indicating the cookie type.
Personalizing Cookie Gifts for Special Occasions
Cookies make perfect gifts for holidays, birthdays, and other celebrations. Customize your cookie selections to fit the occasion—add festive sprinkles for holidays or choose flavors that reflect the recipient’s tastes.
The Significance of Cookies in Celebrations and Traditions
In many cultures, cookies play a significant role in celebrations and traditions. From Christmas cookies to wedding favors, sharing homemade cookies fosters community and connection.
Conclusion: The Timeless Pleasure of Homemade Cookies
Baking chocolate chip cookies from scratch is not just a culinary task; it’s a delightful experience that brings joy and satisfaction. Whether you prefer them chewy or crispy, the process of mixing, baking, and sharing creates cherished memories.
This classic recipe serves as a foundation—feel free to explore variations and adapt it to your preferences. The beauty of homemade cookies lies in their versatility and the personal touch you can infuse into every batch. So gather your ingredients, invite your loved ones to bake alongside you, and create delicious treats that will be enjoyed for generations. Happy baking!
