Roasted Garlic and Broccoli Pita Pizza: A Culinary Delight

WANT TO SAVE THIS RECIPE?

Introduction to Roasted Garlic and Broccoli Pita Pizza: A Flavorful Vegetarian Delight

In a world where quick meals often compromise flavor and nutrition, the Roasted Garlic and Broccoli Pita Pizza stands out as a delicious solution. This innovative recipe marries the savory richness of roasted garlic with the fresh, vibrant taste of broccoli, all atop a wholesome pita base. Whether you’re seeking a light lunch, a satisfying dinner, or a snack that packs a nutritional punch, this dish is not only easy to prepare but also brimming with essential nutrients.

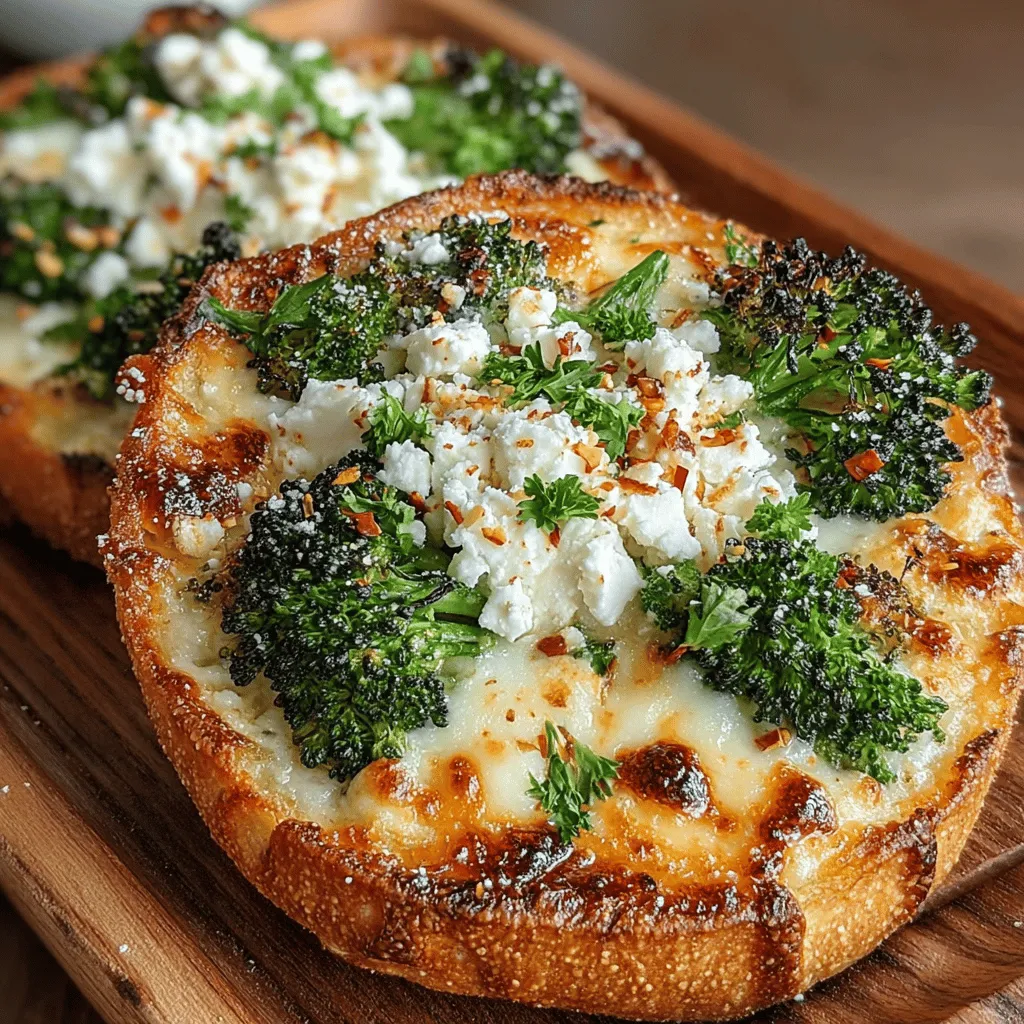
The balance of flavors and textures in this pita pizza makes it a culinary delight that can easily win over even the most discerning palates. The creamy melted cheese, the aromatic garlic, and the tender yet crisp broccoli come together harmoniously, creating a dish that feels indulgent without the guilt. With its vibrant colors and enticing aroma, Roasted Garlic and Broccoli Pita Pizza is bound to become a staple in your meal rotation, appealing to vegetarians and meat-lovers alike.

Understanding the Ingredients: A Closer Look at Nutrition and Flavor

Exploring Whole Wheat Pita Bread

Whole wheat pita bread serves as the nutritious foundation of this pizza. Unlike its white counterpart, whole wheat pita is made from whole grains, preserving the bran and germ of the wheat kernel. This means it is rich in dietary fiber, which promotes digestive health and helps keep you feeling full longer. Additionally, whole wheat pita is packed with essential nutrients such as B vitamins, iron, and magnesium. The hearty texture of whole wheat complements the toppings beautifully, providing a satisfying bite that enhances the overall experience of this dish.

Using whole wheat pita not only contributes to better nutrition but also adds a subtle nutty flavor that pairs perfectly with the roasted garlic and broccoli. It’s a simple swap that elevates your meal without sacrificing taste or satisfaction.

The Versatility of Broccoli

Broccoli is not just a green vegetable; it’s truly a culinary powerhouse. Known for its impressively high levels of vitamins C and K, as well as folate, potassium, and iron, broccoli is an excellent addition to any diet. This cruciferous vegetable also boasts a wealth of antioxidants, which are beneficial for fighting inflammation and reducing the risk of chronic diseases.

Incorporating broccoli into your meals can elevate not only the nutritional profile but also the flavor and texture. When prepared correctly, broccoli adds a delightful crunch and a slightly bitter note that balances the sweetness of the roasted garlic and the creaminess of the cheese. In this recipe, we’ll explore how to prepare broccoli to maximize its flavor and nutritional benefits, making it the perfect topping for our pita pizza.

The Role of Garlic in Cooking

Garlic is a culinary staple revered for its aromatic qualities and health benefits. Its robust flavor can transform even the simplest of dishes, adding depth and a savory punch. When roasted, garlic undergoes a metamorphosis, becoming sweet and mellow, its pungent bite transformed into a rich, buttery flavor. This transformation is essential in this recipe, as roasted garlic enhances the overall taste of the pizza, allowing it to shine without overpowering the other ingredients.

Beyond its flavor-enhancing properties, garlic is celebrated for its numerous health benefits. It is known for its anti-inflammatory and antioxidant properties, which can contribute to improved heart health and immune function. By incorporating roasted garlic into our pita pizza, we not only enrich the dish with flavor but also with beneficial compounds that support overall wellness.

Cheese Choices: Mozzarella and Feta

The combination of mozzarella and feta cheese is what truly elevates this Roasted Garlic and Broccoli Pita Pizza. Mozzarella, with its creamy texture and mild flavor, melts beautifully, creating a luscious base for the toppings. Its gooeyness provides satisfaction and comfort, making each bite feel indulgent.

Feta cheese, on the other hand, adds a delightful tanginess that contrasts exquisitely with the mozzarella. This crumbly cheese brings a burst of flavor that complements the roasted garlic and broccoli perfectly. The mix of creamy and tangy creates a rich flavor profile that keeps you coming back for more. Exploring the unique characteristics of each cheese can help you tailor this recipe to your personal taste, creating a pizza that is distinctly your own.

Step-by-Step Instructions for Perfecting Your Pita Pizza

Roasting Garlic: A Simple Yet Essential Step

Roasting garlic is a straightforward yet transformative step in preparing our pita pizza. To roast garlic, start by preheating your oven to 400°F (200°C). Take a whole bulb of garlic and slice off the top, exposing the individual cloves. Drizzle with olive oil, wrap the bulb in aluminum foil, and place it in the oven. Roast for about 30-35 minutes, or until the cloves are soft and caramelized.

The key to perfect roasted garlic is timing and temperature; too long can lead to bitterness, while too short can result in a harsh flavor. When done correctly, roasted garlic should be sweet and spreadable, ready to be smeared over the pita base. This simple step is crucial for achieving the rich flavor that defines our Roasted Garlic and Broccoli Pita Pizza.

Preparing Broccoli for Optimal Flavor and Texture

To ensure that the broccoli retains its vibrant color and crunchy texture, we’ll use a technique called blanching. Begin by bringing a pot of salted water to a boil. While the water heats, prepare an ice bath by filling a bowl with ice and cold water. Once the water is boiling, add the broccoli florets and blanch for about 2-3 minutes, just until they turn bright green and tender-crisp.

Immediately transfer the blanched broccoli to the ice bath to halt the cooking process. This technique preserves the vegetable’s nutrients and prevents it from becoming mushy during the baking process. After a few minutes in the ice bath, drain the broccoli and pat it dry with a paper towel. The result is perfectly cooked broccoli that will add both flavor and texture to your pita pizza.

Prepping the Pita Base: Ensuring Crispiness

Now that we have our garlic roasted and broccoli prepared, it’s time to focus on the pita base. To achieve a crispy crust, preheat your oven to 425°F (220°C). While the oven heats, place the whole wheat pita on a baking sheet lined with parchment paper. Brush the surface lightly with olive oil, which will help it crisp up during baking.

For an extra layer of flavor, you can sprinkle a pinch of salt and a dash of dried herbs, such as oregano or thyme, over the pita before adding the toppings. This not only enhances the taste but also elevates the overall experience of the pizza. Once the oven is ready, bake the pita for about 5-7 minutes until it’s lightly golden and crispy, setting the stage for the delicious toppings to come.

This combination of steps will ensure that your Roasted Garlic and Broccoli Pita Pizza is not only flavorful but also texturally satisfying, making each bite a delightful experience.

In a world where quick meals often compromise flavor and nutrition, the <strong>Roasted Garlic and Broccoli Pita Pizza</strong> stands out as a delicious solution. This innovative recipe marries the savory richness of roasted garlic with the fresh, vibrant taste of broccoli, all atop a wholesome pita base. Whether you’re seeking a light lunch, a satisfying dinner, or a snack that packs a nutritional punch, this dish is not only easy to prepare but also brimming with essential nutrients.” /></p>
</p>
<h2>Preheating Your Oven and Preparing the Pita Bread</h2>
</p>
<p>Before diving into the delicious creation of your Roasted Garlic and Broccoli Pita Pizza, it is essential to set the stage for baking. Preheating your oven is a critical step that cannot be overlooked. Begin by setting your oven to 425°F (220°C). This high temperature is ideal for achieving a crispy crust while ensuring that the toppings are cooked perfectly.</p>
</p>
<p>While your oven is heating up, prepare your pita bread. Opt for whole grain or regular pita pockets, which serve as a sturdy base for your toppings. To enhance the texture, lightly brush each pita with olive oil on both sides. This not only adds flavor but also helps to achieve an even, golden-brown crust during baking.</p>
</p>
<p>For an extra touch, you can lightly toast the pitas in a skillet on medium heat for a minute or so on each side before assembling. This step adds an extra layer of crunch and ensures your pita holds up well under the toppings.</p>
</p>
<h2>Creating the Garlic Spread: A Flavor Enhancer</h2>
</p>
<p>The foundation of your Roasted Garlic and Broccoli Pita Pizza lies in the garlic spread, which elevates the entire dish. To create this essential flavor enhancer, gather the following ingredients:</p>
</p>
<p>– 6-8 cloves of garlic, peeled</p>
<p>– ¼ cup of olive oil</p>
<p>– 1 tablespoon of freshly squeezed lemon juice</p>
<p>– Salt and freshly ground black pepper to taste</p>
</p>
<p>Begin by roasting your garlic to unlock its sweet, caramelized flavor. You can roast the garlic in the oven wrapped in foil or sauté it in a skillet until golden. Once your garlic is roasted, transfer it to a mixing bowl. Add the olive oil and lemon juice, then mash the mixture with a fork or use a blender for a smoother consistency. Season with salt and black pepper. The balance of olive oil and lemon juice not only enhances the garlic flavor but also provides a creamy texture that makes spreading easy.</p>
</p>
<p>This garlic spread serves as a flavorful base that enhances the overall taste of your pita pizza, ensuring each bite is packed with aromatic goodness.</p>
</p>
<h2>Assembling the Pizza: Layering for Maximum Flavor</h2>
</p>
<p>Now that your garlic spread is ready and the pita is prepared, it’s time for the fun part: assembling your pizza. Start by spreading a generous layer of the garlic paste over the surface of the pita bread. Use the back of a spoon or a spatula to ensure even coverage, reaching all the edges for maximum flavor in every bite.</p>
</p>
<p>Next, evenly distribute the roasted broccoli over the garlic spread. For an added touch, you can include other vegetables, such as bell peppers or spinach, to enhance the nutrition and flavor profile. Follow this with a sprinkling of your favorite cheese. Mozzarella is a classic choice, but feel free to experiment with feta or goat cheese for a tangy flavor twist.</p>
</p>
<p>To add depth, consider a sprinkle of crushed red pepper flakes or a pinch of dried herbs like oregano or thyme, which will complement the roasted flavors beautifully. Finally, drizzle a bit more olive oil over the top to ensure a golden finish while baking.</p>
</p>
<p>Proper layering is essential for achieving a well-balanced flavor and texture. By ensuring that each topping is evenly distributed, you’ll guarantee that every bite is a delightful combination of flavors.</p>
</p>
<h2>Baking to Perfection: Timing is Key</h2>
</p>
<p>Baking your Roasted Garlic and Broccoli Pita Pizza is where the magic happens. Place your assembled pita pizza on a baking sheet lined with parchment paper or directly on the oven rack for a crispier crust. Bake in your preheated oven for about 10-12 minutes.</p>
</p>
<p>Keep a close eye on your pizza as it bakes. The cheese should melt beautifully, and the edges of the pita should turn a lovely golden brown. To test for doneness, check if the cheese is bubbling and slightly browned and if the pita is crispy to the touch. If you prefer a more toasted finish, you can broil it for an additional 1-2 minutes, but watch closely to prevent burning.</p>
</p>
<p>Once removed from the oven, let it cool for a couple of minutes before slicing. This resting period helps the cheese set slightly, making it easier to cut and serve.</p>
</p>
<h2>Garnishing and Serving: Elevating Presentation and Flavor</h2>
</p>
<h3>The Importance of Fresh Herbs</h3>
</p>
<p>Garnishing your Roasted Garlic and Broccoli Pita Pizza not only enhances its visual appeal but also adds an exciting burst of flavor. Fresh herbs like parsley or basil are excellent choices for brightening up the dish. Finely chop your selected herbs and sprinkle them generously over the pizza just before serving.</p>
</p>
<p>The freshness of the herbs contrasts beautifully with the roasted garlic and broccoli, bringing a vibrant color and flavor to your meal. This finishing touch elevates the overall dining experience and makes your homemade pizza look restaurant-worthy.</p>
</p>
<h3>Serving Suggestions: Pairing with Sides and Drinks</h3>
</p>
<p>Consider pairing your pita pizza with complementary side dishes and beverages for a complete meal. A fresh mixed greens salad drizzled with a light vinaigrette can provide a refreshing contrast to the rich flavors of the pizza. You could also serve a side of roasted or steamed vegetables, such as asparagus or carrots, to enhance the meal’s nutritional value.</p>
</p>
<p>When it comes to drinks, a crisp white wine like Sauvignon Blanc or a light beer can pair beautifully with the flavors of the roasted garlic and broccoli. For a non-alcoholic option, consider serving sparkling water with a wedge of lemon or a refreshing iced tea.</p>
</p>
<h2>Nutritional Benefits of Roasted Garlic and Broccoli Pita Pizza</h2>
</p>
<h3>Analyzing the Health Benefits</h3>
</p>
<p>The Roasted Garlic and Broccoli Pita Pizza is not only delicious but also packed with nutritional benefits. By using whole grain pita, you increase your intake of fiber, which aids digestion and promotes a feeling of fullness. The roasted broccoli provides an excellent source of vitamins C and K, along with essential minerals such as calcium and potassium.</p>
</p>
<p>The garlic spread, primarily made from olive oil and garlic, adds healthy fats to your meal. Olive oil is known for its heart-healthy properties, while garlic has been linked to various health benefits, including improved immunity and reduced inflammation.</p>
</p>
<p>Incorporating vegetables into your pizza not only enhances flavor but also ensures you’re getting a good dose of antioxidants and nutrients. Overall, this dish fits perfectly into a balanced diet, making it an ideal option for those looking to enjoy a nutritious yet satisfying meal.</p>
</p>
<h2>Conclusion: Enjoying Your Roasted Garlic and Broccoli Pita Pizza Experience</h2>
</p>
<p>The Roasted Garlic and Broccoli Pita Pizza is more than just a meal; it’s an experience that brings together wholesome ingredients and bold flavors. Its ease of preparation makes it an appealing choice for everyone—from busy professionals to families looking for quick meal ideas.</p>
</p>
<p>With its crispy crust, flavorful garlic spread, and vibrant toppings, this pizza can transform your dining routine into a healthy and enjoyable experience. Whether you enjoy it as a quick weeknight dinner, a weekend treat, or even as a party appetizer, this recipe delivers on taste and nutrition.</p>
</p>
<p>So gather your ingredients, preheat your oven, and get ready to indulge in a delightful culinary creation that will leave you craving more. Enjoy every bite of your Roasted Garlic and Broccoli Pita Pizza, and don’t forget to share your experience with friends and family!</p>
</div>

In a world where quick meals often compromise flavor and nutrition, the Roasted Garlic and Broccoli Pita Pizza stands out as a delicious solution. This innovative recipe marries the savory richness of roasted garlic with the fresh, vibrant taste of broccoli, all atop a wholesome pita base. Whether you're seeking a light lunch, a satisfying dinner, or a snack that packs a nutritional punch, this dish is not only easy to prepare but also brimming with essential nutrients.

Roasted Garlic and Broccoli Pita Pizza

Discover the deliciously healthy Roasted Garlic and Broccoli Pita Pizza, a perfect vegetarian meal that balances flavor and nutrition. This easy recipe combines roasted garlic, vibrant broccoli, and melted cheese on a whole wheat pita base, ensuring each bite is satisfying and guilt-free. With its creamy textures and crunchy greens, this dish pleases even the pickiest eaters. Ideal for lunch or dinner, it’s a go-to that adds excitement to your meal rotation.

Ingredients
  

2 whole wheat pita breads

1 cup fresh broccoli florets

6 cloves roasted garlic (or 2-3 raw garlic cloves minced)

1 cup shredded mozzarella cheese

¼ cup crumbled feta cheese

¼ cup olive oil

½ teaspoon red pepper flakes (optional)

Salt and pepper to taste

1 tablespoon fresh lemon juice

Fresh parsley or basil for garnish

Instructions
 

Roast the Garlic: If using raw garlic, preheat the oven to 400°F (200°C). Wrap the raw garlic cloves in foil with a drizzle of olive oil and a pinch of salt. Roast in the oven for about 30-35 minutes until soft and caramelized. If using pre-roasted garlic, skip this step.

    Prepare the Broccoli: In a small pot, bring salted water to a boil. Blanch the broccoli florets for 2-3 minutes until bright green and slightly tender. Drain and transfer them to an ice bath to stop the cooking process. Once cooled, pat them dry with a paper towel.

      Preheat and Prepare Pita Base: Preheat your oven to 450°F (230°C). Place the pita breads on a baking sheet lined with parchment paper or lightly greased.

        Spread the Garlic: If using roasted garlic, squeeze the soft garlic from the skins into a small bowl. Mix in the olive oil and lemon juice until it forms a paste. If using raw minced garlic, just mix it directly with the olive oil and lemon juice.

          Assemble the Pizza: Spread the garlic mixture evenly over each pita. Top with the blanched broccoli florets, followed by shredded mozzarella and crumbled feta cheese. Sprinkle with red pepper flakes, salt, and pepper to taste.

            Bake: Place the prepared pitas in the preheated oven. Bake for 10-12 minutes, or until the cheese is melted and bubbly, and the edges of the pita are crispy.

              Garnish and Serve: Remove from the oven and let cool for a minute. Garnish with freshly chopped parsley or basil before slicing into wedges. Serve warm and enjoy!

                Prep Time, Total Time, Servings: 15 minutes | 45 minutes | 2 servings

                  WANT TO SAVE THIS RECIPE?

                  Leave a Comment

                  Recipe Rating