Introduction
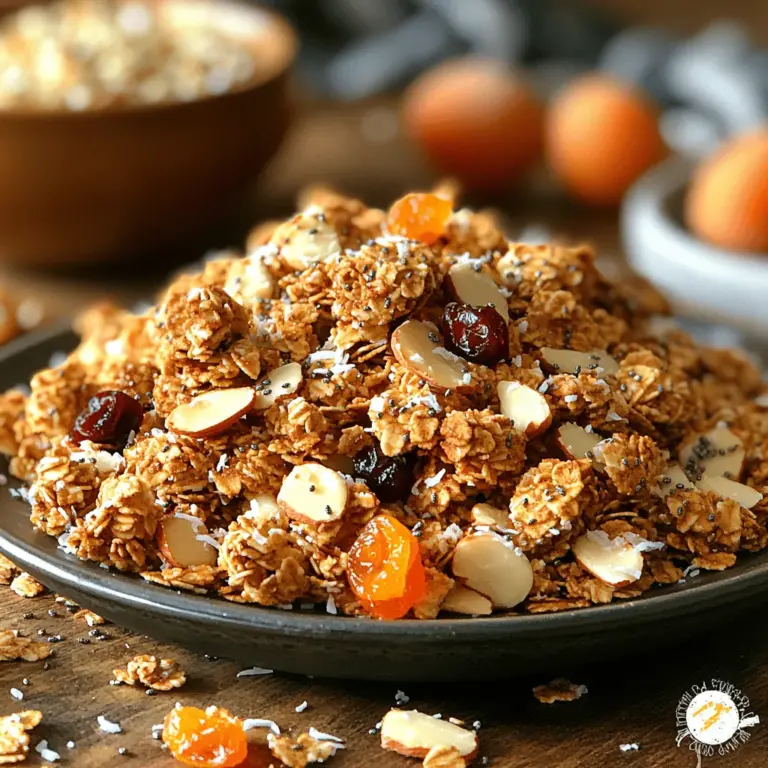
Granola has become a staple in many households, praised for its versatility, health benefits, and delightful crunch. Whether served as a topping on yogurt, enjoyed with milk, or simply eaten by the handful, granola offers a satisfying blend of textures and flavors that can brighten any morning. Among the myriad of granola varieties, the combination of almond and coconut stands out for its nutty aroma and tropical essence. This Toasty Almond Coconut Granola recipe is a perfect way to embrace the wholesome goodness of oats, nuts, and natural sweeteners, making it an ideal breakfast option or snack.
The appeal of making granola from scratch lies not only in the ability to customize the ingredients to your taste preferences but also in the joy of creating something wholesome and delicious. Unlike store-bought versions that often contain added sugars and preservatives, homemade granola allows you to control what goes into your mix, ensuring every bite is as nutritious as it is tasty.
In this article, we will take you through the art of crafting your own Toasty Almond Coconut Granola. We will explore the ingredients that make this recipe special, delve into preparation techniques that guarantee the perfect crunch, and provide tips to elevate your granola-making skills. So, let’s get started on this delicious journey!
History of Granola
The history of granola can be traced back to the 19th century, originating from the health food movement in America. Originally called “granula,” the first version was developed by Dr. James Caleb Jackson in 1863 as a health food made from baked, unrefined wheat. However, it wasn’t until the 1970s that granola gained widespread popularity, particularly among the health-conscious crowd and those seeking natural, wholesome snacks.
The introduction of oats, nuts, and dried fruits into granola recipes marked a turning point, leading to the creation of the crunchy, flavorful mixes we enjoy today. The rise of granola bars in the 1980s further propelled the popularity of this snack, providing a convenient option for those on the go. Over the years, granola has evolved from a health food to a beloved breakfast staple, with countless variations incorporating different grains, nuts, and sweeteners.
As we dive into the specifics of our Toasty Almond Coconut Granola, it’s essential to appreciate the rich heritage of this dish, which has stood the test of time and continues to delight taste buds around the world.
Understanding Ingredients
When it comes to making the perfect Toasty Almond Coconut Granola, understanding the role of each ingredient is crucial. Here’s a breakdown of the essential components that will contribute to the flavor, texture, and overall success of your granola.
Oats
The foundation of any granola is oats, which provide both texture and nutrition. Rolled oats are the best choice for granola as they maintain their shape during baking, creating that signature crunchy texture. They are also rich in fiber, vitamins, and minerals, making them a wholesome base for your granola.
Nuts
In this recipe, almonds take center stage, lending a delightful crunch and nutty flavor. Almonds are not only delicious but also packed with healthy fats, protein, and vitamin E. You can choose to slice or chop the almonds according to your preference. Feel free to mix in other nuts like pecans or walnuts for added variety.
Coconut
Unsweetened shredded coconut adds a tropical flair and a chewy texture to the granola. It pairs beautifully with the almonds, enhancing the nutty profile. Coconut is a rich source of fiber and healthy fats, making it a nutritious addition to your breakfast routine. Opting for unsweetened coconut helps keep the sugar content in check while still delivering great flavor.
Sweeteners
To balance the nutty and coconut flavors, a natural sweetener is essential. Maple syrup is a fantastic choice, imparting a rich, caramel-like flavor and providing moisture to the granola. Honey or agave nectar can also be used, depending on your taste preferences. Just be mindful of the quantity to ensure your granola doesn’t become overly sweet.
Oil
A healthy oil, such as coconut oil or olive oil, is necessary to help the granola crisp up during baking. Coconut oil, in particular, complements the coconut flavor in the recipe, creating a cohesive taste experience. The oil also helps bind the oats and nuts together, forming those delightful clusters that we all love.
Spices and Flavorings
Adding spices like cinnamon or vanilla extract can elevate the flavor profile of your granola. Cinnamon not only adds warmth but also has antioxidant properties, while vanilla enhances the overall aroma and taste.
Optional Add-ins
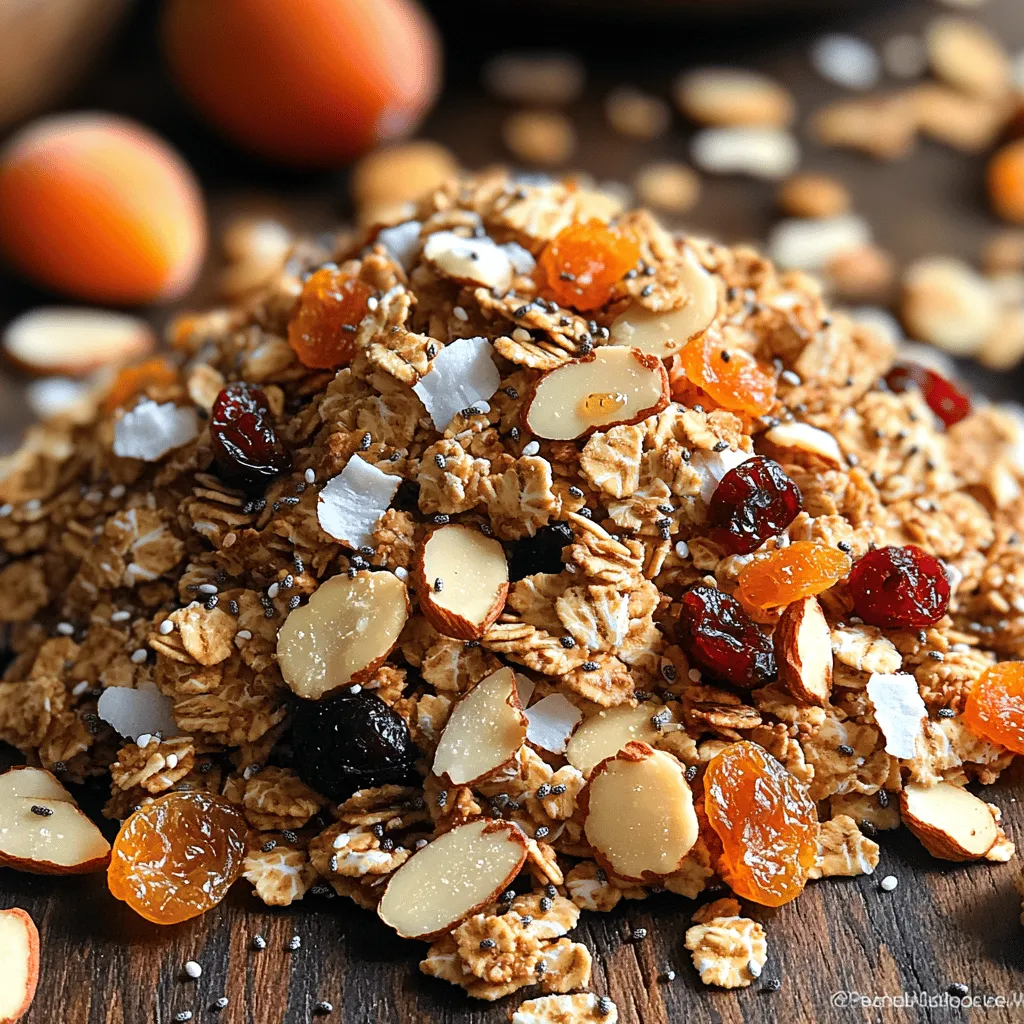
Once the base granola is prepared, you can customize it further with optional add-ins. Dried fruits like cranberries, apricots, or raisins can provide sweetness and chewiness. Seeds such as chia or flaxseed can boost the nutritional value, while chocolate chips can satisfy your sweet tooth. The possibilities are endless!
Preparation Techniques for Perfect Granola
Creating the perfect Toasty Almond Coconut Granola involves a few key preparation techniques. Let’s walk through the steps to ensure your granola turns out crunchy, flavorful, and utterly irresistible.
Step 1: Preheat Your Oven
Before you begin mixing your ingredients, preheat your oven to 325°F (160°C). Preheating ensures that the granola bakes evenly, promoting that beautiful golden color and crisp texture.
Step 2: Combine Dry Ingredients
In a large mixing bowl, start by combining the rolled oats, sliced almonds, shredded coconut, and any spices you choose to include. Stir these dry ingredients together until they are evenly distributed. This step is crucial as it guarantees that every bite of your granola is packed with flavor and texture.
Step 3: Prepare the Wet Ingredients
In a separate bowl, mix the wet ingredients: maple syrup and melted coconut oil. If you’re using honey or another sweetener, combine it with the oil in this step. Whisk the ingredients until they are well blended. This mixture will not only sweeten your granola but also help bind it together during baking.
Step 4: Combine Dry and Wet Ingredients
Pour the wet mixture over the dry ingredients, ensuring an even coating. Use a spatula or wooden spoon to gently fold the ingredients together, taking care not to over-mix. The goal is to distribute the wet ingredients evenly, allowing the oats and nuts to absorb the sweetness without turning into a mushy mixture.
Step 5: Spread on Baking Sheet
Line a baking sheet with parchment paper for easy cleanup and to prevent sticking. Spread the granola mixture evenly across the sheet, pressing it down slightly to create clusters. The more compact the mixture, the larger the clusters will be after baking.
Step 6: Bake
Place the baking sheet in the preheated oven and bake for about 20-25 minutes, stirring halfway through. Keep an eye on the granola as it bakes; it should turn a beautiful golden brown. Baking allows the oats and nuts to toast, enhancing their flavors and contributing to that perfect crunch.
Step 7: Cool and Store
Once baked, remove the granola from the oven and let it cool completely on the baking sheet. The granola will continue to harden as it cools, forming those coveted clusters. Once fully cooled, transfer your Toasty Almond Coconut Granola to an airtight container for storage.
This homemade granola not only makes a fantastic breakfast but also serves as a delicious snack throughout the day. Feel free to experiment with additional ingredients and flavors to make this recipe your own!
With these initial steps and understanding of ingredients, you are well on your way to mastering the art of homemade granola. Stay tuned for the next sections, where we will explore the baking process in detail, along with tips to elevate your granola game further. Enjoy the journey of creating your very own Toasty Almond Coconut Granola!
Ideal Baking Temperatures and Times for Chewy vs. Crispy Cookies
When it comes to baking cookies, the temperature and time are crucial factors that determine their final texture. For those who prefer chewy cookies, it’s essential to bake them at a slightly lower temperature, typically around 325°F (163°C). This allows the edges to set while keeping the center soft and chewy. Bake for about 10 to 12 minutes, checking frequently. The cookies should look slightly underbaked when you remove them from the oven, as they will continue to firm up on the baking sheet as they cool.
In contrast, if you’re aiming for that delightful crispiness, bake your cookies at 350°F (177°C). This higher temperature will create a firmer structure, resulting in a crunchier bite. For crispy cookies, the baking time will generally be a bit longer, around 12 to 15 minutes. Keep an eye on them, as they can go from perfectly golden to overbaked quickly.
How to Know When Cookies Are Done: Visual Cues
Determining when your cookies are done can sometimes be a challenge, but there are several visual cues to guide you. For chewy cookies, look for a golden-brown edge with a soft, puffy center. The edges should be set but not too dark, while the center may look a bit underbaked. For crispy cookies, you want to see an even golden-brown color throughout, with a slightly darker edge. The cookies will also spread more during baking, giving them a flatter appearance.
Another helpful tip is to listen. As cookies bake, you may hear a gentle sizzle or crackling sound. When this noise diminishes, it’s a sign that they might be ready to come out of the oven. Always trust your instincts and visually assess the cookies rather than relying solely on the timer.
Cooling Techniques for the Perfect Texture
Cooling your cookies properly is just as important as the baking process itself. To achieve the perfect texture, transfer your cookies to a wire rack as soon as they come out of the oven. This allows air to circulate around the cookies, preventing them from becoming soggy. For chewy cookies, let them cool on the rack for about 5 to 10 minutes before moving them to an airtight container. This short cooling period helps them maintain their soft texture.
For crispy cookies, on the other hand, it’s beneficial to let them cool completely on the wire rack. This ensures that they firm up nicely and develop that satisfying crunch. Once cooled, store them in a container that allows some air circulation to maintain their crispness.
Variations on the Classic Recipe
Nutty Chocolate Chip Cookies: Adding Walnuts or Pecans
One of the easiest ways to elevate your chocolate chip cookies is by incorporating nuts. Walnuts and pecans add a delightful crunch and complement the chocolate beautifully. Simply chop them coarsely and mix them into your cookie dough before baking. A combination of nuts can also work wonders, providing a mix of textures and flavors that enhance the classic cookie experience.
Gluten-Free Chocolate Chip Cookies: Alternative Flours and Binders
For those needing a gluten-free option, swapping out traditional flour is a must. Almond flour, coconut flour, or a gluten-free all-purpose blend can be excellent substitutes. When using these alternative flours, you might need to adjust the binding agents in your recipe. For instance, adding an extra egg or using flaxseed meal as a binder can help achieve the right consistency for your gluten-free cookies.
Vegan Chocolate Chip Cookies: Substitutes for Eggs and Dairy
If you’re looking to whip up a batch of vegan chocolate chip cookies, there are plenty of substitutions available. Instead of eggs, you can use flaxseed meal mixed with water, applesauce, or even mashed bananas to act as a binding agent. For dairy, opt for plant-based butter or coconut oil and use dairy-free chocolate chips. These substitutions will maintain the integrity of the cookies while catering to vegan dietary preferences.
Fun Flavor Twists: Adding Sea Salt, Espresso Powder, or Spices
To add a unique twist to your chocolate chip cookies, consider incorporating different flavors. A sprinkle of sea salt on top just before baking can enhance the sweetness of the chocolate, creating a beautiful contrast. For coffee lovers, adding a teaspoon of espresso powder to the dough will deepen the flavor profile. Additionally, spices like cinnamon or nutmeg can be introduced to provide a warm undertone, making your cookies even more inviting.
Seasonal Variations: Pumpkin Spice and Peppermint Chocolate Chip Cookies
Seasonal flavors can also inspire your chocolate chip cookies. During fall, try adding pumpkin puree and pumpkin spice to your dough for a cozy autumn treat. For winter, consider incorporating crushed peppermint candies or peppermint extract to create a festive version of your cookies. These variations not only celebrate the seasons but also keep your cookie repertoire exciting.
Storing and Freezing Cookies
Best Practices for Storing Baked Cookies to Maintain Freshness
To ensure your cookies stay fresh and delicious, proper storage is essential. Once your cookies have completely cooled, place them in an airtight container. If you’re stacking cookies, separate layers with parchment paper to prevent them from sticking together. For cookies that are crispy, consider using a container that allows for some airflow to maintain their texture.
How to Freeze Cookie Dough for Future Baking
If you want to have homemade cookies ready to bake at a moment’s notice, freezing cookie dough is a fantastic option. Simply scoop the dough into balls and place them on a baking sheet lined with parchment paper. Freeze them until solid, then transfer the dough balls to a zip-top freezer bag. Label the bags with the date and type of cookie, and they can last up to three months in the freezer. When you’re ready to bake, just preheat your oven and bake the frozen dough balls without thawing, adding an extra minute or two to the baking time.
Tips for Reheating Cookies to Restore Freshness
If you find yourself with leftover cookies that have lost their initial freshness, you can easily bring them back to life. Preheat your oven to 300°F (150°C) and place the cookies on a baking sheet. Heat them for about 5 to 10 minutes, or until they are warmed through. This method helps restore their original texture and taste, making them feel freshly baked again.
Serving Suggestions
Creative Ways to Serve Chocolate Chip Cookies
When it comes to serving chocolate chip cookies, the possibilities are endless. You can create an impressive display by arranging them on a decorative platter, mixing in different variations for a colorful assortment. Consider pairing your cookies with fresh fruit or a selection of cheeses for a unique twist on dessert.
Pairing with Ice Cream or Milk
One classic combination is chocolate chip cookies with a glass of cold milk or a scoop of ice cream. For a fun treat, sandwich a scoop of your favorite ice cream between two warm cookies to create an indulgent ice cream sandwich. The warm cookie coupled with the cold ice cream is a delightful experience that will satisfy any sweet tooth.
Cookie Platters for Parties and Gatherings
For parties and gatherings, consider creating a cookie platter featuring an array of flavors and textures. Mix your chocolate chip cookies with other varieties like oatmeal raisin, snickerdoodle, and peanut butter. This not only caters to different tastes but also adds a visual appeal to your dessert table.
The Joy of Sharing Cookies
The Emotional Connection of Baking for Others
Baking cookies is not just about creating delicious treats; it’s also about the emotional connections we forge with others. The act of baking can be a labor of love, and sharing those cookies with family and friends can create lasting memories. Whether it’s a special occasion or just a simple gesture, cookies often bring people together.
Cookies as Gifts: Packaging and Presentation Ideas
Homemade cookies make for thoughtful gifts that show you care. Consider packaging them in decorative boxes or tins, perhaps tied with a colorful ribbon. You can also include a handwritten note or recipe card to personalize your gift further. Such gestures transform simple cookies into cherished presents.
Stories of Cookie Baking Traditions Within Families
Every family has its own cookie baking traditions that often span generations. Whether it’s a special recipe passed down from a grandmother or a family gathering where everyone pitches in to bake, these stories create a sense of belonging. Sharing these traditions with loved ones not only keeps the memories alive but also strengthens family bonds.
Conclusion
Homemade chocolate chip cookies hold a timeless appeal that transcends generations. Whether you prefer chewy or crispy, classic or with a twist, the joy of baking and sharing cookies is a universal experience. As you explore the variations and tips included, remember that the heart of baking lies in experimentation and personalization. So, don your apron, gather your ingredients, and enjoy the simple pleasure that comes from baking and sharing cookies with your loved ones. Embrace the warmth of the kitchen, the delightful aroma of cookies baking, and the smiles that follow when you share your creations.
